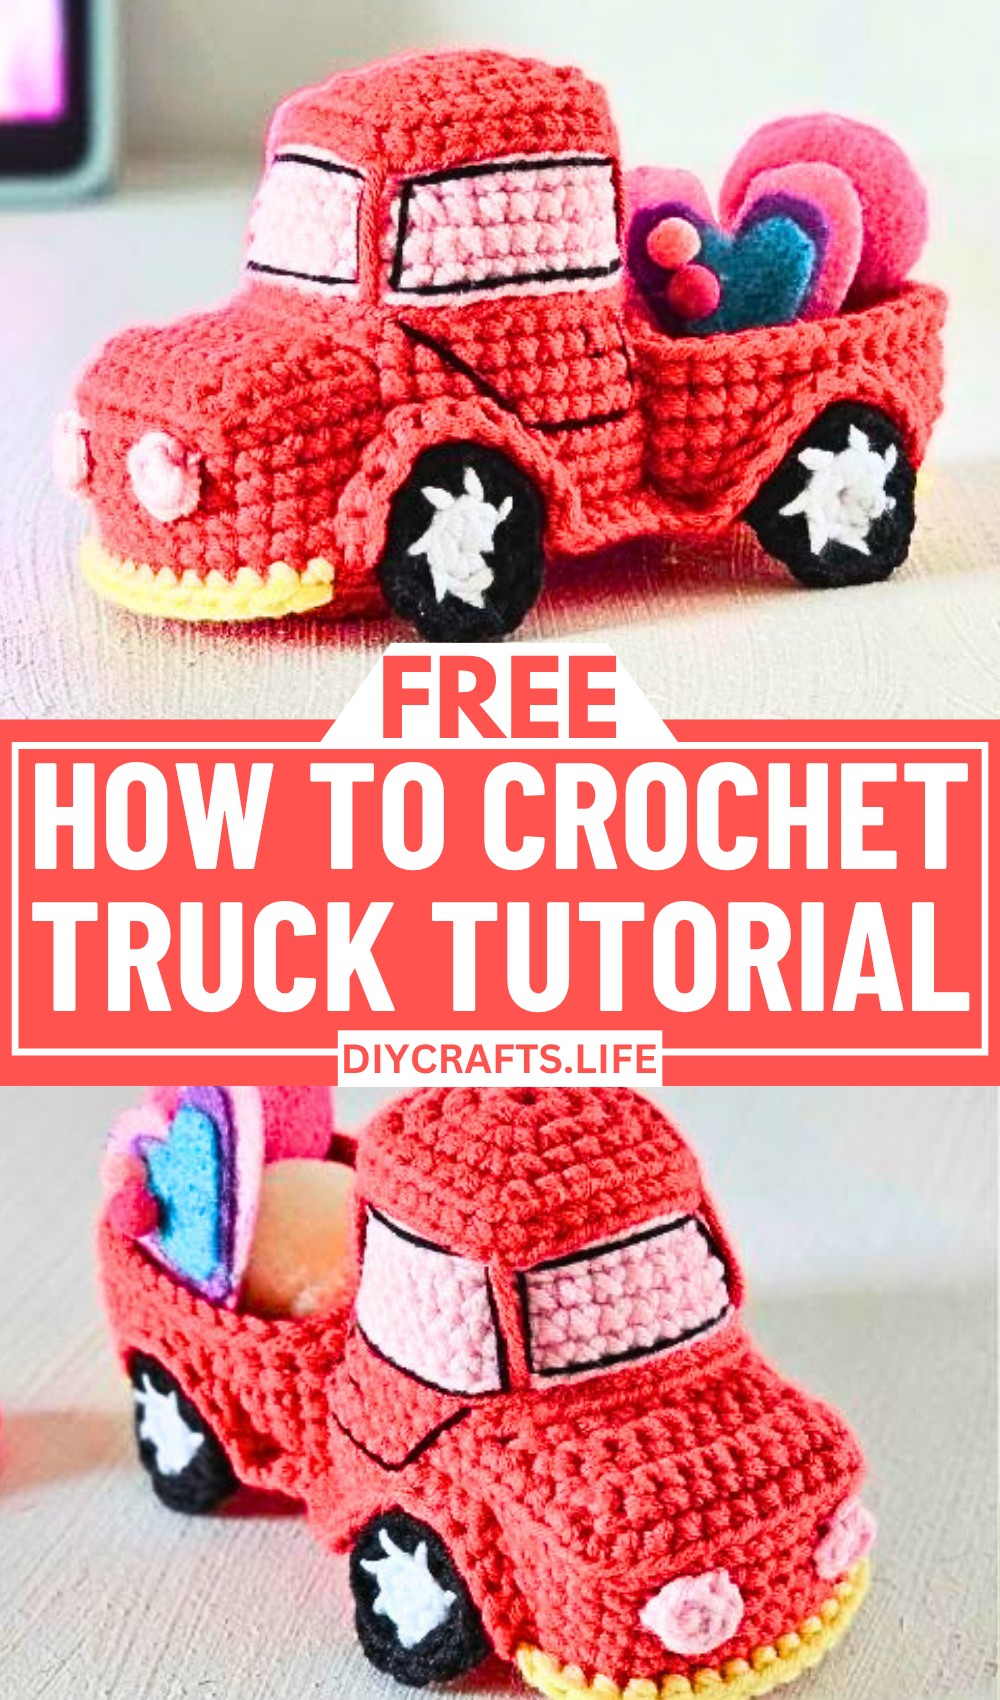
This crochet truck design is a cheerful and creative way to make a playful item that can brighten any space or put a smile on someone’s face. Whether used as a toy for kids, a thoughtful gift, or even a decorative piece for a shelf, its charm is truly special. With soft yarn and adorable details like a cozy truck bed that you can fill with little items, it’s an ideal design for beginners and experienced crocheters alike.
How To Crochet A Detailed Truck
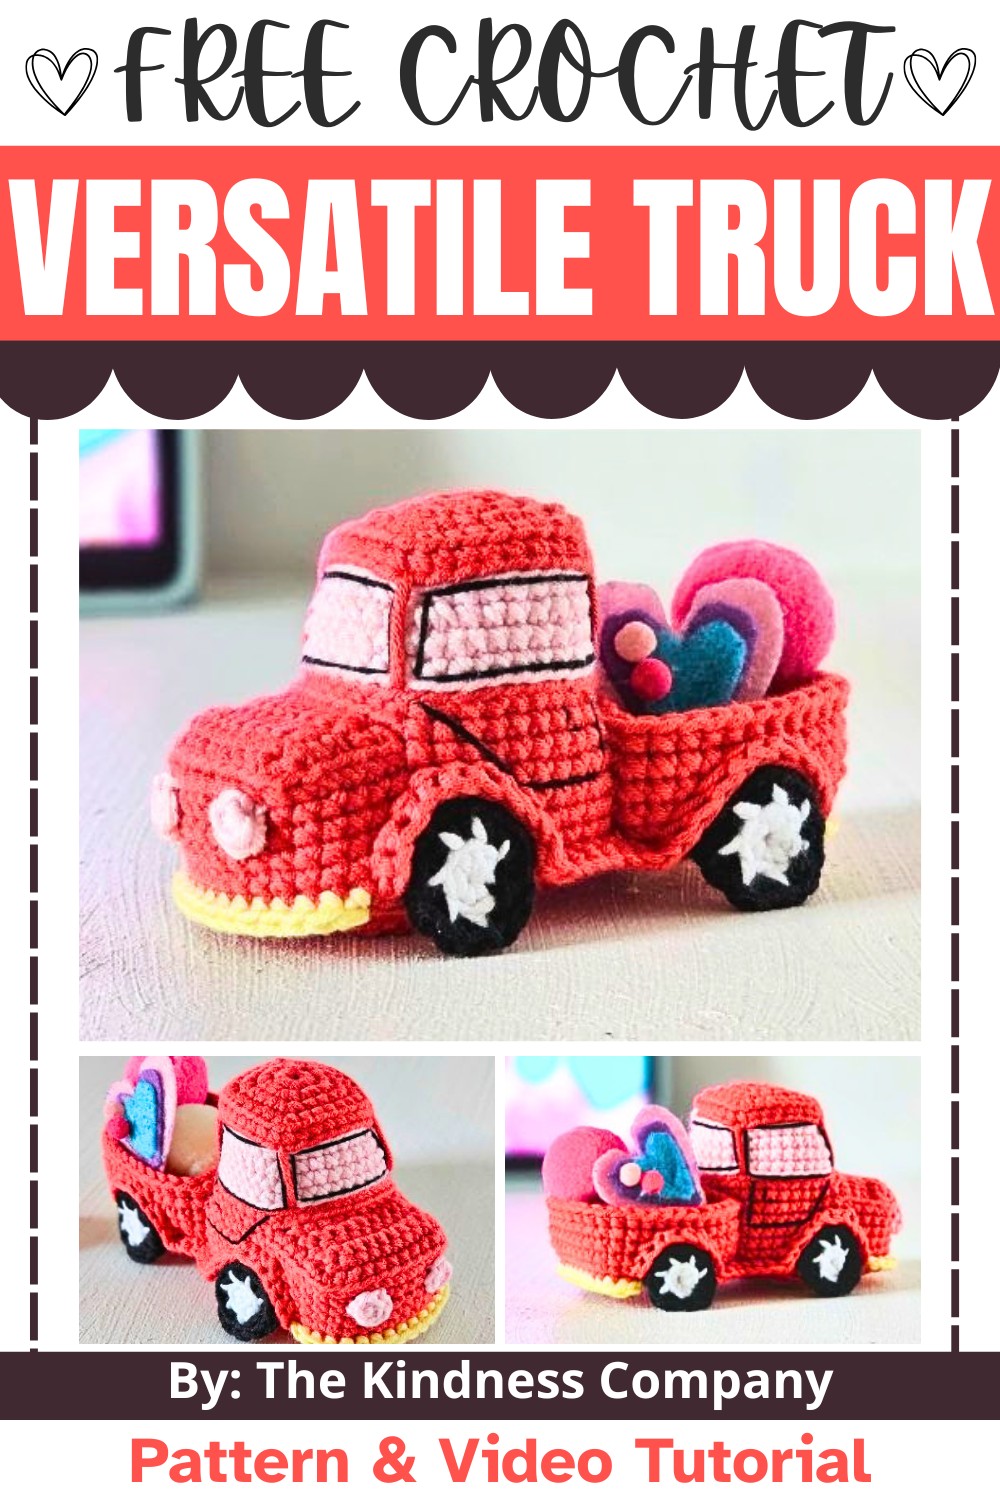
Making this truck is easier than it looks. Using simple techniques like magic rings, loops, and stitching, you’ll build the cab, windows, and truck bed step by step. You can personalize the colors or add fun touches, such as filling the truck bed with small crochet characters or trinkets. Even if you're new to crochet, this pattern is perfect for learning while creating something practical and delightful.
Credit The Kindness Company
Materials & Tools Needed
- Yarn:
- Red: Approx. 26g
- White: Approx. 1.5g
- Black: Approx. 2.5g
- Pink: Approx. 3.5g
- Pastel Yellow: Approx. 1g
- Hook Size: 3mm recommended (or 4mm for a slightly larger truck as demonstrated in the tutorial).
- Additional Supplies:
- Yarn needle
- Stitch markers
- Embroidery floss (black for detailing)
- Stuffing material
- Scissors
Note: Gauge is not critical. You can customize the size by adjusting the hook size and yarn weight. Larger hooks will result in a slightly larger truck.
Finished Size & Customization Ideas
- Estimated Size: Using the suggested yarn and hook size, the truck is small enough for decorative or gift purposes.
- Customization Ideas:
- Change the primary color of the truck (e.g., blue, green, yellow).
- Add different handwritten or embroidered details (e.g., initials on the hood or side panels).
- Use felt or buttons to create unique decorative elements.
Pattern Abbreviations & Terminology
- SC: Single Crochet
- INC: Increase (2 SC in one stitch)
- DEC: Decrease (Single Crochet 2 stitches together)
- SC3TOG: Single Crochet Three Stitches Together
- BLO: Back Loop Only
- FLO: Front Loop Only
- SL ST: Slip Stitch
- CH: Chain
- MR: Magic Ring
- ST: Stitch

Step-by-Step Crochet Instructions
Truck Cab
Rounds 1–4: Forming the Base
- Round 1: Using red yarn, create a MR, then SC 8 into the ring. Pull the tail to close the circle tightly. SL ST to the first SC and CH 1. (8 SC total)
- Round 2: INC in every ST around. SL ST, CH 1. (16 SC total)
- Round 3: SC in the next 3 STs, then INC in the next ST. Repeat (SC 3, INC) around the circle 4 times. SL ST, CH 1. (20 SC total)
- Round 4: SC in the next 4 STs, then INC in the next ST. Continue the sequence around with the increases at the desired corners. (Exact positional details aligned with the tutorial)
Rounds 5–10: Building the Structure
5. Round 5: SC in BLO of every ST around. (No increases or decreases; ~20 SC total)
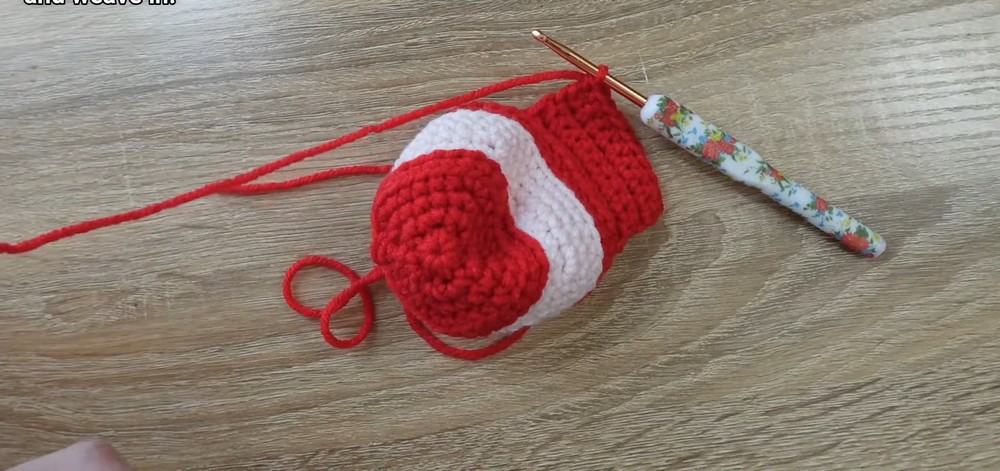
- Change to pink yarn (using the technique in the tutorial) by SL ST and pulling through with pink.
- Round 6: Slip stitch (loosely!) in BLO around. SL ST, CH 1.
- Round 7: Return to SC in BLO for 1 round. Make sure the shape starts forming square corners.
- Rounds 8–10: Continue SC in every ST, ensuring to maintain symmetry and tight edges to form the rectangular cab. The chain stitches at the start of rounds help maintain the cab height.
Round 11–13: Cab Roof
10. SC rows back and forth (using red yarn) for the split panel roof. Chain 1 at the end of each row and turn.
- After finishing the flat section, sew and close the top corners securely with a whipstitch.
Truck Hood
- Measure and attach red yarn to the desired points near the front panel.
- Crochet rows back and forth using SC for the hood. Maintain 10 SC across with CH 1 at the start of every row for crisp edges.
- After achieving adequate height for the hood, secure and weave in all loose ends.
Adding Embroidery Details to the Cab
- Use black embroidery floss to outline the windshield and side windows with straight stitches.
- Divide the cab into visible sections by stitching edges along the windows.
- Tie off and weave in embroidery tails inside the cab.
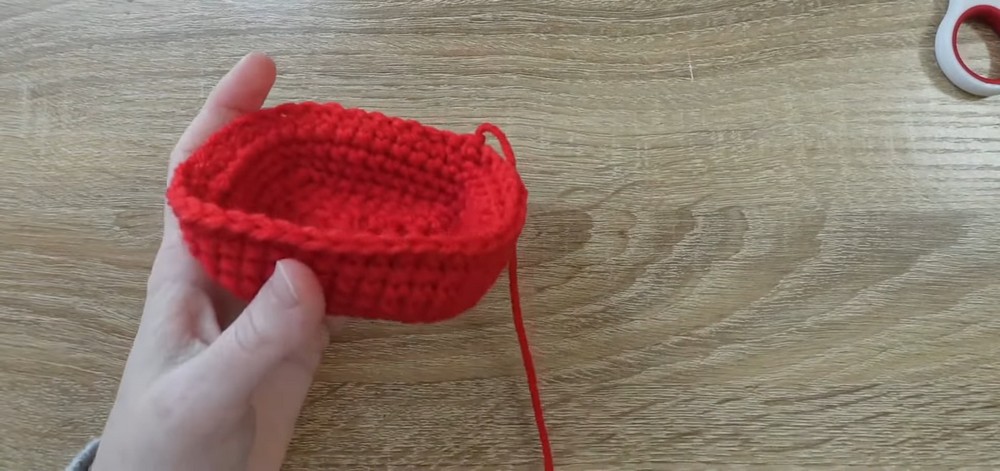
Bottom of the Truck
- Begin with red yarn and CH 9.
- Rows 1–11: SC across each row, chaining and turning (as explained in the bottom panel section). (Finalize the rectangular panel.)
Truck Bed
Rounds 1–4: Creating the Base
- Start with a MR using red yarn; SC 8 inside. Pull tight, SL ST, CH 1.
- Add increases symmetrically (following similar logic as the cab base).
Rounds 5–15: Standing Walls
3. Alternately SC in BLO or FLO along with typical SC rounds (details as in the transcription). Handle color trims and outlines where necessary.
Round 16: Narrow down with SC3TOG at the designated corners for a structured wall. Finish off cleanly, leaving a long tail for sewing.
Assembly
Stuff and Attach Parts:
- Use stuffing carefully to maintain the form of the vehicle. Avoid overstuffing to prevent losing structural integrity.
- Sew the bottom panel to the cab section with whipstitches, ensuring alignment with the cab walls. Add stuffing as necessary before fully closing.
- Attach the truck bed to the back of the cab, ensuring clean and tight joins. Use your hands to mold the shape as needed.

Final Touches
- Wheels: Crochet four small circular panels using black yarn and attach securely to the bottom.
- Headlights and Taillights: Use pastel yellow and red yarn to create small circular accents for the front and back of the truck.
- Optional Embellishments: Add embroidered details like license plates or stripes for extra flair.