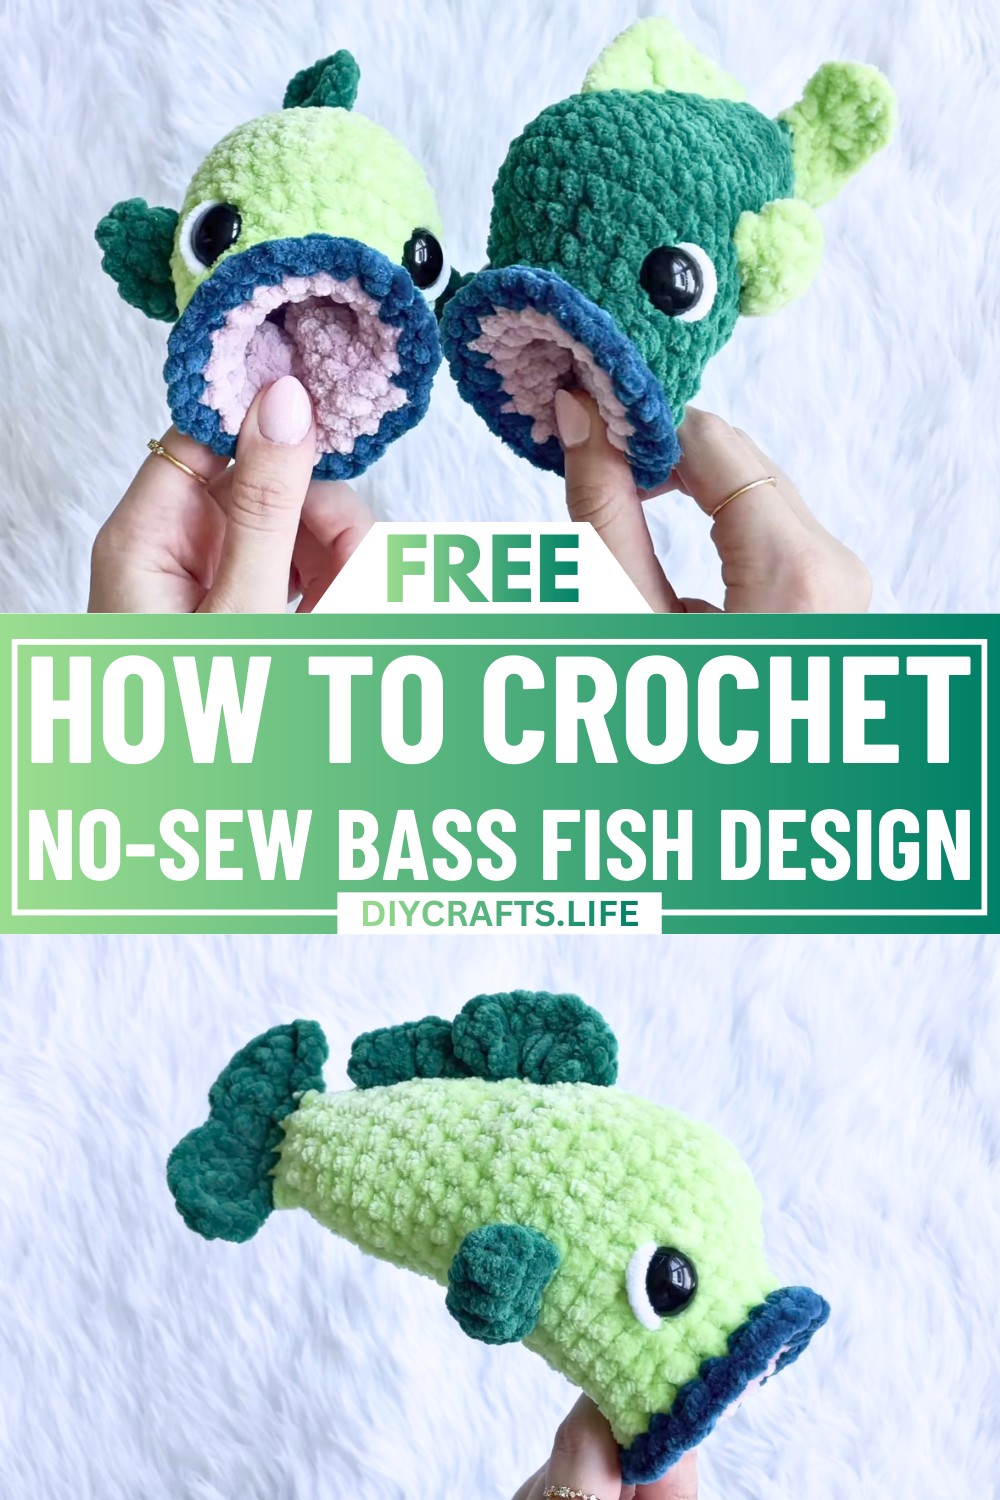
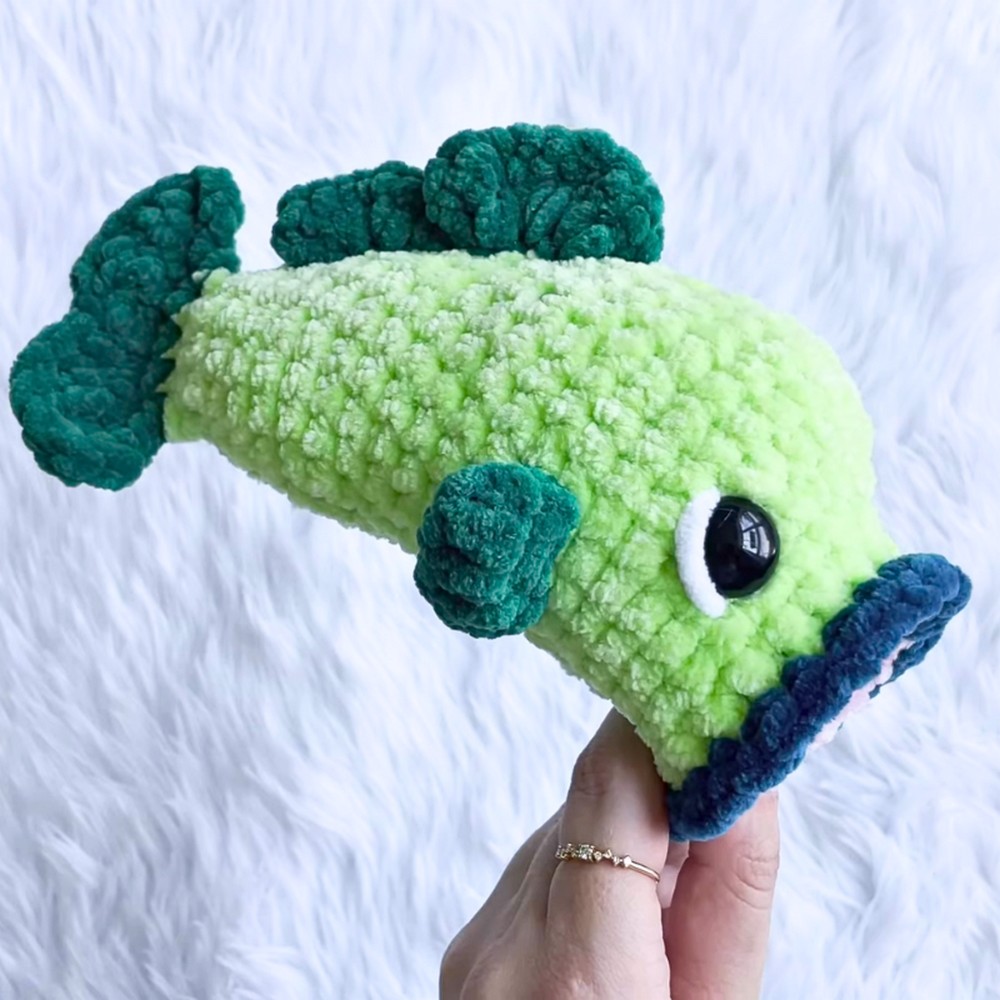
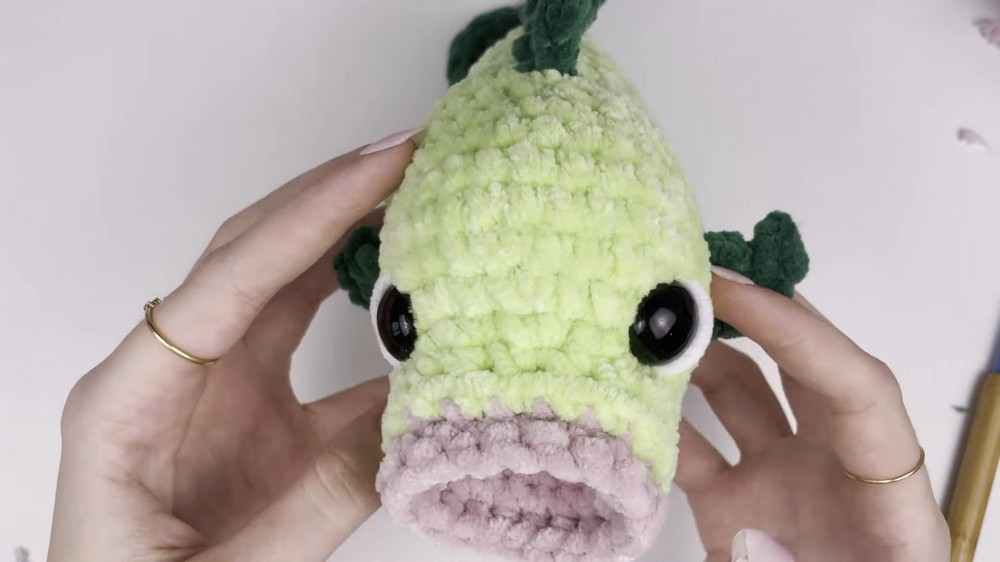
Turn stitches into charm with this eye-catching crochet design! This no-sew bass fish pattern is the perfect mix of whimsy and creativity, bringing to life a fun underwater friend without the need for sewing. Whether you're crafting something playful for decorations or gifting someone a one-of-a-kind piece, this crochet bass fish is bound to add a splash of joy to any space.
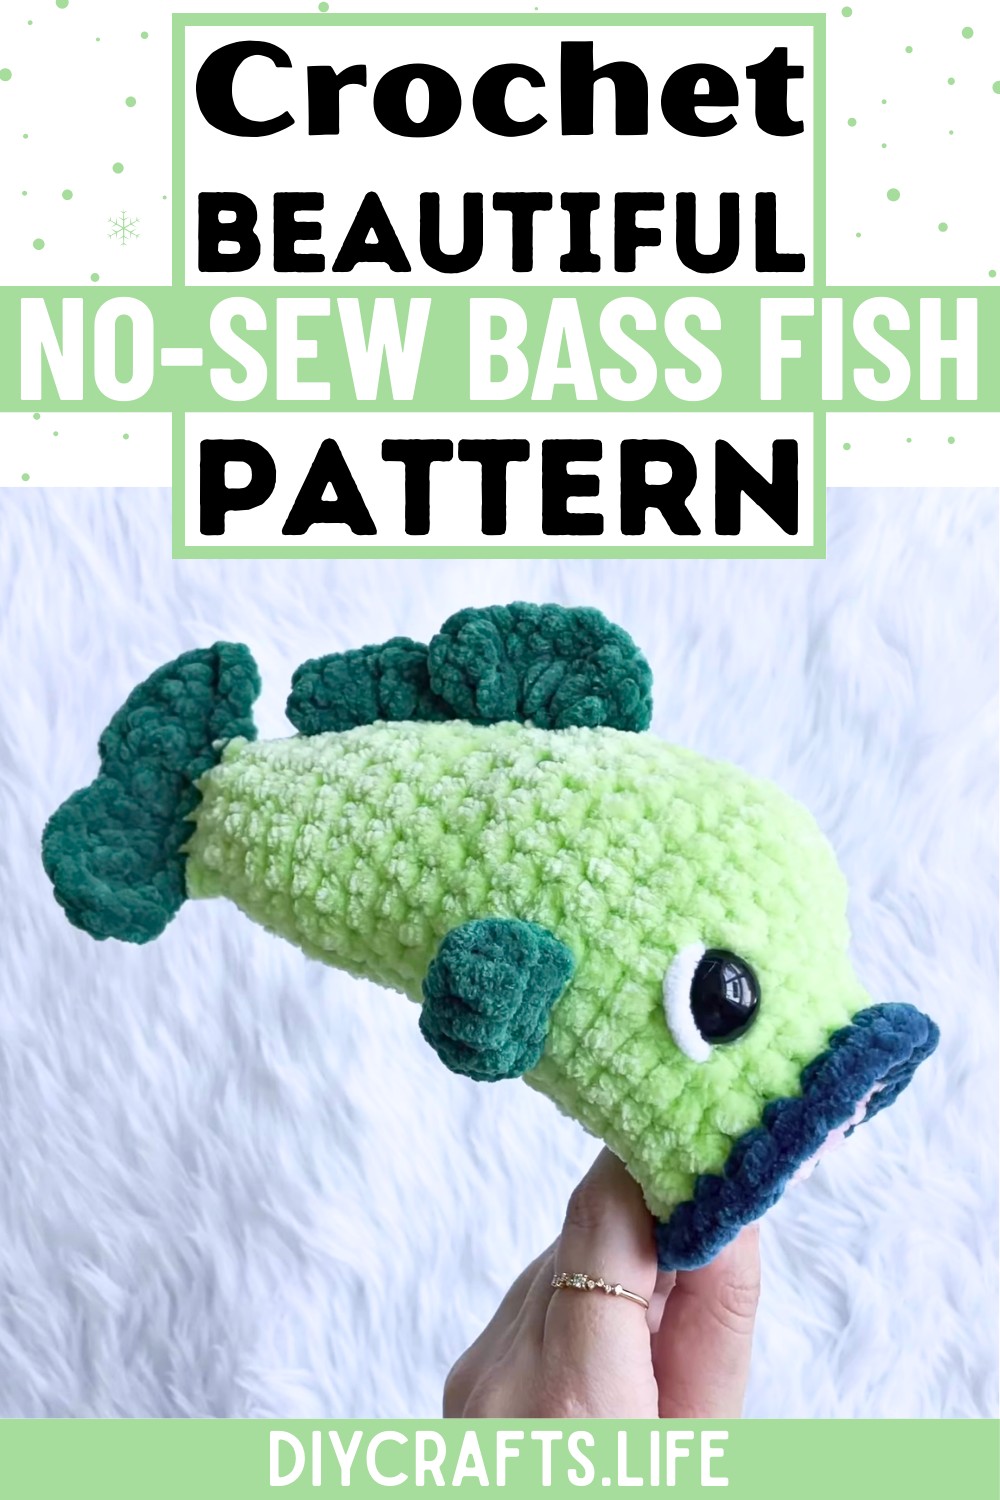
What makes this design truly special is its thoughtful no-sew construction, making assembly quick and simple for any level of crafter. It features playful fins, a 3D mouth, and charming safety eyes—all creating a lively and fun personality for your fish. This project pairs creativity with ease, letting you experiment with colors to craft a bass fish that matches your personal style, season, or home vibe.
Credit Crochet with Kyra
Required Materials
To create the no-sew crochet bass fish, you'll need the following materials:
- Scissors
- 5 mm crochet hook
- Stitch marker
- Embroidery needle
- 20 mm safety eyes
- Polyfill stuffing
- Yarn:
- Premier Parfait chunky yarn (colors: rose, key lime, peacock, emerald)
- Scrap piece of white plush yarn
Important Notes
- Beginner Help: If you're new to crochet, refer to Kira's tutorials for the magic ring technique and other stitches used in this pattern (linked in the video description).
- Stitch Marker Placement: Always place your stitch marker in the last stitch of each round for consistency.
- Orientation of the Crochet Work: Pay careful attention to orientation (e.g., flipping the work inside out for certain parts).
- Decreasing/Center Alignment: As the body narrows, regularly ensure the stitch marker stays at the bottom center of the fish for proper symmetry.
- Stuffing Advice: Avoid overstuffing, especially at the mouth area. Ensure the stuffing focuses on the head and body parts for a well-shaped finish.
- Surface Crochet: This technique is used to attach fins and add detail to the body.
Detailed Step-by-Step Instructions
1. Fish’s Mouth
- Begin with the pink yarn to create the inner mouth.
- Step 1: Make 6 single crochet stitches in a magic ring.
- Step 2: In the next round, make 6 increase stitches (i.e., 2 single crochets into each stitch).
- Step 3: Create one single crochet and one increase, repeating six times around.
- Step 4: Make 5 additional rounds of 18 single crochet (SC) stitches around.
- Step 5: For the next round, crochet 18 SC in the front loops only, then tie off the yarn.
Flip the work inside out so the pretty side is on the inside of the mouth. This ensures the back loops from the previous round remain visible on the exterior for the body later.

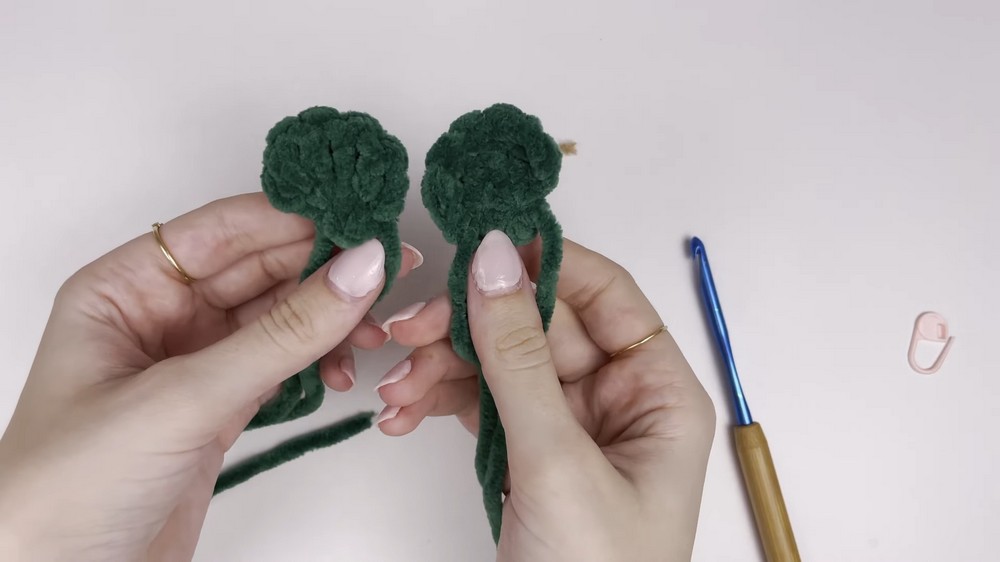
2. Side Fins
- Using the dark green yarn, work on the side fins.
- Step 1: Make 6 SC in a magic ring.
- Step 2: Chain 2 and turn your work over to work along the outside of the ring.
- Step 3: Starting in the 3rd stitch from the hook, create 4 double crochet (DC) stitches. Repeat in the next stitch.
- Step 4: Chain 2 and slip stitch into the last stitch where the DCs were placed.
- Step 5: Tie off the yarn.
Repeat the steps above to create a second fin. Set the fins aside; no tails need to remain.
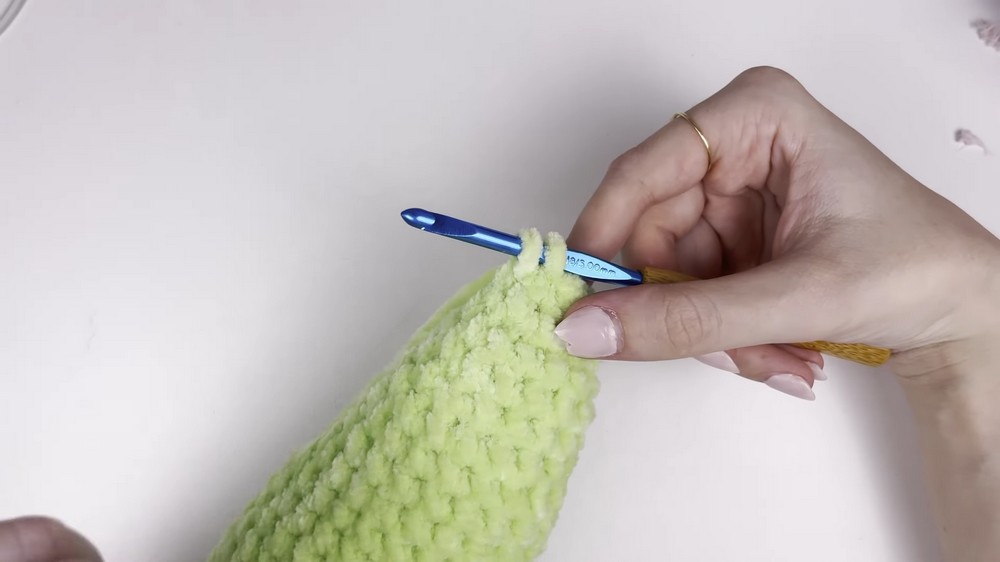
3. Fish Body
- Using key lime yarn for the main body color:
- Step 1: Join the yarn to the back loops left from the mouth. Make 18 SC stitches all around.
- Step 2: For the next round, work another 18 SC in back loops only.
- Step 3: Begin shaping the body. Gradually increase stitches in subsequent rounds:
- Round 1: 7 SC + 3 increases + 8 SC.
- Round 2: 7 SC + (1 SC + 1 increase) x3 + 8 SC.
- Round 3: 7 SC + (2 SC + 1 increase) x3 + 8 SC.
- Step 4: Create 2 rounds of 27 SC stitches. After completing, flip the work so the outer section is the proper orientation.
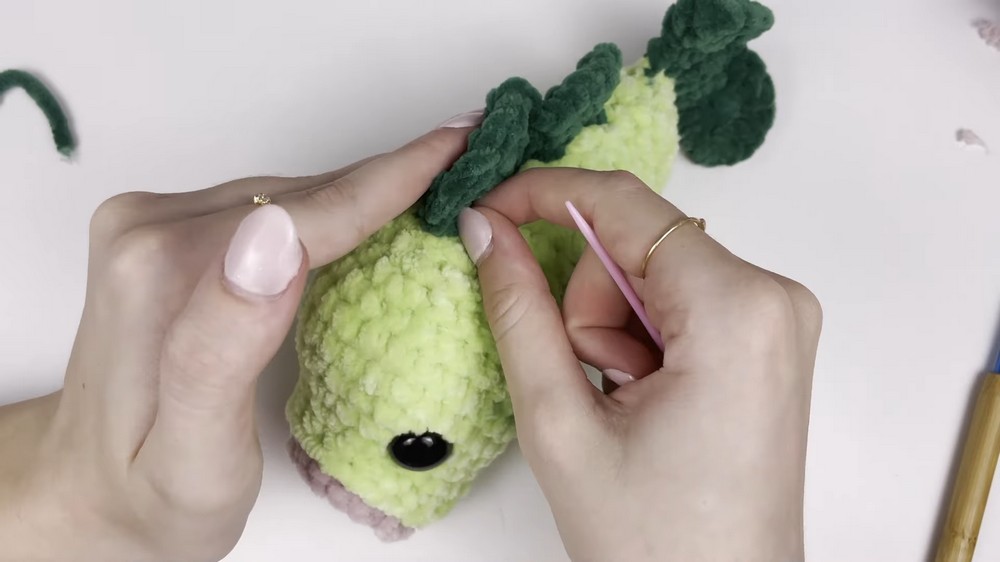
4. Attach Fins
- Align the fins carefully matching placement on both sides of the body.
- Attach each using single crochet stitches to the top and body of the fish.
5. Decreasing the Body
Gradually taper the body shape:
- Decrease one stitch per round for 8 rounds. Example:
- Round 1: 12 SC + 1 decrease + 13 SC.
- Round 2: 11 SC + 1 decrease + 12 SC.
- Place safety eyes midway through these rounds. Count backward to correctly align them between Rounds 13 and 14, keeping them 8 stitches apart.
Add stuffing as you go.
6. Tail
- Step 1: Close the fish tail by making 4 SC stitches through both sides of the tube-like narrowing end.
- Step 2: Use dark green yarn for the tail. Chain and turn to create rows:
- Row 1: 4 increase stitches.
- Row 2: 8 SC stitches.
- Row 3: Chain 2, turn, and make bumps using DC stitches (3 DC per stitch in select areas).
- Row 4: Tie off and weave in the ends.
7. Top Fin
- Count 3 rows down from the top center of the fish and begin surface crocheting along its back.
- Crochet 7 SC across the back. Turn and add bumps using half-double crochet (HDC) and DC stitches. Tie off yarn after forming fins appropriately.
8. Eye Details
- Add white accents around each eye using plush yarn. Create two small white arcs near the outer edge of each eye, pulling yarn through and tying off securely.
9. Lips
- Use dark teal yarn for the lips. Work through the front loops left by the earlier rounds near the mouth and the corresponding pink stitches.
- Make 1 SC and 1 increase repeatedly 9 times to form rounded lips. Slip stitch to join, tie off, and tuck the ends.
Final Touches
Ensure all tail ends are neatly tucked away, and add some final shaping to the fish. You'll now have your fully made crochet bass fish!