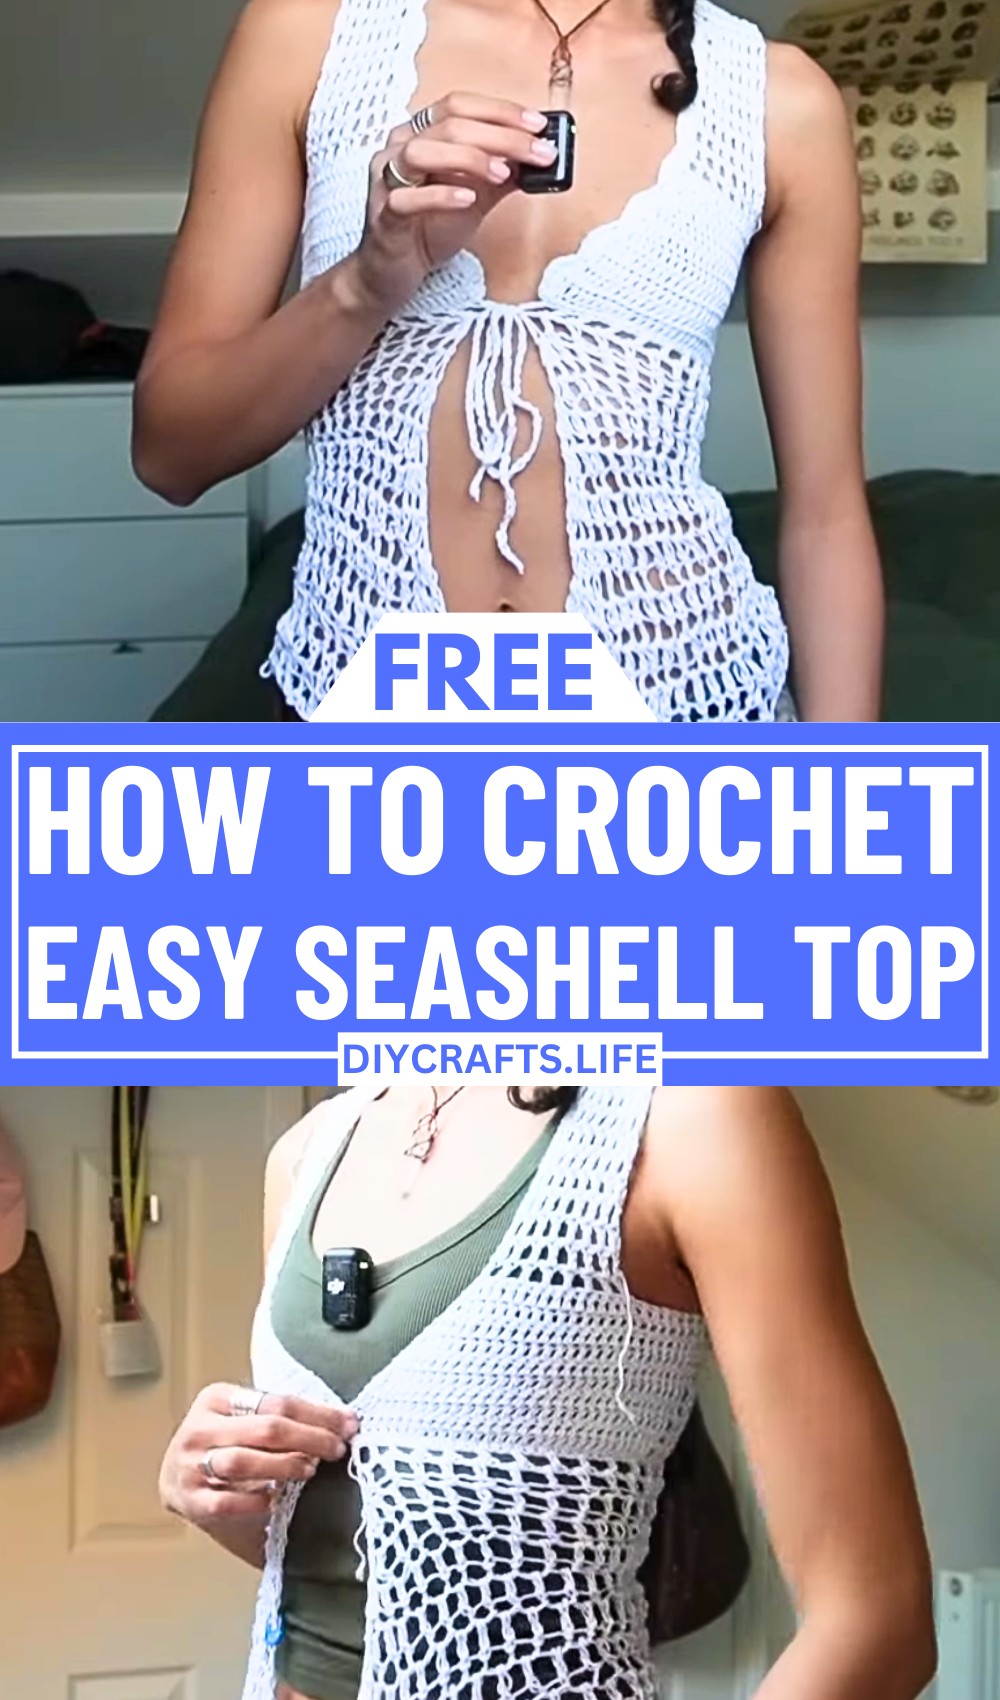
Transform your summer wardrobe with the Seashell Crochet Top, a beautiful blend of simplicity and elegance! This top brings a perfect lightweight feel and timeless design, crafted to make you stand out on sunny days. Whether you’re heading to the beach or layering it with your favorite outfit, it’s a crochet piece that captures the carefree essence of summer.

Seashell Crochet Top
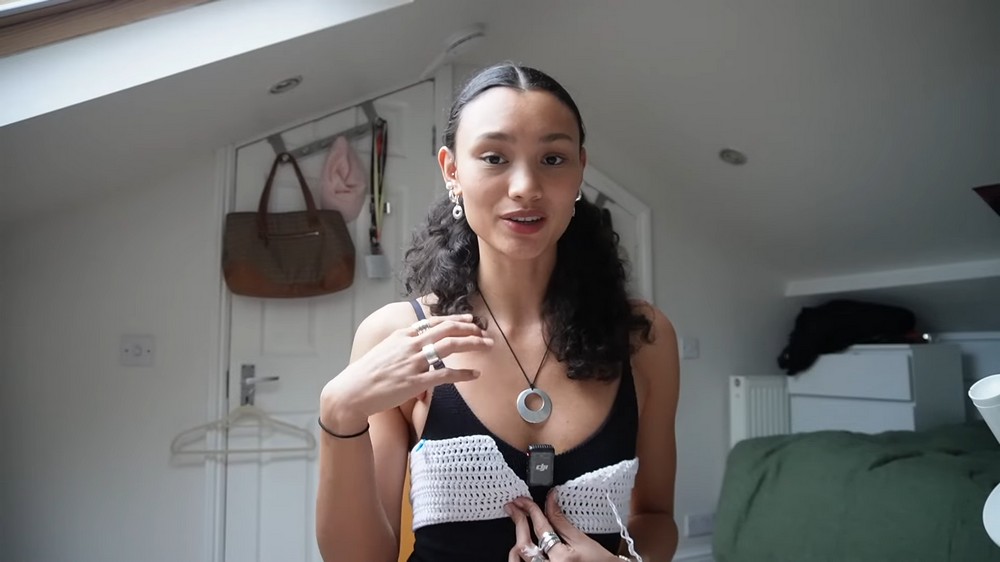
What makes this design truly special is its unique combination of textures, featuring delicate mesh stitching for a breezy and airy look. The flattering V-neck silhouette, paired with intricate straps and a stunning shell-style detail along the neckline, brings a soft and feminine touch to the design. With options for personalization in color and length, this top pattern offers endless creative possibilities. Perfect for all crochet enthusiasts, it’s a versatile piece that balances artistic charm with functional style.
Credit Nikita Nightingale
Materials & Tools Needed
- Yarn:
- DK weight yarn was used for the original design.
- Colors: Original top included orange, pink, and a variegated combination of these. Current tutorial uses plain white yarn.
- Amount: Approximate amount depends on customization, but DK weight yarn is recommended for this silhouette.
- Crochet Hooks:
- Top portion: 3.5mm hook for tighter stitches.
- Lace bottom: Larger hooks for a flowy effect (examples: 8mm, 10mm, 12mm). Adjust based on desired effect or use one larger hook size.
- Needles:
- Yarn needle for joining shoulder pieces and weaving in ends.
- Other Tools:
- Stitch markers (to mark cups and back portions).
Finished Size & Customization Ideas
Approximate Size:
- The design is customizable to fit various body sizes. Stitch count depends on your measurements:
- Chain long enough to fit just under your bust (117 chains were used in the tutorial).
- Cups: Positioned to end under your armpit.
Customization Ideas:
- To adjust size:
- Add/remove chains to start, ensuring an odd number for the mesh stitch pattern.
- Customize the cup size based on your bust size by crocheting more rows before beginning the decreases.
- Explore different yarn weights:
- Lightweight yarns for a delicate summer feel.
- Chunkier yarns for a more snug and structured appearance.
- Change straps or neckline:
- Longer straps for a halter neck or crisscross.
- Decrease rows earlier for more cleavage or later for additional coverage.
- Play with colors:
- Variegated or multicolored yarn for visual interest.
- Add contrasting shades for the lace bottom or edge details.
Pattern Abbreviations & Terminology
- ch = chain
- dc = double crochet
- sc = single crochet
- sl st = slip stitch
- yo = yarn over
Step-by-Step Crochet Instructions
Top Portion
- Foundation Chain:
- Create a chain long enough to fit snugly underneath your bust. Example: 117 chains (ensure odd number).
- Cups and Back Panel Marking:
- Mark where the cups should end (under the armpit). Count and mark stitches for symmetry. Example: 31 stitches each side for cups.
- Row 1:
- dc across until the first marker.
- For the mesh stitch at the back panel: Chain 1, skip 1, then dc into the next stitch. Repeat until reaching the next marker. Complete with dc stitches across remaining chains.
- Rows 2–4:
- Continue alternating between double crochet for cups and mesh stitch for the back panel.
- Adjust the number of rows depending on desired size. Example: 4 rows total were crocheted before decreases began.
Decreasing Rows for Cups
- Start Decreasing:
- Chain 2, turn work, and dc2tog (double crochet two together) at the beginning of the row.
- Crochet double crochets until reaching the mesh section. Complete this section as before (ch 1, skip 1, dc).
- Finish the row with another dc2tog.
- Repeat Rows:
- Continue decreasing the cups on both sides until they reach a “V-neck” shape. Example: the tutorial completed 2 decrease rows after the initial rows.
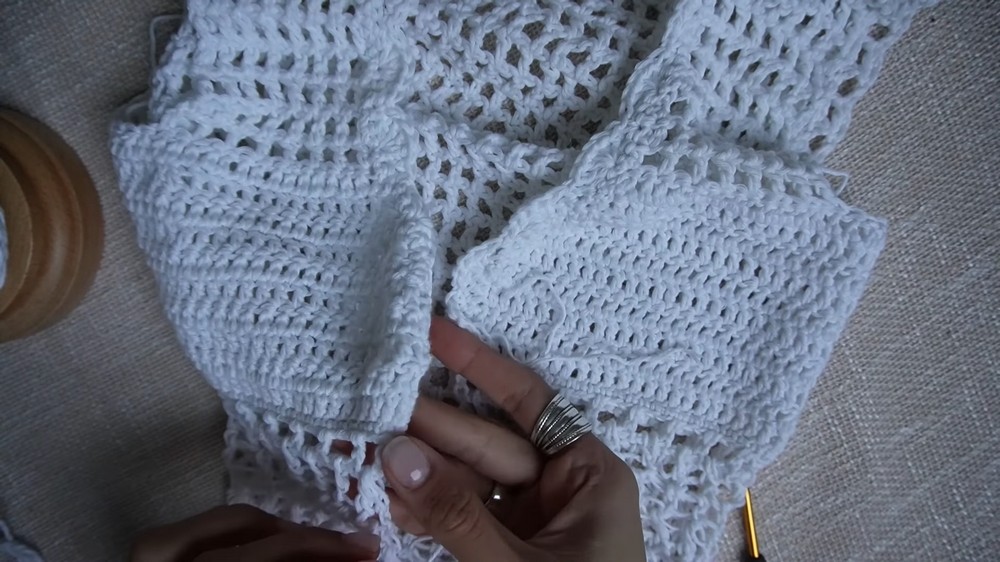
Shoulder Straps
- Mesh Stitch for Straps:
- Use stitch markers to mark the strap width (e.g., 15 stitches each side). Ensure an odd number of stitches for symmetry.
- For the straps, crochet mesh stitch rows (ch 1, skip 1, dc) until the strap reaches the desired length for your shoulders. Example: 14 rows of mesh stitch.
- Join Shoulder Straps to Back:
- Use yarn needle to stitch or crochet straps to the back panel using single crochets/sl stitches.
Back Panel
- Work Mesh Rows:
- Add mesh rows across the back panel, matching the size and stitches on the front portion. Example: 14 rows of mesh stitch were done.
Bottom Lace Portion
- Single Crochet Row:
- Create a base row of sc stitches across the bottom edge to start the lace.
- Larger Mesh Stitch Rows:
- Switch to a larger crochet hook (8mm or more).
- Work wider mesh rows with ch 2, skip 2, dc into next stitch, creating flowy gaps. Increase every row by adding stitches at the start and end.
- Example: Tutorial used:
- 5 rows (8mm hook)
- 4 rows (10mm hook)
- 2 rows (12mm hook)
Border (Optional)
- Shell Stitch Border:
- Add detail to the neckline edge:
- Row 1: Single crochet evenly around neckline.
- Row 2: Shell stitch pattern (sc in one stitch, skip 2, 5 dc in next stitch, skip 2, sc in next stitch) around neckline edge.
Final Touches
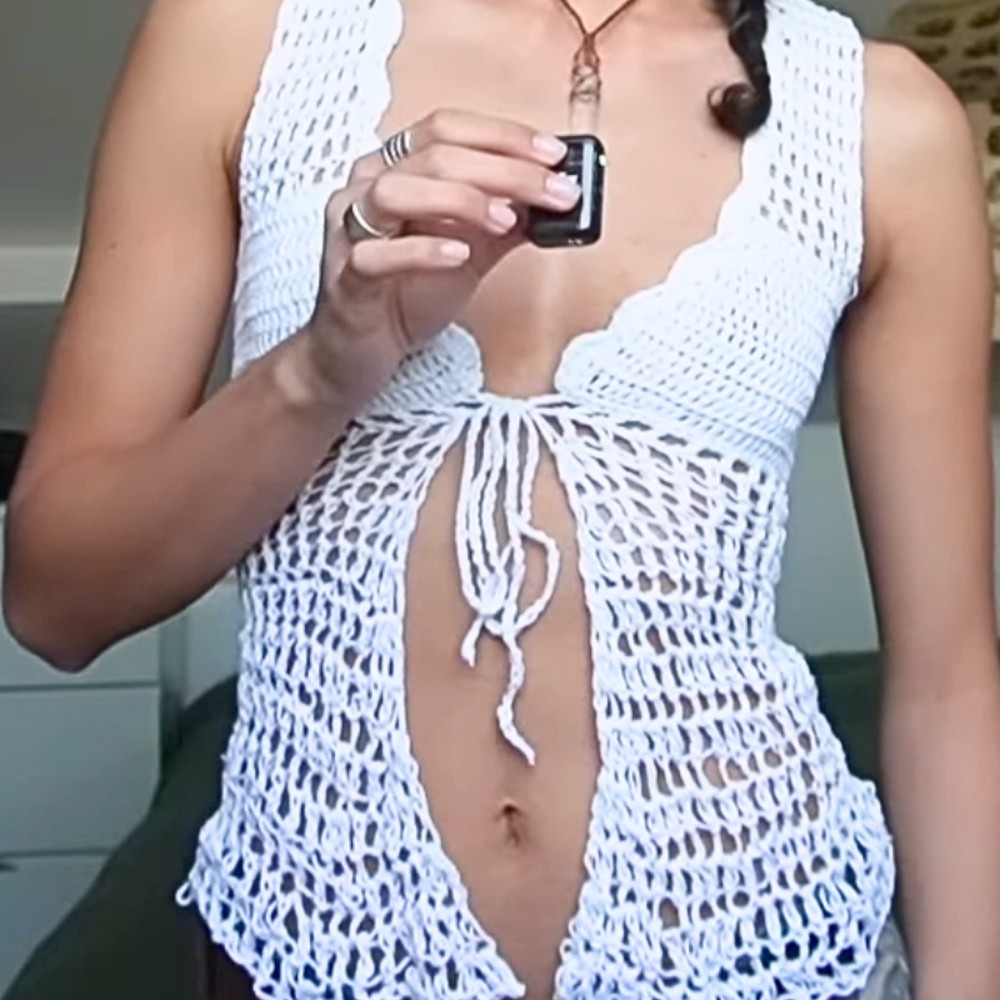
- String for Front Tie:
- Create a chain long enough to tie the front cups securely. Example: 60 cm chain. Thread through the designated stitches.
- Assembly & Weaving Ends:
- Secure all loose ends using a yarn needle. Ensure stitches are tucked neatly.
Tips and Tricks
- Try on frequently: Keep trying on the top between steps to ensure proper fit.
- Modifying cup size: Add or remove rows before decreasing based on your coverage preference.
- Flowy lace effects: Use progressively larger hooks as demonstrated in the tutorial for a cascading lace bottom.
Finished Look
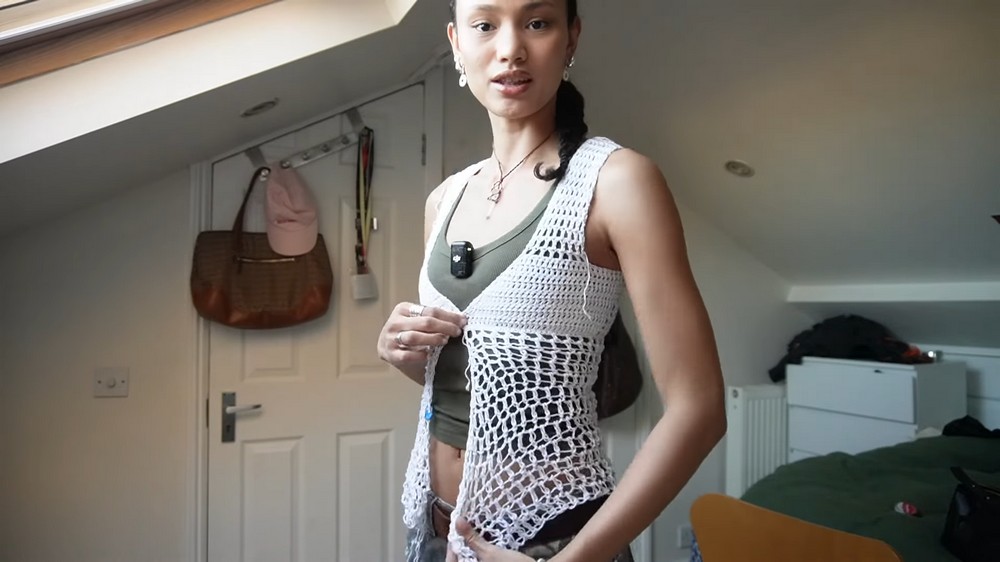
The completed "Seashell Crochet Top" combines a fitted bustline with a loose crochet lace bottom perfect for summer wear! Adjust details such as strap width, lace length, or color contrast to make it truly your own.