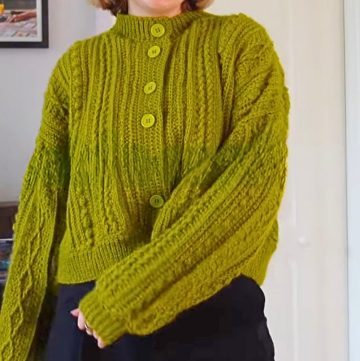
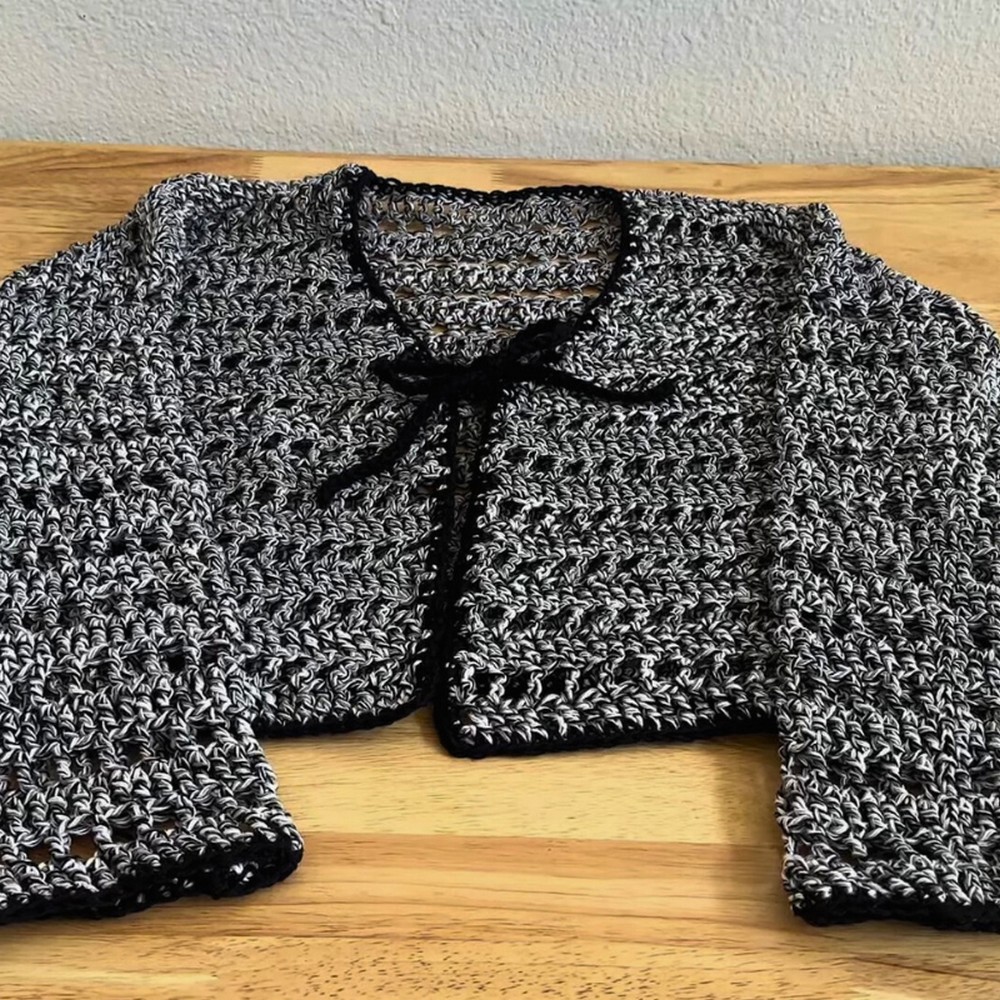
Create a stylish and breezy summer cardigan perfect for layering on warm days. This beautiful and customizable crochet project is ideal for confident beginners, combining versatility and elegance for a timeless addition to your wardrobe.

This summer cardigan adds a touch of sophistication to any outfit while remaining lightweight and breathable. Its durable construction ensures it holds up to regular use, and the customizable fit makes it both stylish and practical for all body shapes and sizes.
Crochet Cardigan Pattern
Dive into crafting this lovely summer cardigan with an engaging step-by-step process. Suitable for confident beginners, it offers endless possibilities for personalization, letting your creativity shine through every stitch. Make it truly yours with your favorite yarn and colors.
Materials and Preparation
Materials Needed:
- Yarn: Sugar 'n Cream - Color: Overcast Twists (used 4 skeins)
- Hook Size: Suitable crochet hook for the yarn (e.g., 5.0mm or the recommended size for your yarn)
- Additional Tools: Stitch markers or bobby pins, yarn needle, scissors
Yarn Weight:
Medium weight yarn works best for this pattern.
Abbreviations and Notes
Abbreviations:
- CH: Chain
- SC: Single Crochet
- TR: Treble Crochet
- TR Dec: Treble Crochet Decrease
Pattern Notes & Tips:
- Crochet Terms: US terminology is used in this pattern.
- Tip for Sizing: To determine the width of the back panel, you can lay a fitted shirt flat and measure it or chain a length that matches your back plus half of each side of your body.
- Odd Number Rule: Always ensure your chain counts are odd.
Gauge, Approximate Size, and Pattern Notes
Gauge:
This pattern is customizable, so gauge specifics aren't strict. Make a gauge swatch if you're unsure how the yarn works with your hook size.
Approximate Size:
This tutorial produces a size large cardigan, but the pattern can be adjusted to fit any size.
Techniques:
- Chain 45 for ties.
- Decreases are used to shape the neckline.
- Single crochets are used for seaming panels and adding borders.
Step-by-Step Pattern
Back Panel
- Foundation:
- Chain 61 (or customize to your size). Add 4 chains for turning.
- Row 1:
- Treble crochet into the 5th chain from the hook.
- Continue placing one treble crochet into each chain across the row.
- Row 2:
- Chain 3, flip your work, and treble into the same space.
- Chain 1, skip 1 stitch, and treble into the next stitch. Repeat this pattern across the row.
- Row 3:
- Chain 3, flip your work, treble into the same stitch.
- Place one treble crochet into each stitch across (including chain spaces from Row 2).
- Repeat Rows 2 and 3:
- Alternate between gap rows and solid rows until you reach your desired length (e.g., 23 rows), measuring the panel against yourself for fit.

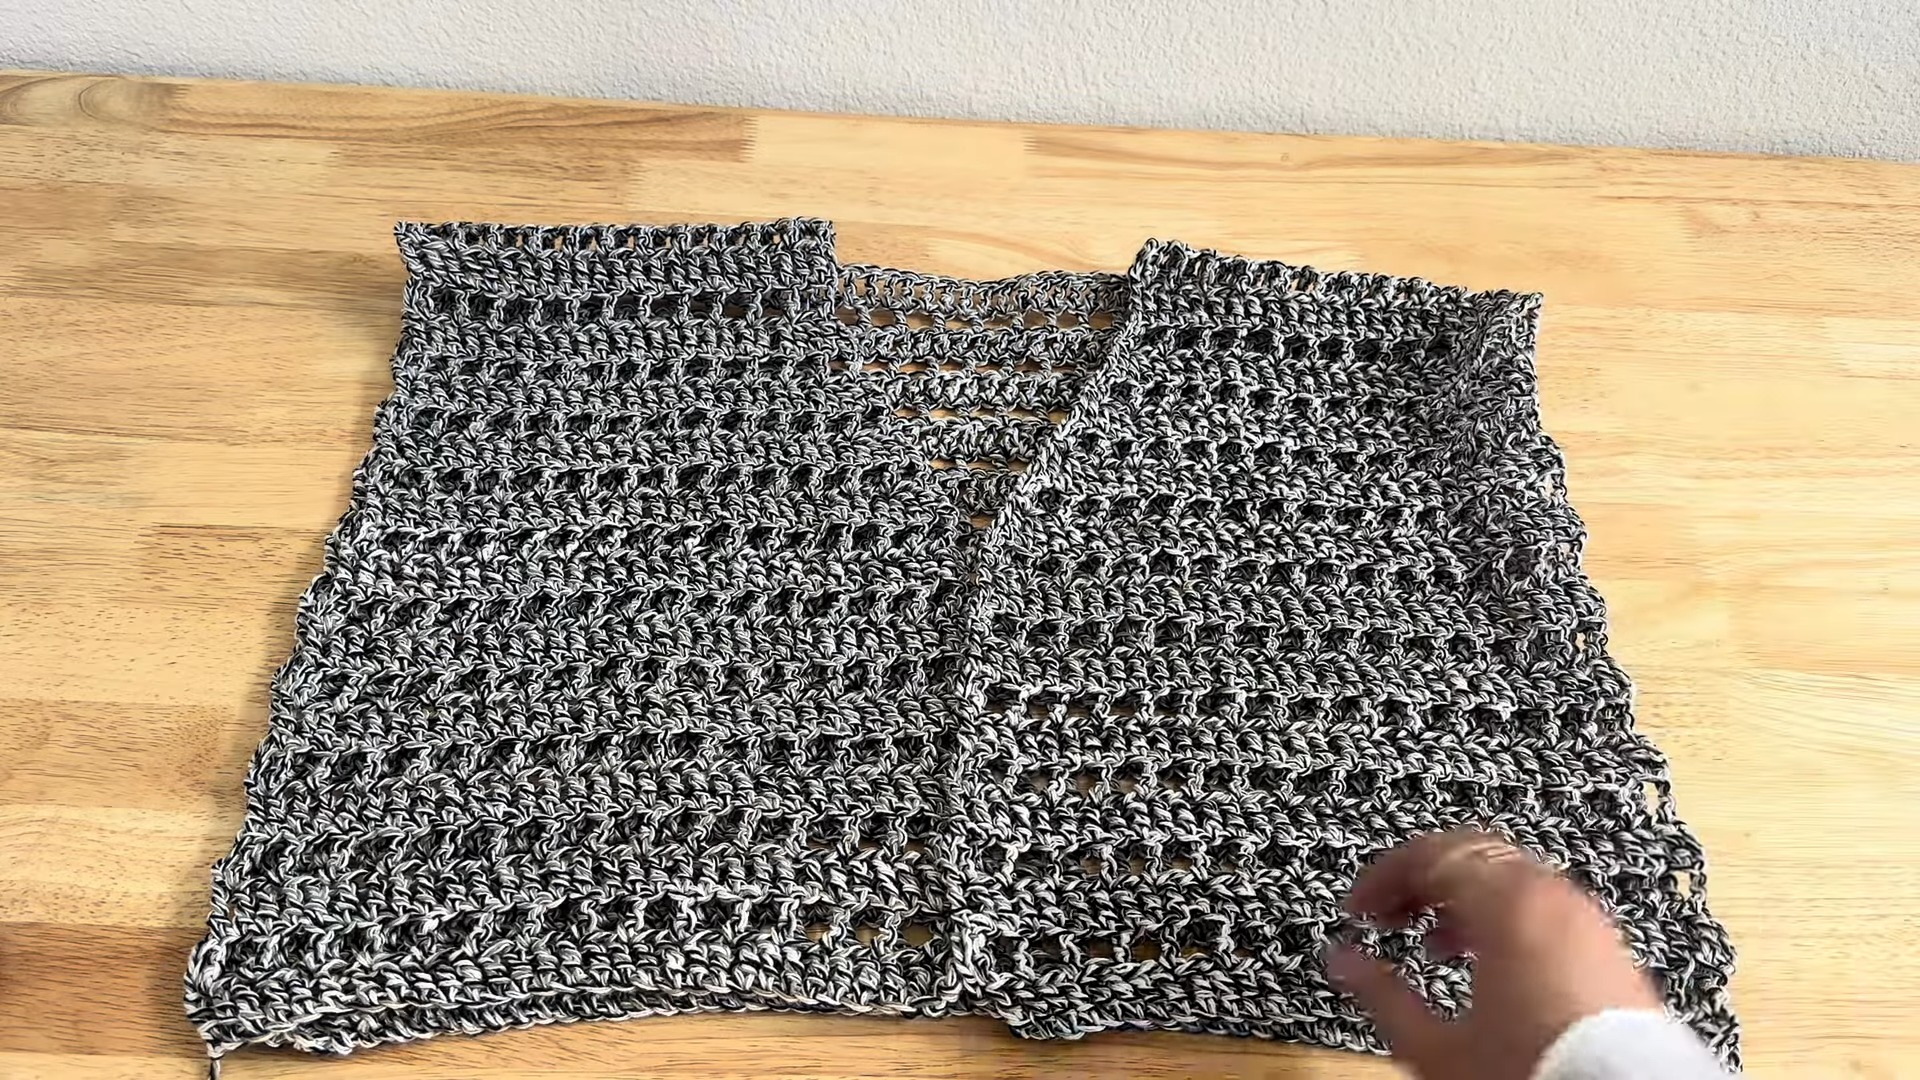
Front Panels
Both front panels are symmetrical but structured differently due to the neckline shaping.
Left Front Panel
- Base:
- Chain 31 (half of the back panel stitches, plus 4 chains for turning).
- Rows 1–12:
- Alternate Rows 2 and 3 as described earlier (no decreases).
- Start Neckline Decreases (Row 13):
- Chain 3, treble crochet into the next stitch (counts as one decrease).
- Make another treble decrease over the next two stitches (total 2 decreases).
- Place treble crochet in each stitch across the remaining row.
- Row 14 (No Decreases):
- Repeat treble chain gap pattern from Row 2.
- Row 15:
- Chain 3, treble into the next stitch (decrease).
- Make another treble decrease in the next two stitches.
- Complete the row with treble crochet in every stitch.
- Continue:
- Alternate Row 14 (no decreases) and Row 15 (decreases) for the next 5 rows.
- Finishing:
- Complete rows 21–23 with no decreases to finish the panel.

Right Front Panel
The right panel follows the pattern for the left panel but reverses the side where decreases occur.
- Decreases:
- Begin decreases at the end of each decrease row instead of the beginning.
- Follow the same steps:
- Adjust the decrease placement until the neckline mirrors the left panel.
Assembly
- Attach Front Panels to Back Panel:
- Place the back panel and left front panel inside out.
- Seam the panels by single crocheting across the edges. Repeat for the right panel.
- Side Seams:
- Fold the panels inward, matching the sides.
- Place a stitch marker at the bottom of the armhole. Adjust the placement to ensure a comfortable fit.
- Seam the sides using 2 single crochets per horizontal treble.
Sleeves (Optional)
- Starting at the bottom of the armpit hole, attach yarn.
- Row 1:
- Chain 3, treble crochet into the next stitch (counts as one decrease).
- Place 2 treble crochets into every stitch around the armhole edge.
- Row 2 (No Decreases):
- Chain 3, treble crochet into the same stitch.
- Chain 1, skip a stitch, treble crochet into the next stitch.
- Continue:
- Alternate Row 1 (with decreases) and Row 2 (no decreases) until desired sleeve length is achieved.
- Optional: Add a black single crochet border for a polished edge.
Ties and Border
- Optional Ties:
- At Row 12 of the left panel, chain 45. Slip stitch into the second chain from the hook and continue slip stitching down the chain.
- Repeat this on the corresponding row of the right panel for symmetry.
- Border:
- Add black single crochet edging around the sleeves and along the opening of the cardigan.
- For corners, make 1 SC, chain 2, and 2 more SC into the same stitch.

Final Touches
- Try on your cardigan: Ensure the fit is correct and the armholes are comfortable.
- Weave in loose ends: Use a yarn needle to secure all loose ends.

Q: How do I determine the correct number of chains for my cardigan?
A: Measure a chain that fits across your back and half of each side of your body, ensuring the total is an odd number. Alternatively, lay a shirt flat and match the width to your chain length.
Conclusion
Crocheting this summer cardigan is a delightful way to express creativity while crafting a functional, stylish piece. Its flexible design and rewarding process make it an enjoyable project, perfect for adding personal flair to your summer wardrobe.