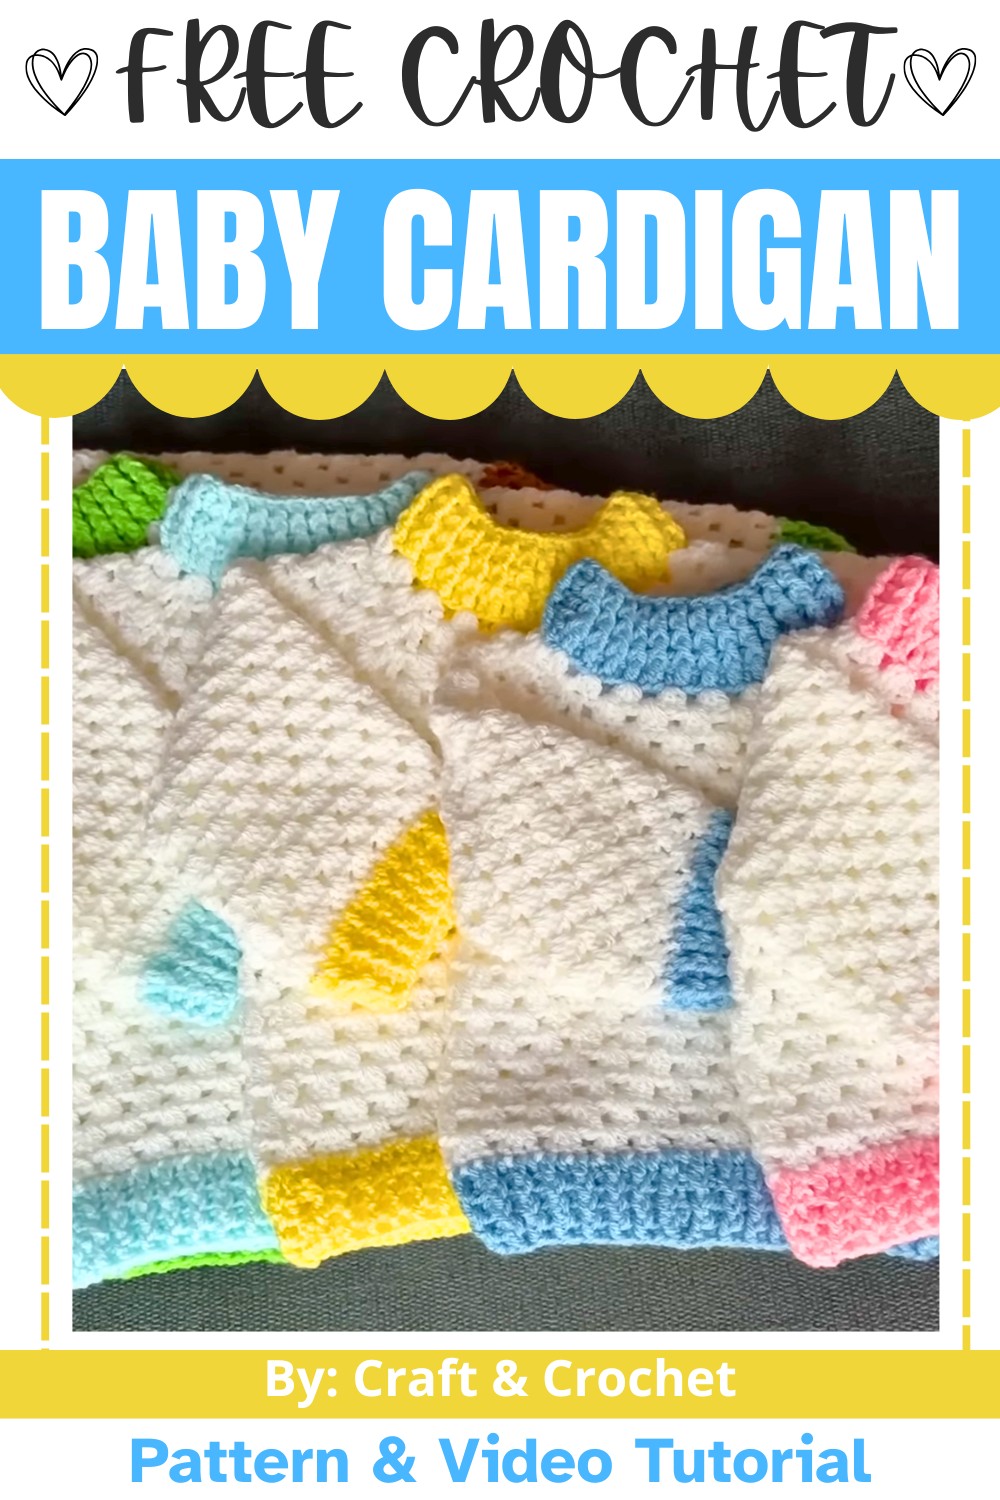
A baby crochet Cardigan is a cozy and adorable sweater specially designed for little ones. It is not only practical but also a beautiful way to express love and care through handmade clothing. Its warmth and comfort make it an ideal choice for chilly days. The handmade crochet cardigan is made with soft, high-quality yarn, helping keep your baby snug and comfortable. Your little one will stay warm and look adorable wherever they go. But this is only the beginning, as the details below highlight the features that make this cardigan a favorite among crochet lovers.
Free Crochet Baby Cardigan Pattern
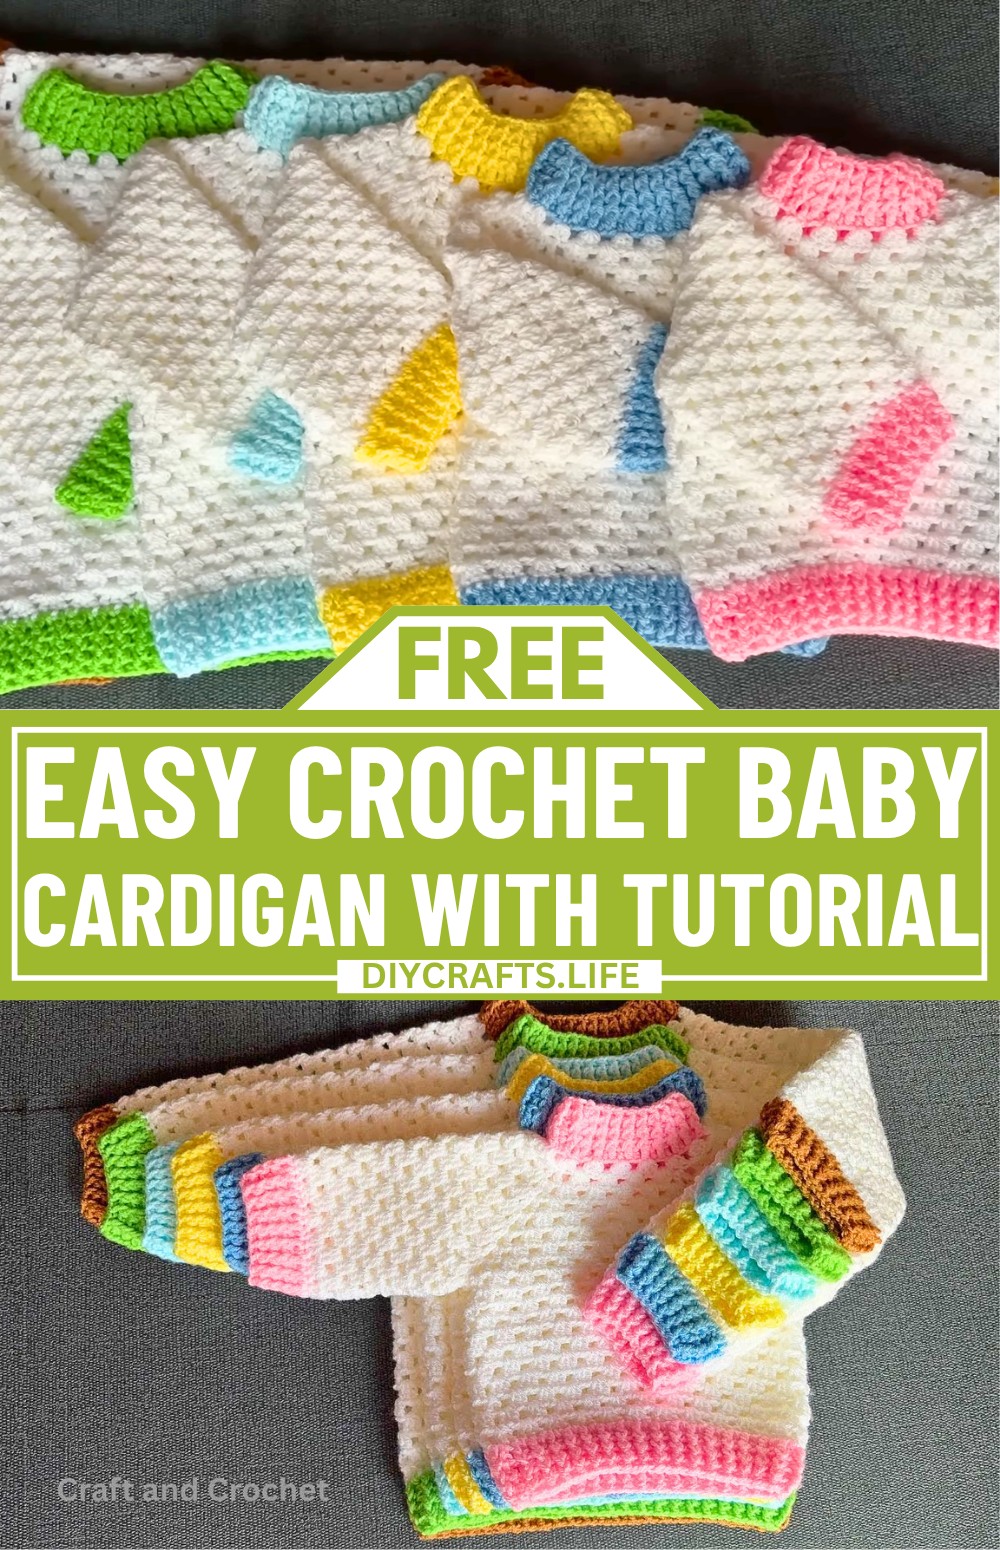
One of the standout features of this crochet baby Cardigan is its wide size range. It can be made in six different sizes, ranging from newborns to children up to 5 years old. You can choose one or multiple colours to personalize the crochet design according to your preference, making each Cardigan truly unique. The beginner-friendly tutorial includes clear step-by-step instructions. It is easy to follow and helps you successfully make the crocheted cardigan. Whether you are learning new skills or looking for a fun piece, this baby crochet Cardigan is a great choice. It creates a crochet handmade garment that is both practical and charming.
Credit Craft & Crochet
Materials & Tools Needed
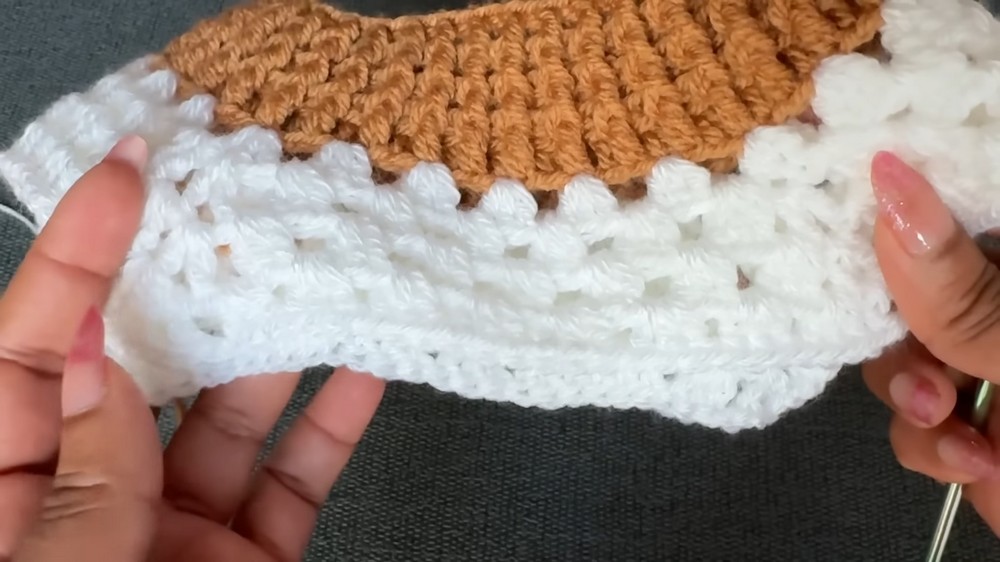
- Yarn: Double knitting yarn (100 g, 330 m per ball).
- Main Color: White (1.5 balls; Color Code: CE001).
- Second Color: Brown (small amount required; Color Code: CE057).
- Crochet Hook: 4 mm crochet hook (recommended).
- Other Tools:
- Stitch markers (to mark the corners).
- Yarn needle (for weaving in ends).
- Scissors.
Finished Size & Customization Ideas
The tutorial walks through the size for 4-5 years, starting with 74 foundation chains.
Other Sizes:
- 0-6 months: Size 1.
- 6-12 months: Size 2.
- 1-2 years: Size 3.
- 2-3 years: Size 4.
- 3-4 years: Size 5.
- Customization: Adjust sizes by beginning with a different number of chains and shaping the yoke accordingly.
The finished chest circumference for size 4-5 years is 35 cm (13.5 inches). You can customize the number of rounds for body length and sleeve length, choosing between short sleeves or long sleeves.
Pattern Abbreviations & Terminology
- ch – Chain.
- dc – Double Crochet.
- sl st – Slip Stitch.
- FPdc – Front Post Double Crochet.
- BPdc – Back Post Double Crochet.
- st(s) – Stitch(es).
- block – 3 double crochets grouped in the same space.
Step-by-Step Detailed Crochet Instructions
1. Foundation Chain
Start with the second color:
- Make a slip knot and chain 74 for sizes 4- 5 years.
Adjust the chain count for different sizes based on the chart in the tutorial. - Turn the chain to the backside, using the “bumps” for the first row.
2. Row 1 — Double Crochet Across
- Skip the first 3 chains, and dc into the 4th chain from the hook.
- Work 1 dc into each chain along the row.
- At the end of the row, there will be 72 dc in total.
- Join the first and last dc of Row 1 together using a sl st to form a circle. Then chain 3 for the next row.
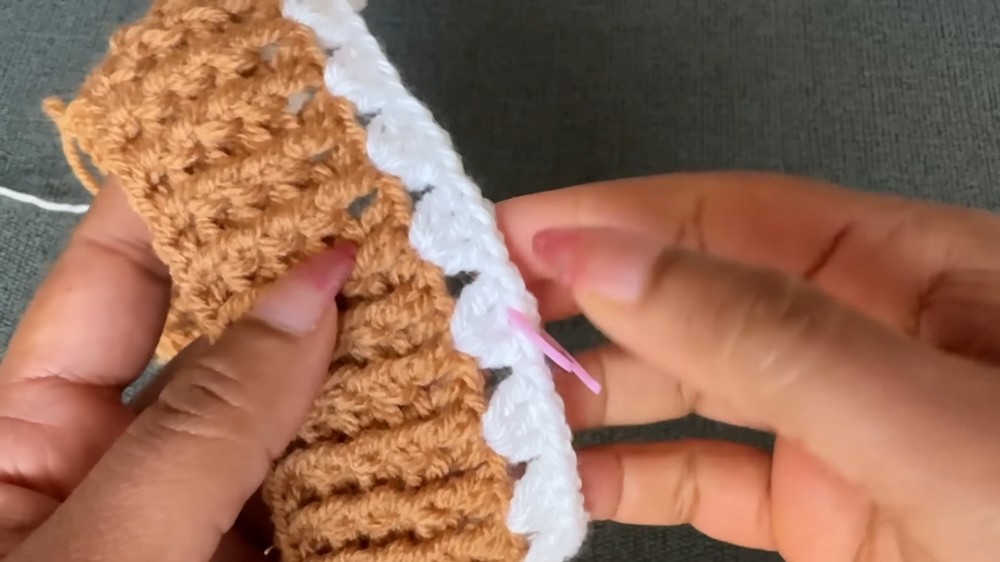
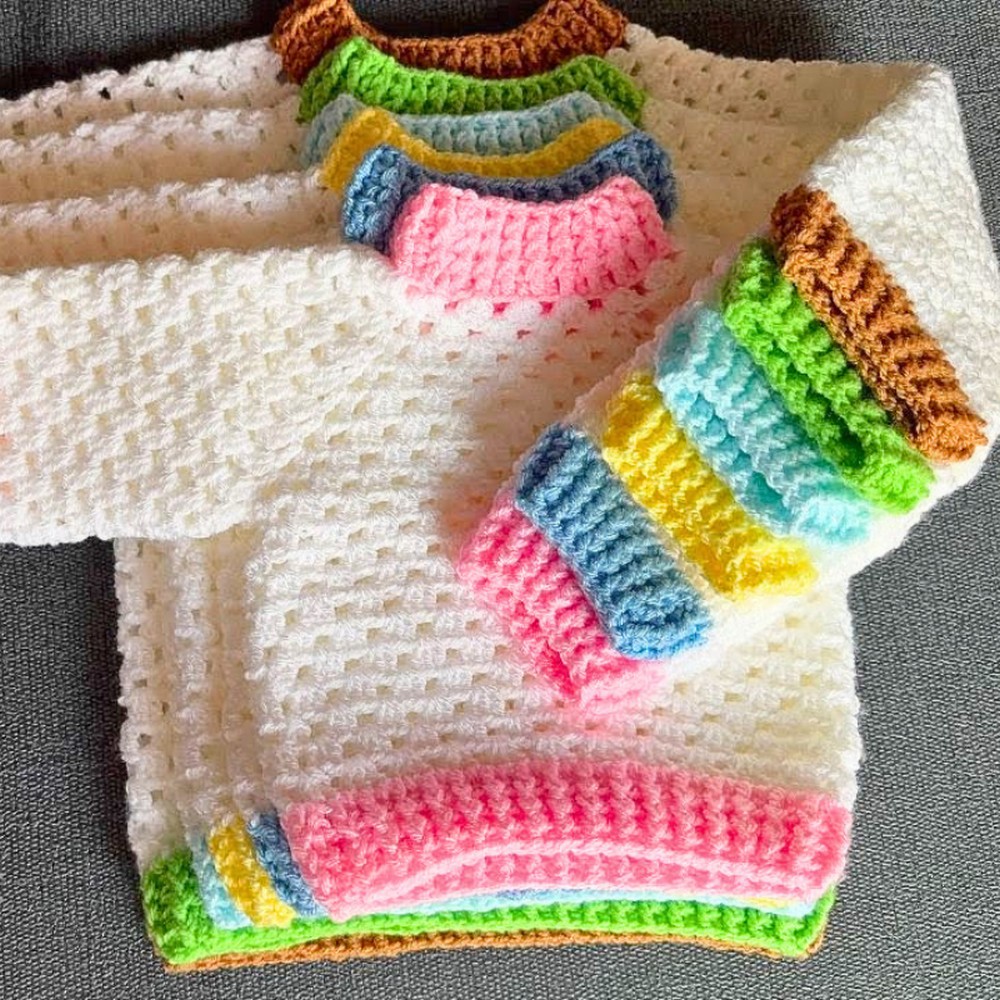
3. Rows 2-4 — Ribbed Collar (Front and Back Post Double Crochet)
These rows create the textured collar using alternating front and back post double crochets.
- Row 2:
- Work FPdc into the next st.
- Work BPdc into the following st.
- Alternate until the end of the row.
- Join with a sl st and chain 3 to begin the next row.
- Row 3-4: Follow the same pattern (alternating FPdc and BPdc).
- At the end of Row 4, cut the second color yarn.
4. Start the Yoke (Switch to Main Color)
Join the main color yarn into any dc from Row 1 and begin shaping the cardigan yoke.
Round 1:
- Ch 3 and add 2 dc into the same space (counts as the first block of 3 dc).
- Skip 2 dc, then work 3 dc into the next st.
- Continue this pattern around the row.
- At the end of Round 1, you’ll have 24 blocks of 3 dc. Join with a sl st and mark the corners.
Round 2-10:
- Create 4 corners by placing stitch markers every six blocks.
- At each corner:
- Work 1 dc, ch 2, 1 dc into the middle of the marked corner block.
- Continue adding blocks of 3 dc in each space around the row.
- For each subsequent round, you will increase the number of blocks per side by one per round.
- Round 1: 5 blocks per side.
- Round 2: 6 blocks per side.
- Round 10: 14 blocks per side.
At the end of Round 10, hold the first and last corners together to join the sleeves and begin working the body.
5. Cardigan Body
Round 1:
- Join the first and last corners together using a sl st.
- Begin working blocks of 3 dc into each space around the body.
- At the end of Round 1, there will be 32 blocks.
Round 2–20:
- Continue working blocks of 3 dc in each space around the body.
- Stop increasing after Round 2.
- Alternate rounds:
- Round 3: Start with 3 dc.
- Round 4: Begin with 2 dc to keep the line straight.

Finishing the Body:
- To finish the bottom edge, switch to the second color and complete 4 rounds of FPdc/BPdc ribbing (same as the collar).
6. Sleeves
Start:
Join the main color into the chain spaces at the armholes.
Rounds 1–6:
- Work blocks of 3 dc into each space around the sleeve.
- Round 1: Start with 16 blocks.
- From Round 7 onward, reduce stitches:
- Work 2 dc instead of 3 dc into specific stitch blocks.

Ribbing:
After completing 20 rounds for the sleeves, switch to the second color and work 4 rounds of FPdc/BPdc ribbing.
7. Final Touches
- Weave in all ends using your yarn needle.
- Adjust sleeve openings if needed by slightly tightening stitches.
- Block the cardigan for a more uniform finish.
Additional Notes
- This cardigan pattern is beginner-friendly with clear increases for shaping.
- Ensure stitch counts and corner configurations match the tutorial for accurate sizing.