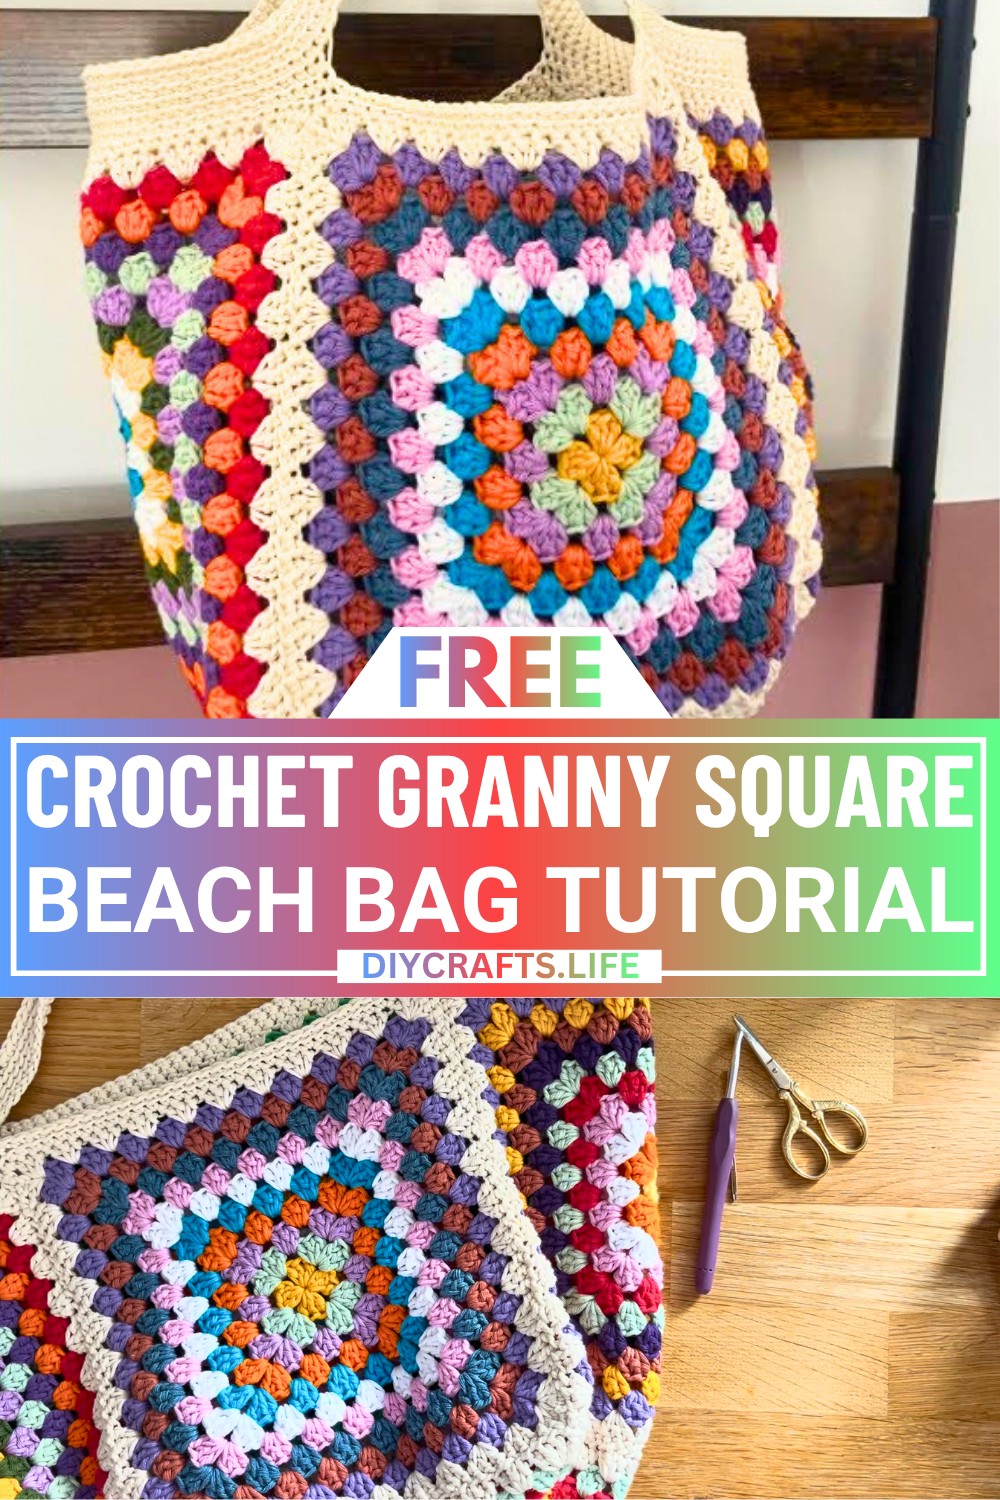
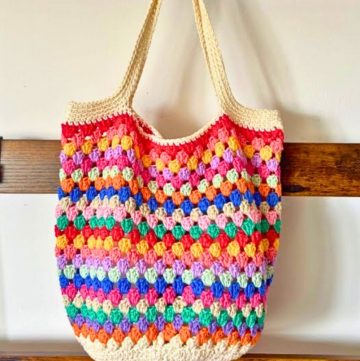
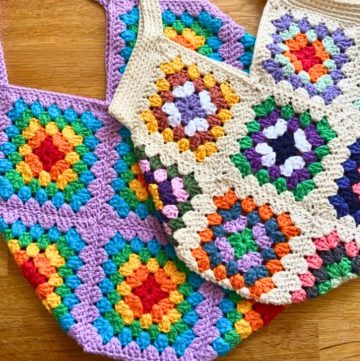
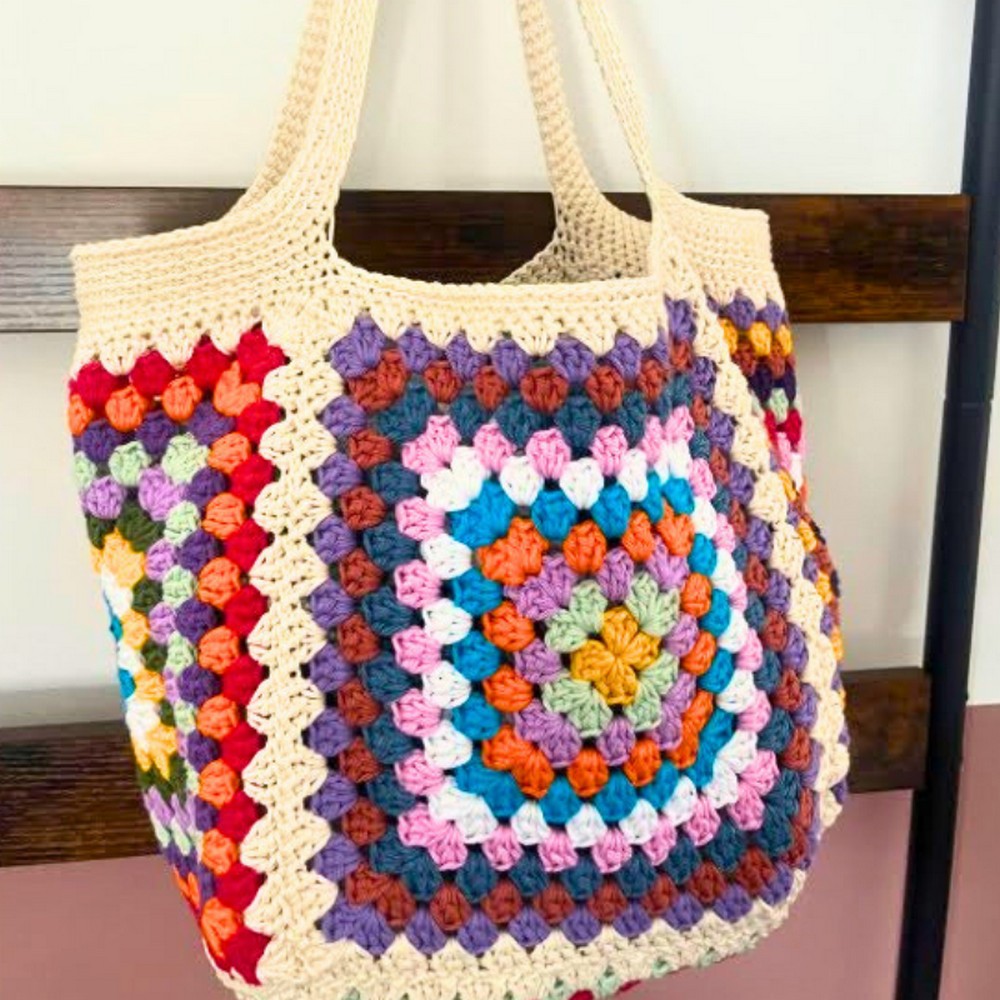
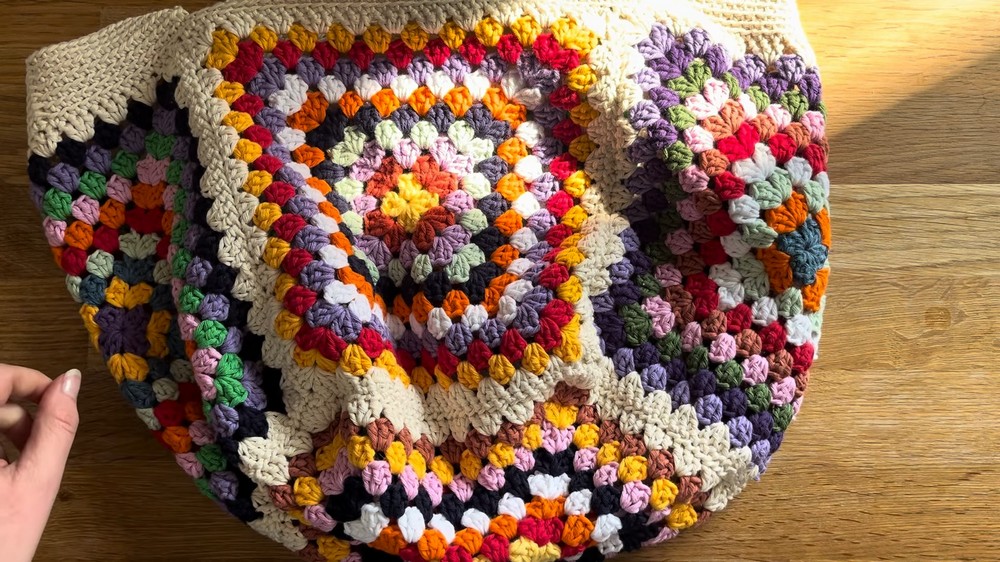
Make your very own crochet granny square beach bag! This bag is not only stylish but also super handy for carrying all your essentials. It’s made with colorful granny squares that add a pop of fun to your beach days or picnics. You’ll love the cheerful design and how lightweight yet sturdy the bag feels.
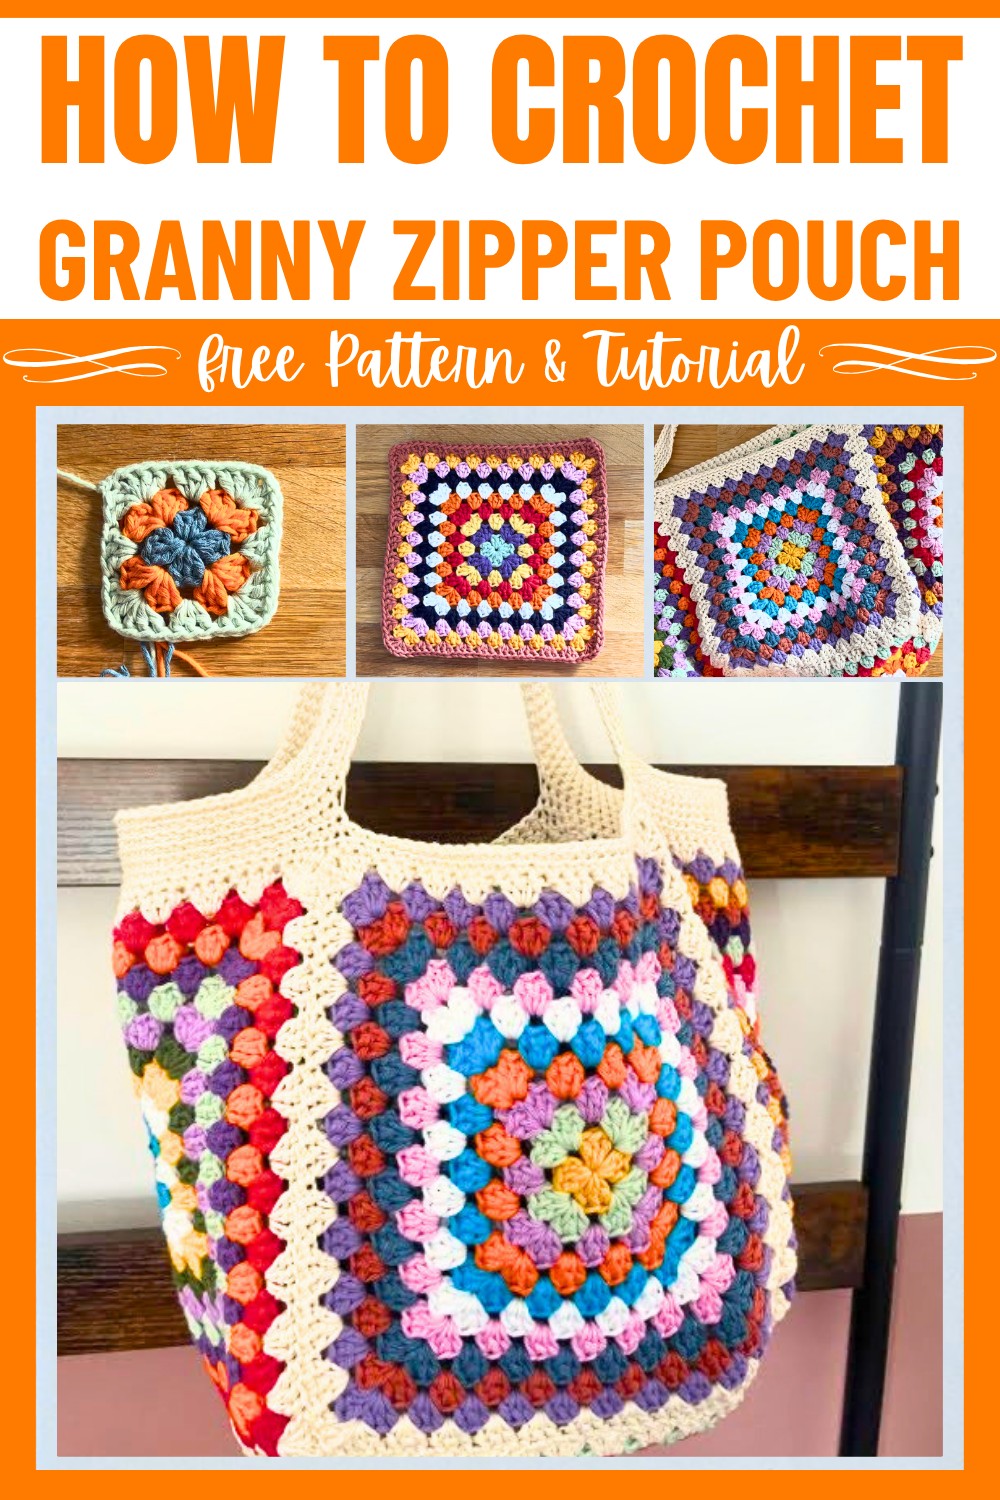
This Crochet beach bag looks amazing and has plenty of space for towels, sunscreen, snacks, and more. Making it is simple and so enjoyable—you’ll put together bright, beautiful squares and join them into the perfect bag shape. It’s a wonderful way to carry your favorite designs with you wherever you go!
Credit Crafted by Cat
Materials & Tools Needed
- Yarn: Approx. 335g of aran-weight yarn (you can use scrap yarn for color variety).
- Crochet Hook: 5 mm hook (or appropriate size based on your yarn).
- Additional Tools:
- Scissors
- Darning needle
Finished Size & Customization Ideas
- Finished Size: Each granny square is ~9 inches across.
- Customization:
- Adjust the size of the bag by using more or fewer granny squares.
- Change the number of rounds in each granny square to make them larger or smaller.
- Use different weights of yarn and adjust the hook size accordingly.
Pattern Abbreviations & Terminology
(Note: This pattern uses US crochet terms.)
- ch: Chain
- dc: Double crochet
- magic ring: Magic circle/ring
- sl st: Slip stitch
- sc: Single crochet
- BLsc: Back loop single crochet
Step-by-Step Detailed Crochet Instructions
Component 1: Granny Square
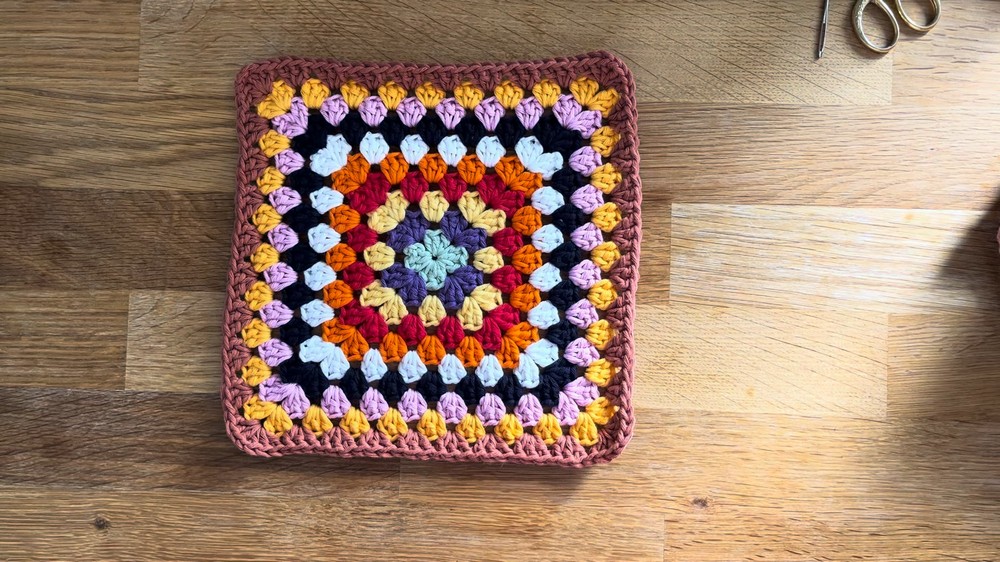
Create 5 granny squares, each with 11 rounds.
Round 1:
- Start with a magic ring.
- Chain 3 (counts as first dc).
- Work 2 dc into the ring.
- Chain 1.
- Repeat the following 3 times:
- Work 3 dc into the ring.
- Chain 1.
- Tighten the magic ring and join with a slip stitch to the top of the chain-3.
- Fasten off.
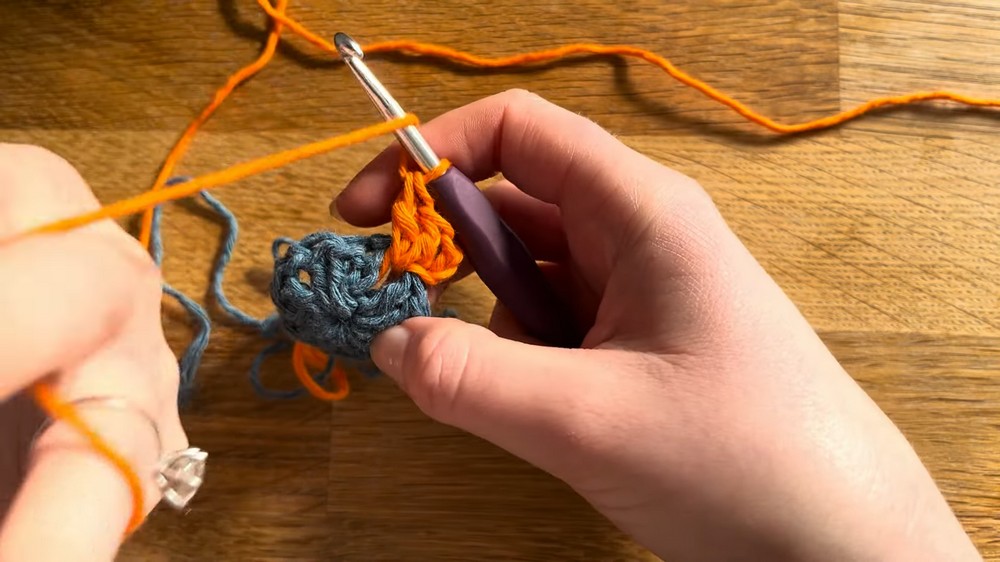
Round 2:
- Attach a new color yarn to any chain-1 space.
- Chain 3 (counts as 1 dc) and work 2 dc into the same chain-1 space (half of the first corner).
- In the next chain-1 space:
- Work 3 dc, chain 1, 3 dc (full corner).
- Repeat the previous step for the next 3 chain-1 spaces.
- Complete the first corner:
- Work 3 dc, chain 1 into the starting chain-1 space.
- Join with a slip stitch to the chain-3.
- Fasten off.
Round 3:
- Attach yarn to any corner chain-1 space.
- Chain 3 (counts as 1 dc) and work 2 dc into the same space (half of the first corner).
- Continue around:
- Work 3 dc into the side space.
- In the corner chain-1 space: Work 3 dc, chain 1, 3 dc.
- Repeat around until the last side. Complete the first corner:
- Work 3 dc, chain 1.
- Join with a slip stitch to the chain-3.
- Fasten off.
Rounds 4–10:
- Repeat Round 3.
- Each round increases the number of side spaces between corners by one.
- Work 10 total rounds in mixed/scrap yarn colors.
Round 11:
- Use an outer cream color yarn for this final round.
- Work as described in Round 3, continuing with cream for a cohesive finish.
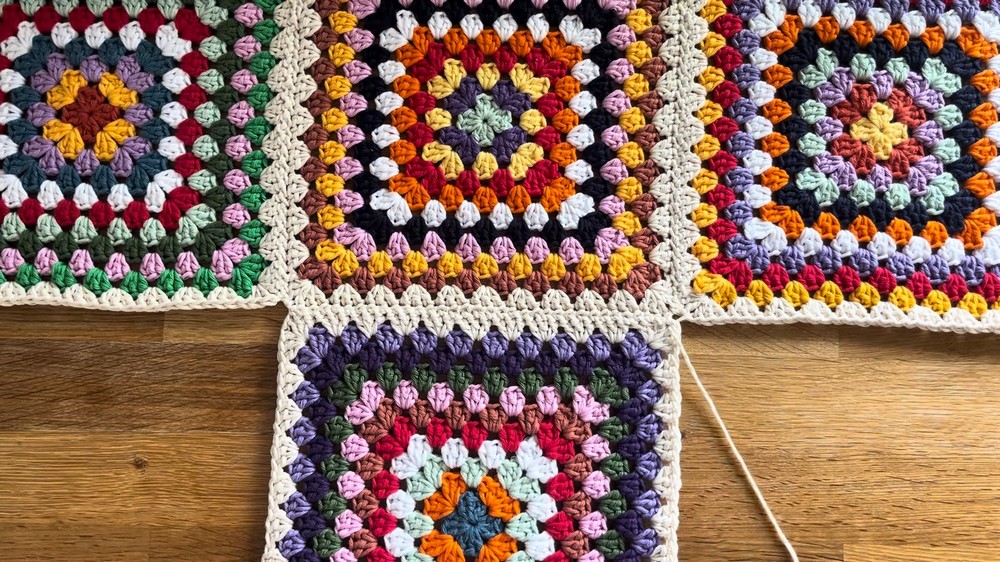
Layout & Joining Granny Squares
- Arrange the 5 squares:
- Place 1 square in the center.
- Position the remaining 4 squares around the center square (1 on each edge).
- Seaming:
- Use a mattress stitch or slip stitch to join squares along their edges.
- Seam each edge to create the bag layout.
Component 2: Side Seaming
- Fold the side squares in half, forming the bag shape.
- Seam the sides of the bag using the same method as above (mattress stitch or slip stitch).
Component 3: Handles
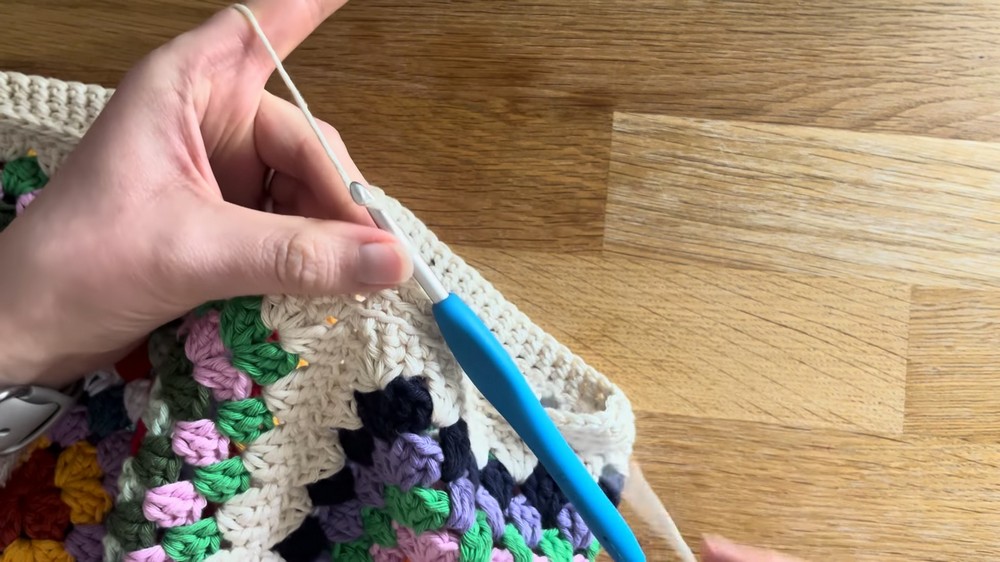
Handles are worked around the top edge of your bag.
Step 1: Base Rim of the Bag
- Attach yarn to any stitch in the middle of one square along the top of the bag.
- Work sc into each stitch around the top rim.
- Work sc into corner chain spaces as well.
- Join with a sl st to the first sc.
- Chain 1.
Step 2: Back Loop Single Crochets
- Work BLsc into each stitch around for the next round.
- Complete the round by joining with a sl st and chaining 1.
Step 3: Adding Handles
For straps:
- Continue working BLsc until you reach the middle of the square at the front.
- Make a chain for the handle:
- Chain 65 for a standard-sized shoulder strap (or adjust as desired).
- Skip stitches across the front square and join the chain to the opposite side of the square top with an sc.
Repeat Steps 1–3 for the opposite strap (on the other side).
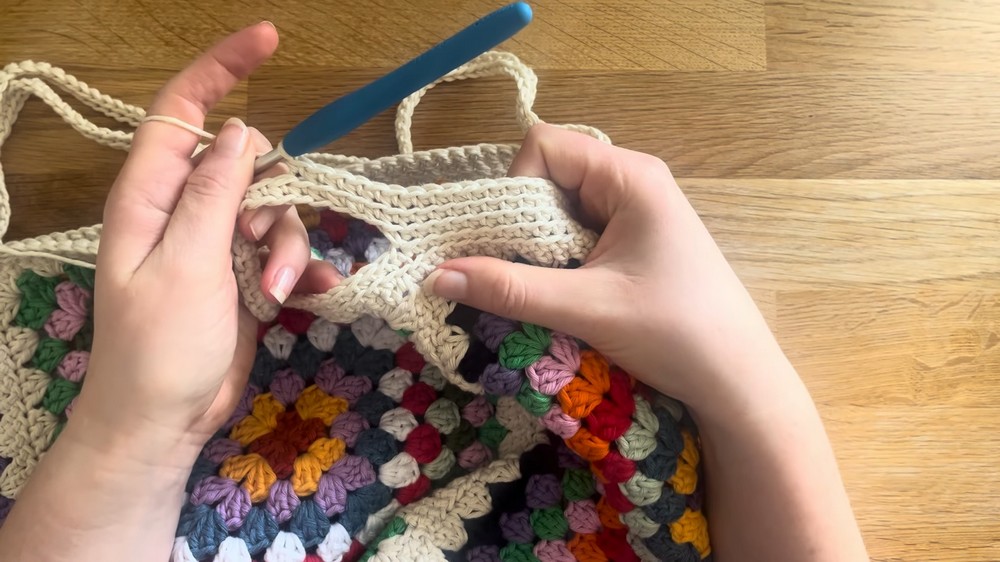
Step 4: Reinforcing the Handles
- Work sc into each chain stitch of the handle.
- Repeat for both straps.
- Work additional BLsc rounds along the rim and over the strap edges (total: 3–4 rounds) to make the straps sturdy.
Finishing the Bag
- Fasten off.
- Weave in all ends using the darning needle.
Helpful Tips for Customization
- Make wider or thinner handles by increasing or decreasing the chain length.
- Add a decorative border or edge to the straps for a personalized touch.