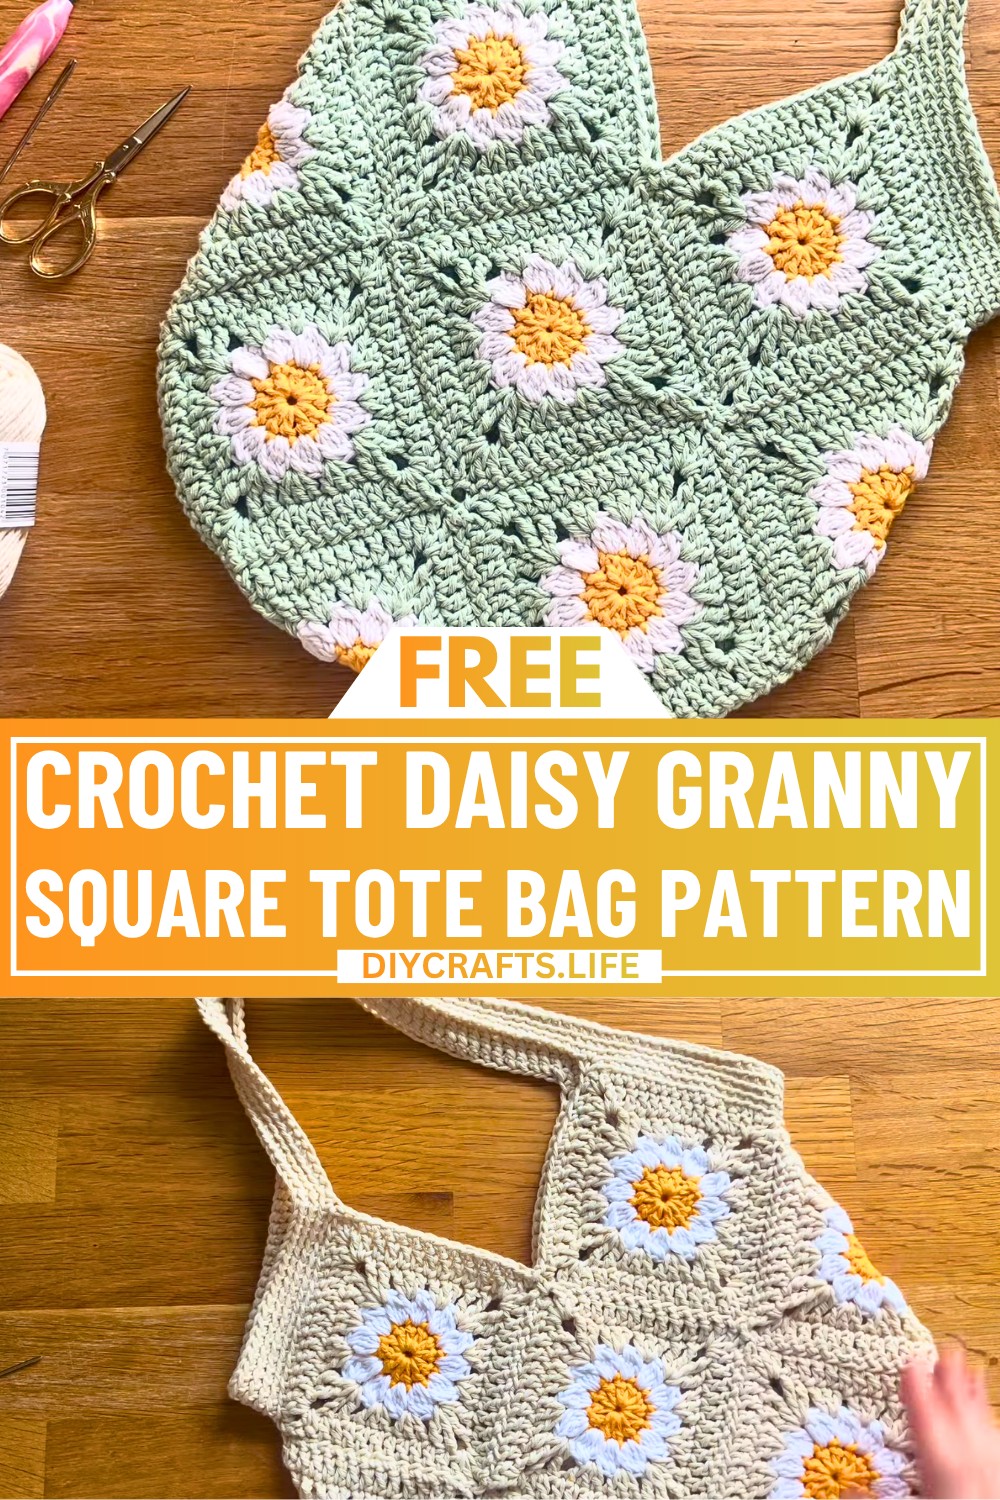
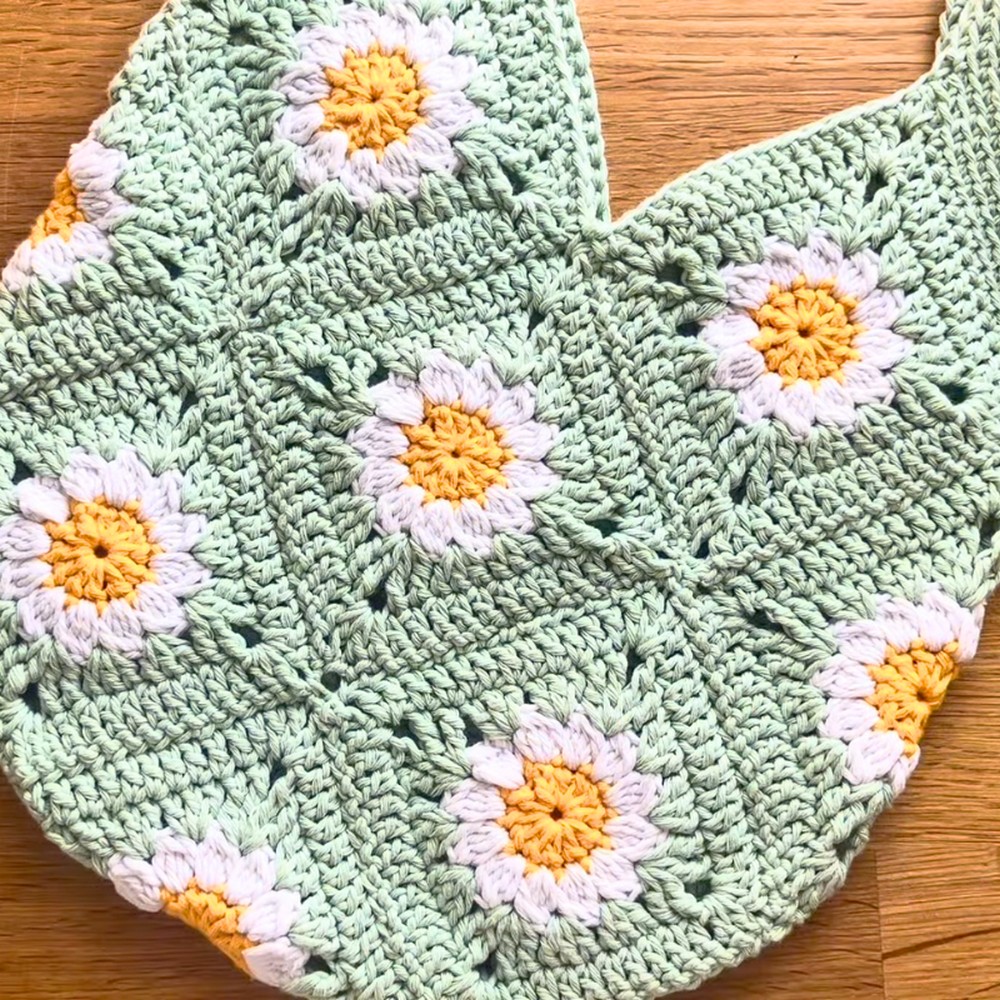
The crochet Daisy Granny Square Tote Bag is a lovely, handmade accessory that adds charm to your everyday life. It's decorated with cheerful daisy squares that make it stand out. This crochet tote bag is lightweight, stylish, and practical — perfect for carrying your essentials. Use it for shopping, as a casual bag, or even as a cute way to store belongings at home.
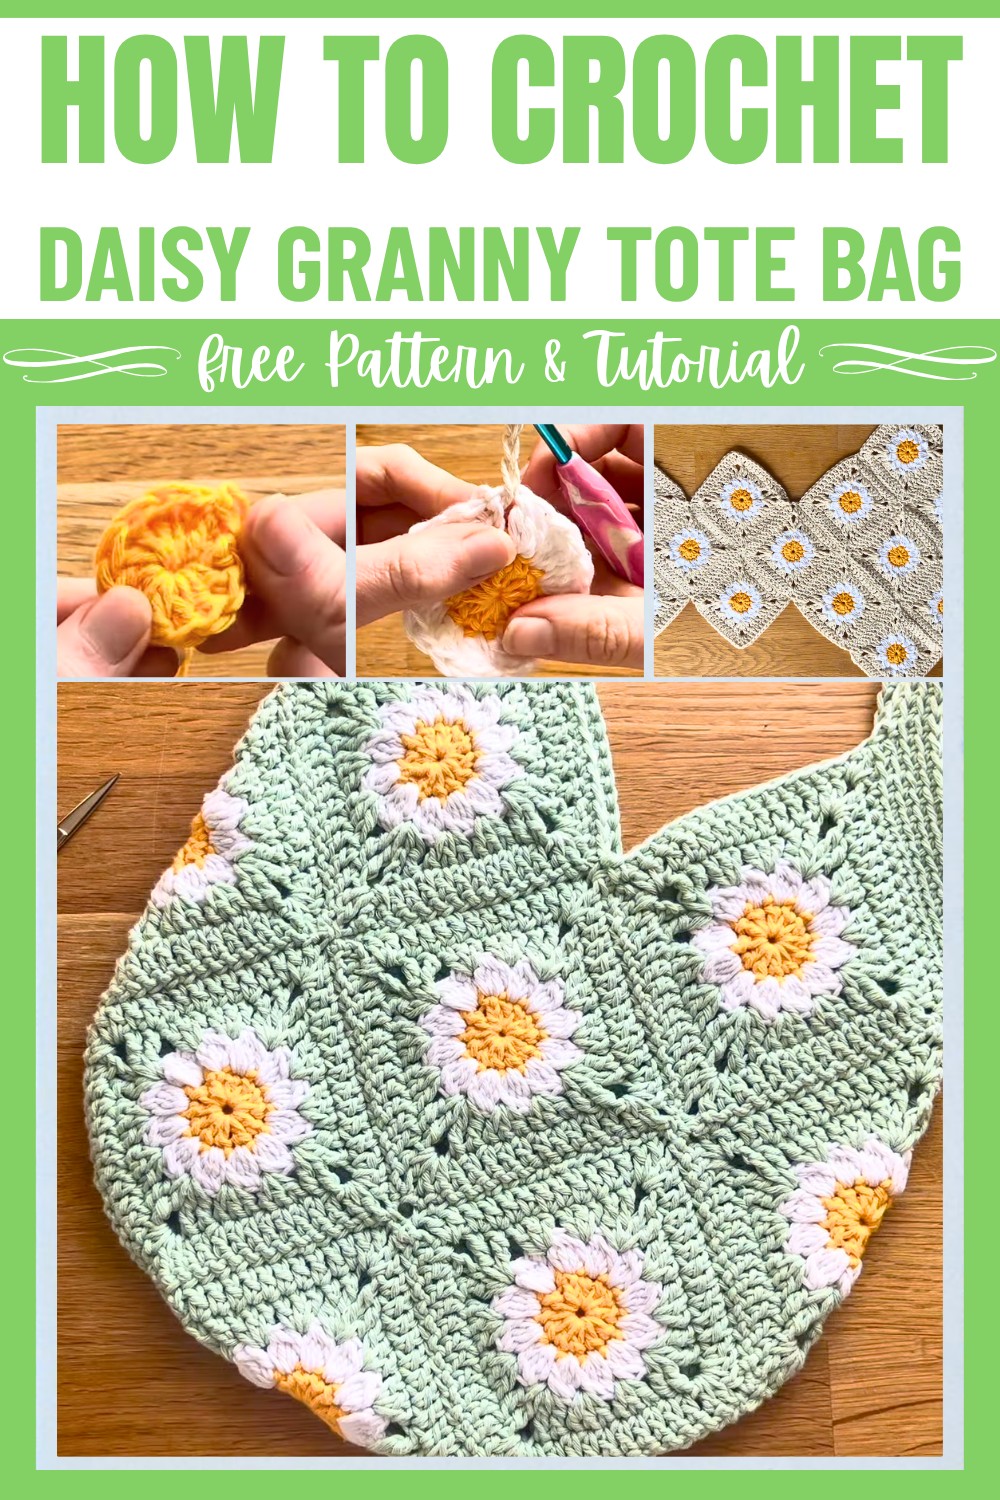
This crochet tote bag pattern is easy to follow and helps you create something worth showing off. You’ll make 13 daisy squares and join them into a flat design before folding and sewing them into a neat tote. The handle is simple and sturdy, designed to ensure your bag is comfortable to carry. All you need is some durable cotton yarn, a crochet hook, and a few basic tools. The end result is a beautiful bag that’s both creative and useful.
Credit Crafted by Cat
Materials & Tools Needed
- Yarn:
- 150g of the outer color (3 x 50g balls of 100% Cotton Aran weight yarn)
- 25g of the center color
- 50g of the petal color
- Crochet Hook: 5mm
- Scissors
- Darning Needle
- Blocking Tools:
- Spray bottle with water
- Blocking board and pins
Finished Size & Customization Ideas
- Finished Size:
- The complete tote bag consists of 13 daisy granny squares, blocking and stitching them together into the described layout. Dimensions depend on gauge and the exact squares' size after blocking.
- Customization Ideas:
- Personalize the colors to match your preferred palette.
- Adjust the strap length for cross-body or shoulder styles (chain 55 for shoulder straps, or chain 120 for cross-body straps).
- Use alternative yarn types (like acrylic or blend fibers) for added variety.
Pattern Abbreviations & Terminology
Note: The tutorial uses US Crochet Terminology.
- ch = Chain
- dc = Double Crochet
- tr = Treble Crochet
- sc = Single Crochet
- sl st = Slip Stitch
- st = Stitch
- loops = Refers to loops of stitches, including back loops.
- magic ring = A technique for starting rounds tightly.
Step-by-Step Detailed Crochet Instructions
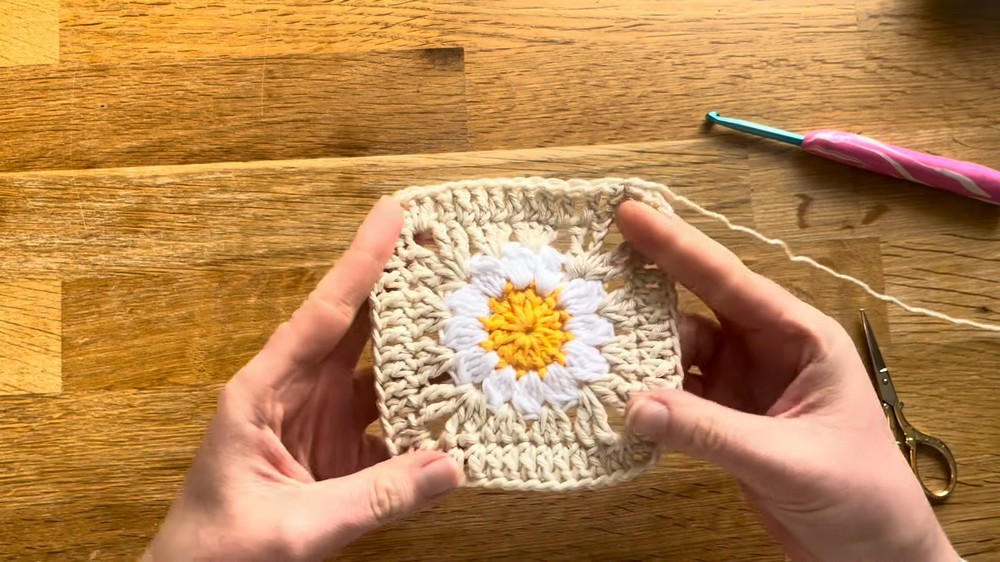
Granny Square (Make 13)
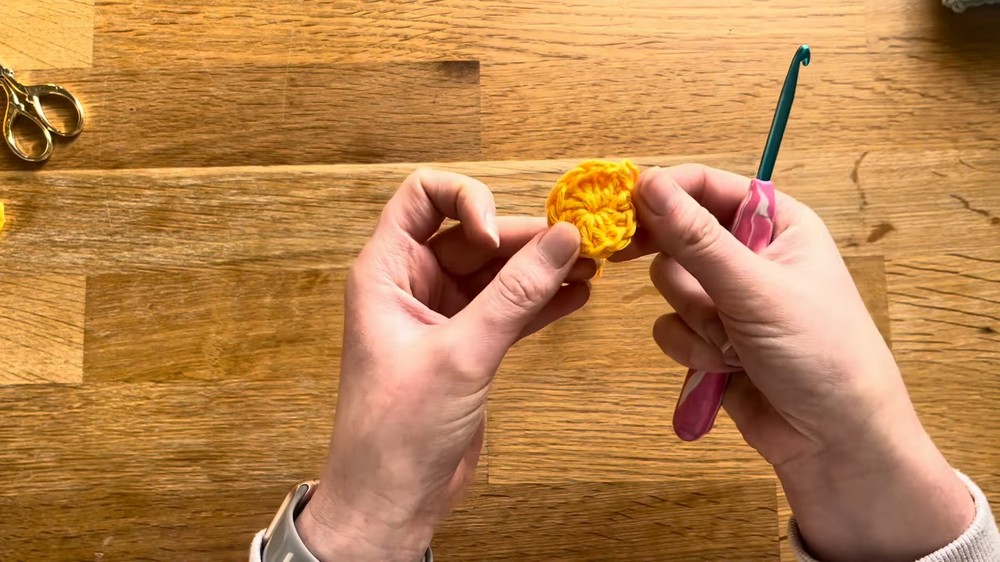
Center (Round 1)
- Create a Magic Ring:
- Wrap yarn around your fingers and cross over.
- Insert hook under the first strand, pull the second strand through, twist, and secure.
- Insert the hook again under the second strand and pull through to complete the magic ring.
- Chain (ch) 2:
- Chain 2 to count as the first double crochet (dc).
- Make 12 Double Crochets (dc):
- Yarn over, insert your hook into the magic ring, yarn over, pull through (3 loops on hook).
- Yarn over, pull through 2 loops, yarn over, pull through last 2 loops for a complete double crochet.
- Repeat for a total of 12 double crochets, including the first ch 2.
- Pull Magic Ring Closed:
- Tighten the tail of the magic ring to close the center hole.
- Join & Fasten Off:
- Slip stitch into the first dc (not the top of the chains).
- Fasten off and cut yarn.
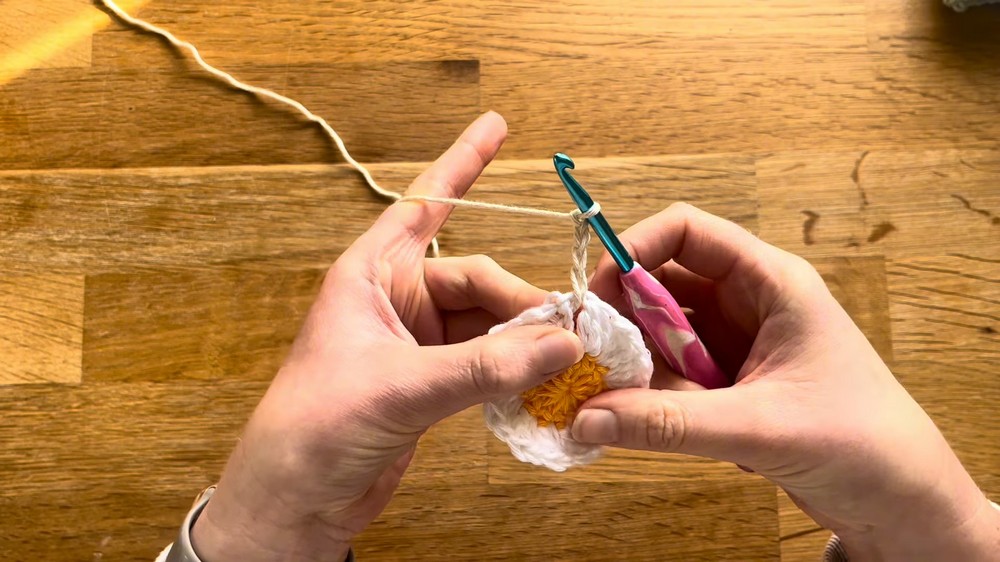
Petals (Round 2)
- Add Petal Color:
- Attach the petal color yarn to any stitch (preferably the first dc from Round 1).
- Chain 1 to secure (does not count as a stitch).
- Make First Petal:
- Yarn over, insert hook into the same stitch, yarn over, pull through, yarn over, pull through 2 loops.
- Repeat the above process 3 more times in the same stitch (for a total of 4 dc-style loops).
- Yarn over, pull through all 5 loops.
- Chain 1 to secure the petal.
- Repeat for 12 Petals:
- Make 12 petals in total, working through each stitch from Round 1.
- Final petal is made above the last chain-3 space from Round 1.
- Join & Fasten Off:
- Slip stitch to the base of the first petal and cut off the yarn.
Outer Rounds (Rounds 3 & 4)
Round 3:
- Add Outer Color:
- Attach the outer color yarn to a chain-1 space between any petals.
- Create First Corner:
- Chain 4 (counts as first treble crochet) and add 1 more treble crochet into the same chain-1 space.
- You will complete the corner at the end of this round.
- Clusters:
- Make 3 double crochets (dc) in each of the next two chain-1 spaces.
- Second Corner:
- Into the next chain-1 space, create a corner:
- Yarn over twice and make 2 treble crochets.
- Chain 2 and make 2 more treble crochets in the same space.
- Into the next chain-1 space, create a corner:
- Repeat Around:
- Follow the sequence: 3 double crochets in chain-1 spaces, 2 treble crochets + chain 2 + 2 trebles for corners, until the round is complete.
- Complete First Corner:
- End the round by adding 2 trebles into the same first chain-1 space where you started.
- Chain 2 and slip stitch into the top of the initial chain-4.
- Fasten Off.
Round 4:
- Chain 3:
- Begin with a chain 3 (counts as first double crochet).
- Work Along Edges:
- Add double crochet stitches in each stitch along the edge.
- Complete Corners:
- In chain-2 spaces from Round 3 corners, create 2 double crochets + chain 1 + 2 double crochets.
- Repeat:
- Work all the way around.
- Fasten Off:
- Slip stitch to the initial chain-3.
Blocking Squares
- Spray squares lightly with water using a spray bottle.
- Pin each square to a blocking board, ensuring edges align evenly.
- Allow squares to dry for ~30 minutes.
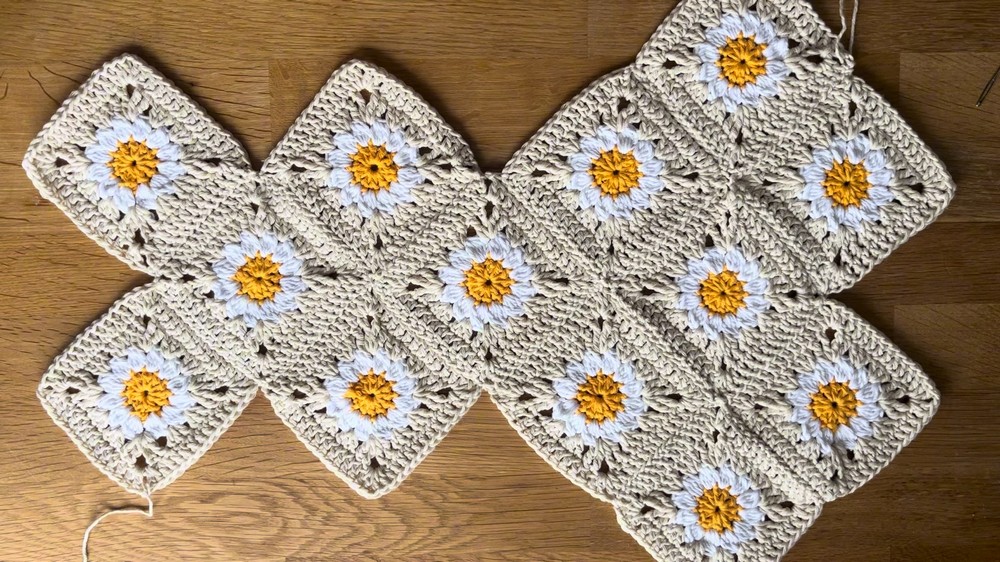
Layout & Joining
- Layout Diagram:
- Arrange squares as per the layout (refer to diagram in the tutorial).
- The layout consists of 13 squares strategically placed flat.
- Join Squares:
- Use the mattress stitch for seamless edges:
- Thread the darning needle with yarn tail from each square.
- Go underneath each stitch in adjoining squares, alternating back and forth.
- Use the mattress stitch for seamless edges:
- Tie Knots:
- Secure joins at corners by tying knots. Leave long tails in case adjustments are needed.
Forming the Bag
- Flip Layout:
- Flip the layout so wrong sides are facing inward.
- Fold and Sew:
- Fold squares upward, bringing top edges together.
- Seam along sides and bottom edges to create the bag shape.
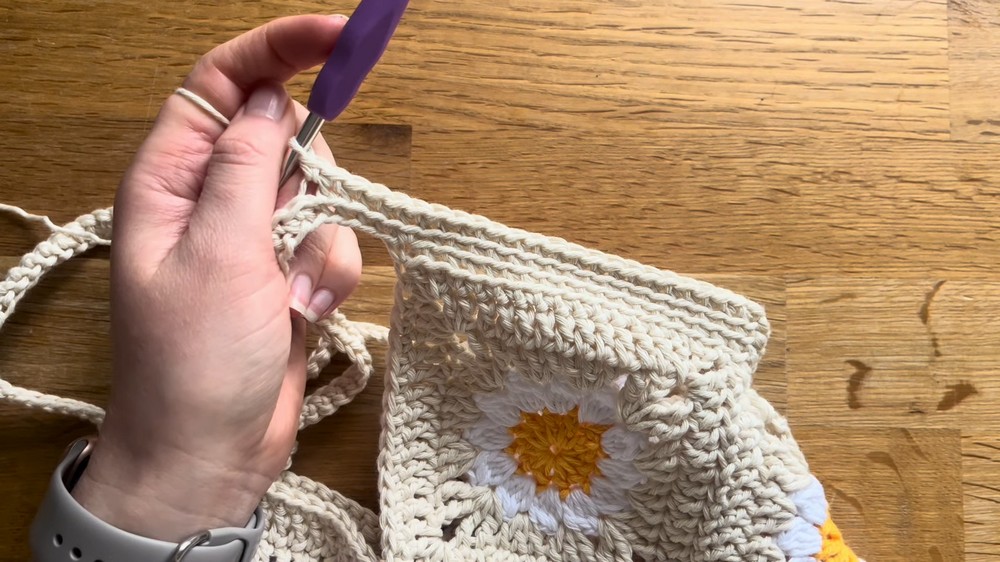
Adding Handles
- Attach Yarn:
- Begin in the corner chain-2 space at the bottom of the bag.
- Single Crochet Base:
- Work single crochet stitches along the upper edge of the bag, placing 3 double crochets in each peak point (corners of the layout).
- Create Straps:
- Chain 55 for each handle (or 120 for cross-body). Skip adjacent stitches and secure straps by single crocheting into opposite corners.
- Thicken Handles:
- For the next two rounds, work single crochets (back loop only) across the bag and handles.
- Finish:
- Slip stitch at the end of the round to close. Fasten off and weave in ends.
Finishing
- Check Join Points:
- Ensure all joins are strong and seamless.
- Weave Ends:
- Tie knots on magic ring ends; weave ends securely.
- Block Entire Bag (optional):
- Block the assembled bag lightly for sharper edges.