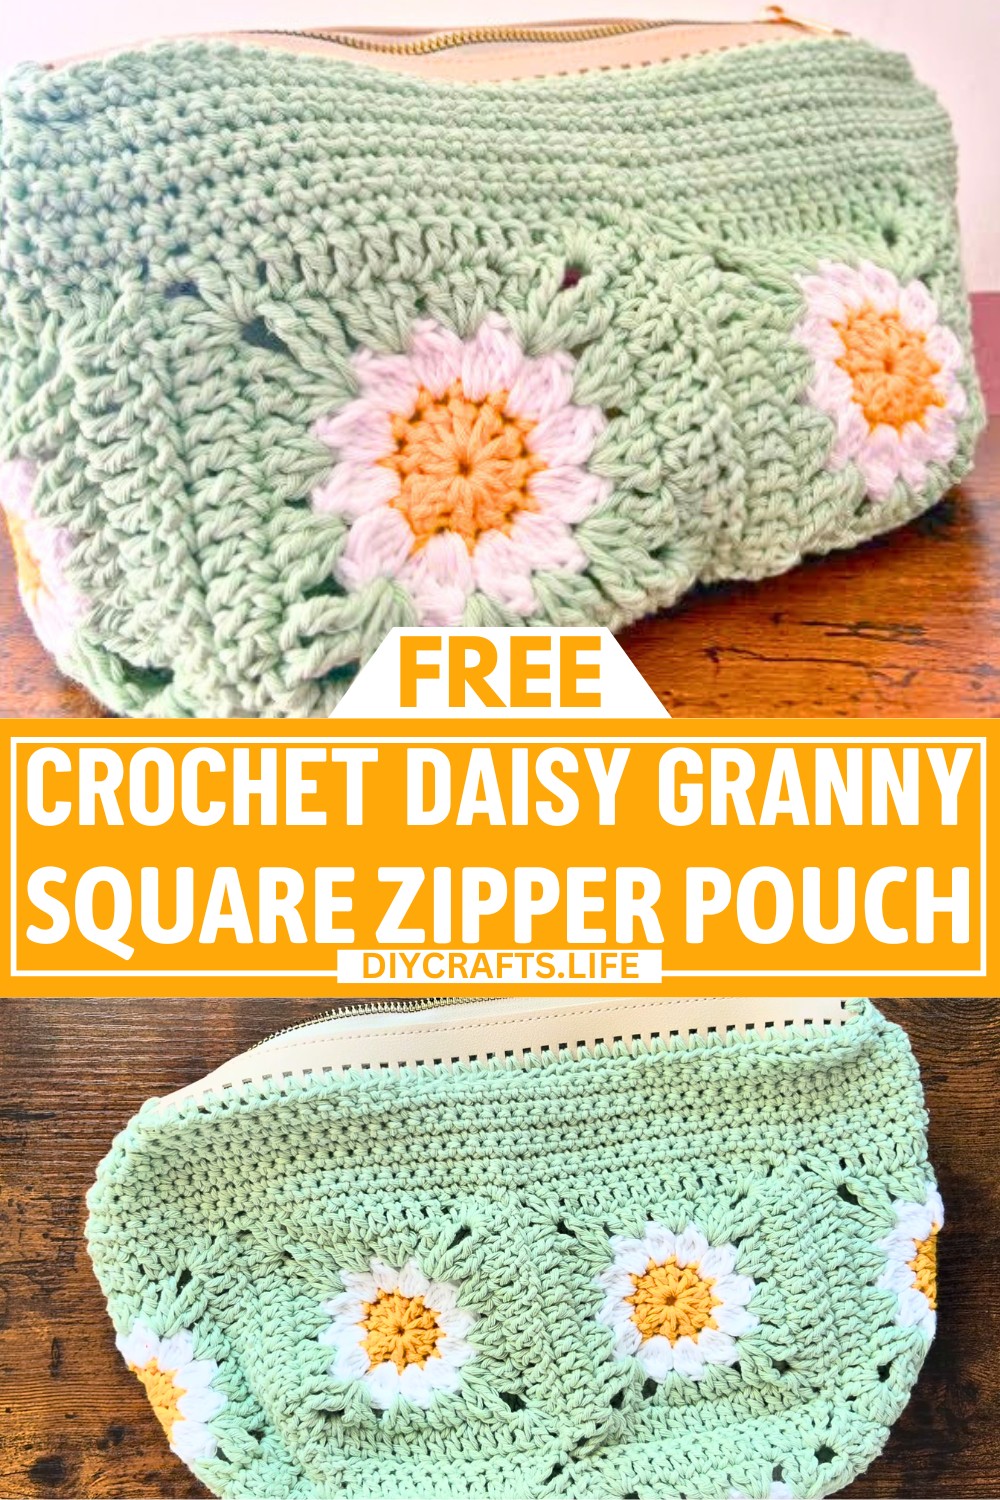
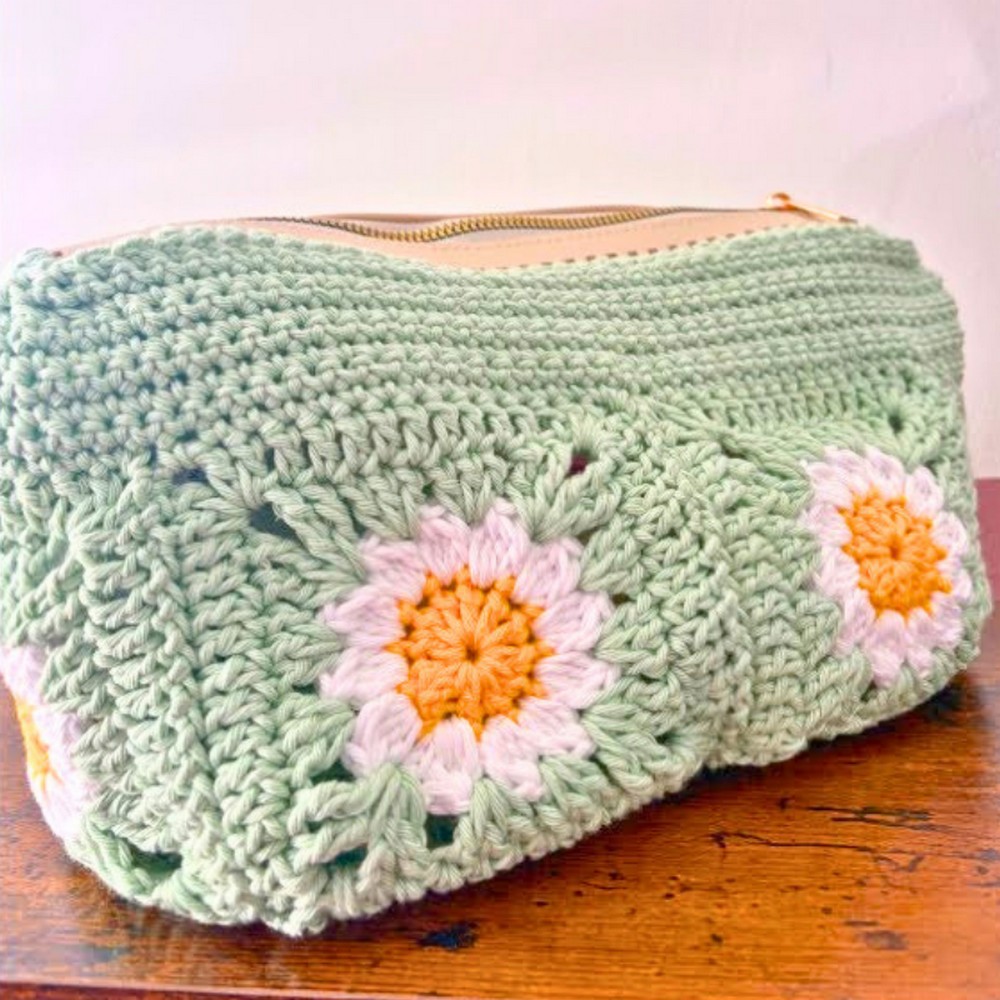
The Crochet Daisy Granny Square Zipper Pouch is a delightful and functional item that’s perfect for everyday use. With its colorful daisy flower design, it’s not just a pouch—it’s a creative way to bring joy to your accessories. It’s great for storing small essentials like coins, cards, or makeup, while also adding a cheerful touch to your day.
What makes this pouch unique is the combination of beauty and practicality. The zipper ensures all your items stay secure, while the daisy granny square pattern makes it stylish and fun to create. The crochet technique used is straightforward, making it a sweet introduction to crafting useful items. If you’re gifting it or keeping it for yourself, this pouch is a wonderful addition to any collection.
Credit Crafted by Cat
Materials & Tools Needed
- Yarn:
- Cotton Aran weight yarn:
- Outer color (Drops Paris): 2 x 50g balls.
- Petals color: 1 x 50g ball.
- Center color: About half a ball.
- Cotton Aran weight yarn:
- Hook: 5 mm crochet hook (you may use a smaller hook for tight spaces like zipper holes).
- Zipper: Approx. 10" zipper with pre-punched holes (or regular zipper—sewn directly to your work).
- Darning needle
- Scissors
Finished Size & Customization Ideas
- The pouch is rectangular and formed by sewing together eight Daisy Granny Squares (four on top and four forming a “T” shape).
- Customizations:
- Use different colors for the squares to create varied effects.
- Adjust the zipper size to make a smaller or larger pouch.
- Swap the cotton yarn for another yarn weight to create different pouch textures.
- Customizations:
Pattern Abbreviations & Terminology
- Sl st: Slip stitch
- Ch: Chain
- Sc: Single crochet
- Dc: Double crochet
- Tr: Treble crochet
- Dec: Decrease (single crochet two stitches together)
- Magic Ring: Adjustable ring used to start work
All instructions are written in US terminology.
Step-by-Step Crochet Instructions
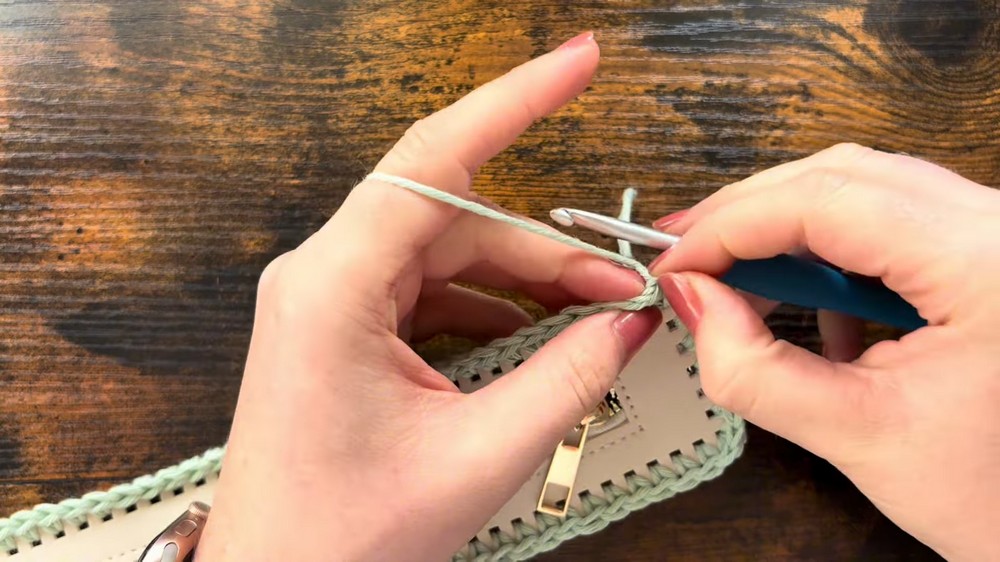
Step 1: Preparing the Zipper
- Join Yarn to Zipper:
- Make a slip knot with your yarn.
- Insert your hook into the first pre-punched hole in the zipper corner.
- Yarn over, pull through the hole, yarn over again, and pull through both loops: Sc made.
- Continue Around the Zipper:
- Work 1 single crochet in each hole along the edges.
- At each corner, make 2 single crochets.
- Join with a slip stitch to the first single crochet.
- Fasten off: Leave a long tail to sew the zipper to your pouch later.
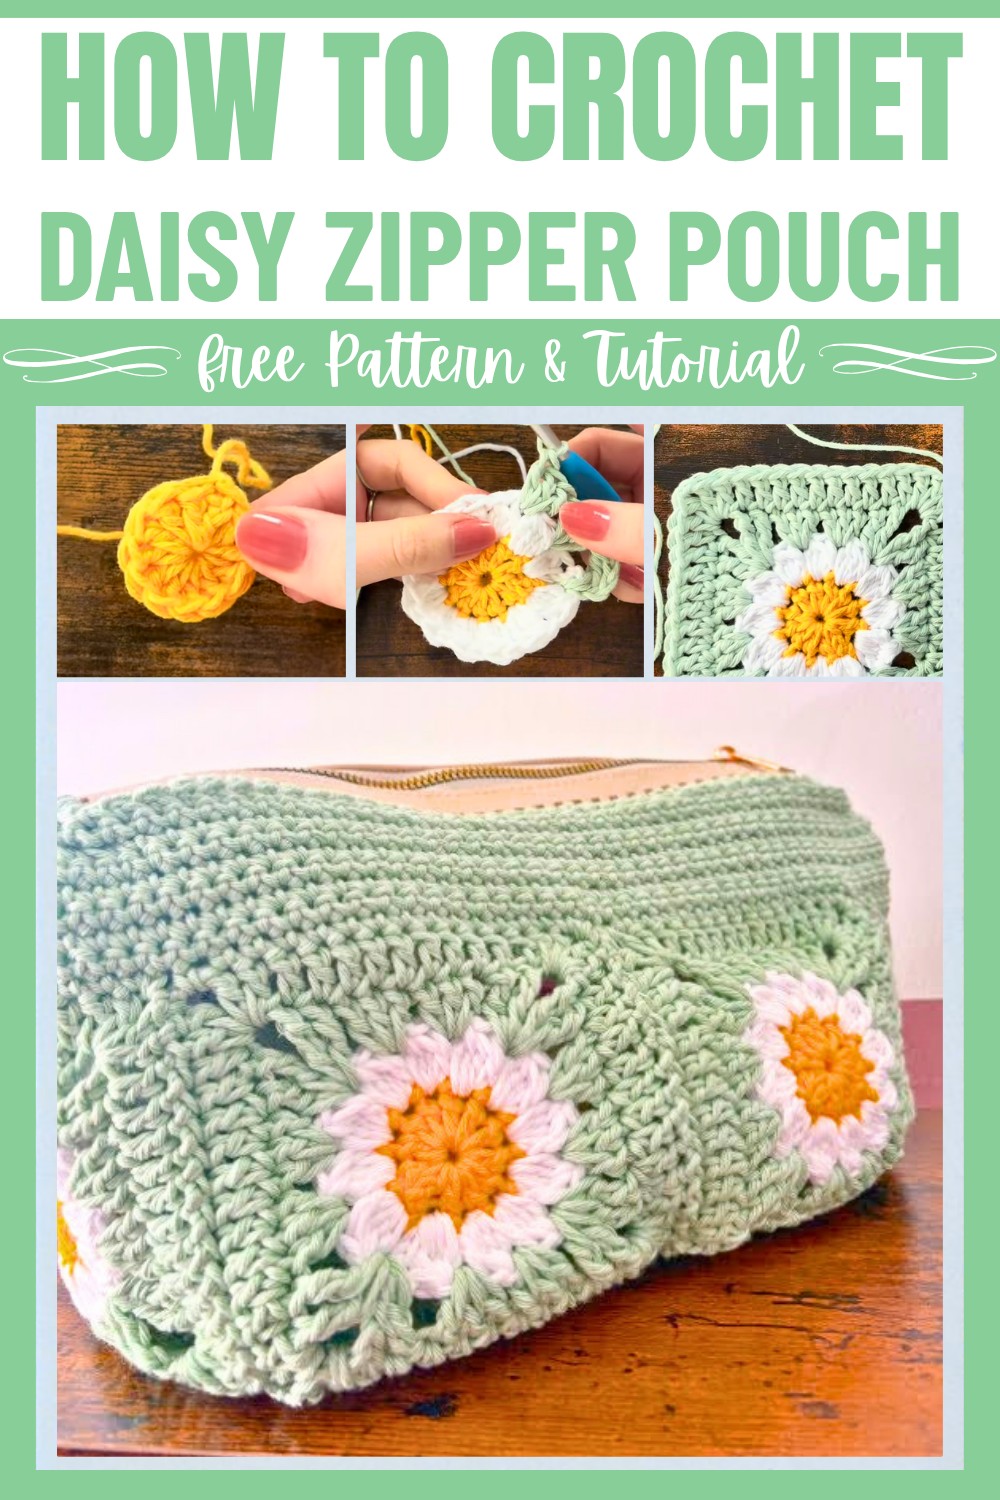
Step 2: Daisy Granny Square
Daisy Granny Square (Round Breakdown)
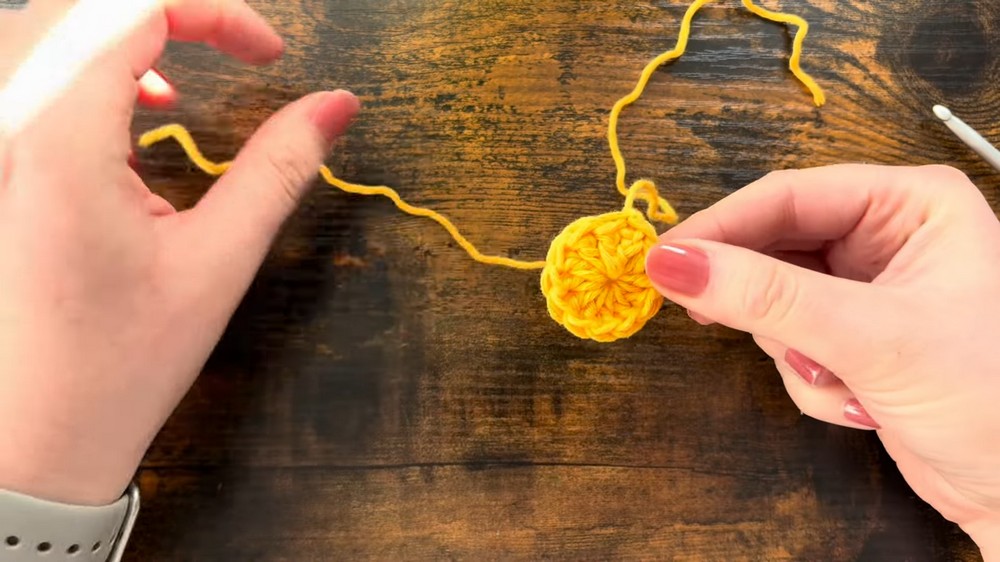
Round 1: Magic Ring (Center Color)
- Make a Magic Ring.
- Wrap yarn into a cross on your fingers.
- Insert hook under the first strand, then hook over the second strand and pull it through.
- Ch 2 (counts as 1 dc).
- Work 11 more dc into the ring. (Total = 12 dc.)
- Pull the Magic Ring tail tight to close the ring.
- Slip stitch to the first dc. Fasten off, leaving a long tail for weaving in ends.
Round 2: Petals (Petals Color)
- Join yarn to the first stitch of Round 1 with a slip stitch. Ch 1 (does not count as a stitch).
- Cluster Stitch for Petal:
- Yarn over, insert hook, yarn over, pull through. Yarn over, pull through 2 loops.
- Repeat 4 more times (total = 5 loops on hook).
- Yarn over, pull through all loops. Ch 1.
- Repeat the Cluster Stitch in each of the remaining 11 stitches. (Total = 12 petals.)
- Slip stitch to the first petal and fasten off.
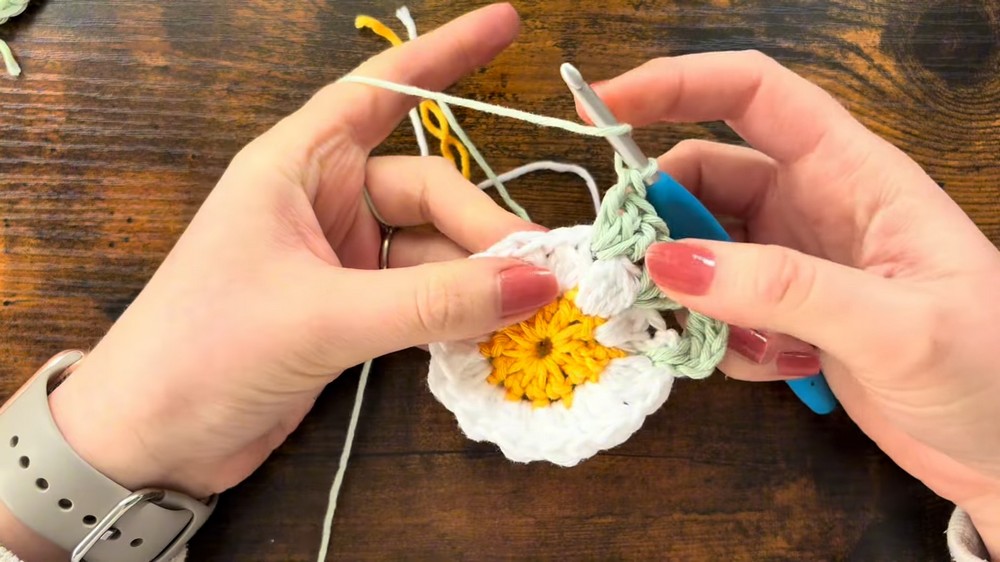
Round 3: Outer Color (Mint)
- Join yarn between 2 petals with a slip stitch.
- Ch 4 (counts as 1 tr). Yarn over twice, insert hook into the same space, yarn over, pull through, yarn over and pull through two loops at a time 3 times (1 tr completed).
- In next 2 spaces: Work 3 dc.
- Corners (next space): Work 2 tr, ch 2, 2 tr.
- Repeat this pattern:
- 3 dc in the following 2 spaces, and 2 tr, ch 2, 2 tr in corner spaces.
- Join with a slip stitch to the initial ch-4.
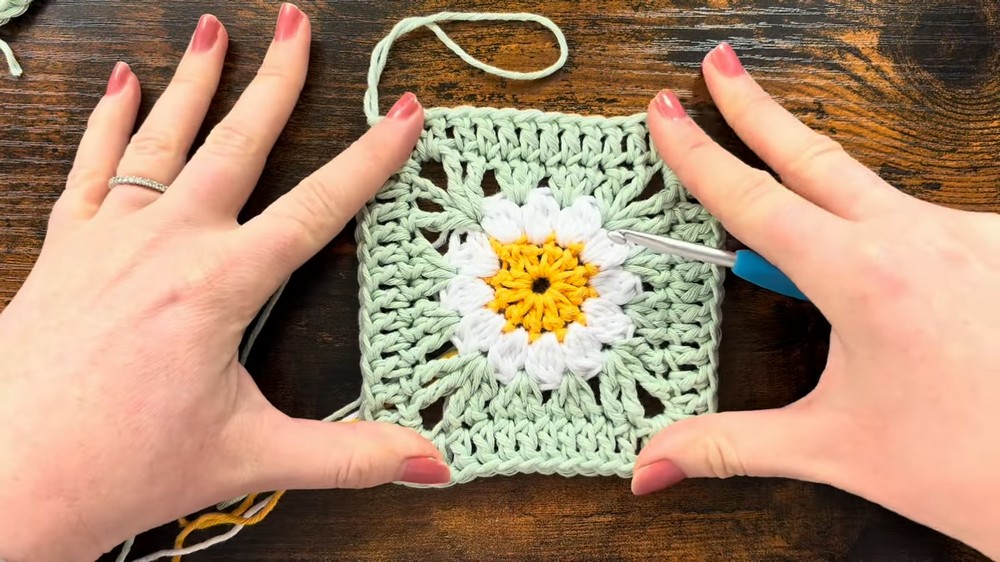
Round 4: Final Round
- Ch 3 (counts as 1 dc). Work 1 dc in the same corner space.
- Dc in each stitch along the side.
- Corners: Work 2 dc, ch 1, 2 dc in each corner space.
- Continue this sequence (dc across sides, with 2 dc, ch 1, 2 dc in corners) until you complete the round.
- Slip stitch to the first dc. Fasten off, leaving a long tail for sewing.
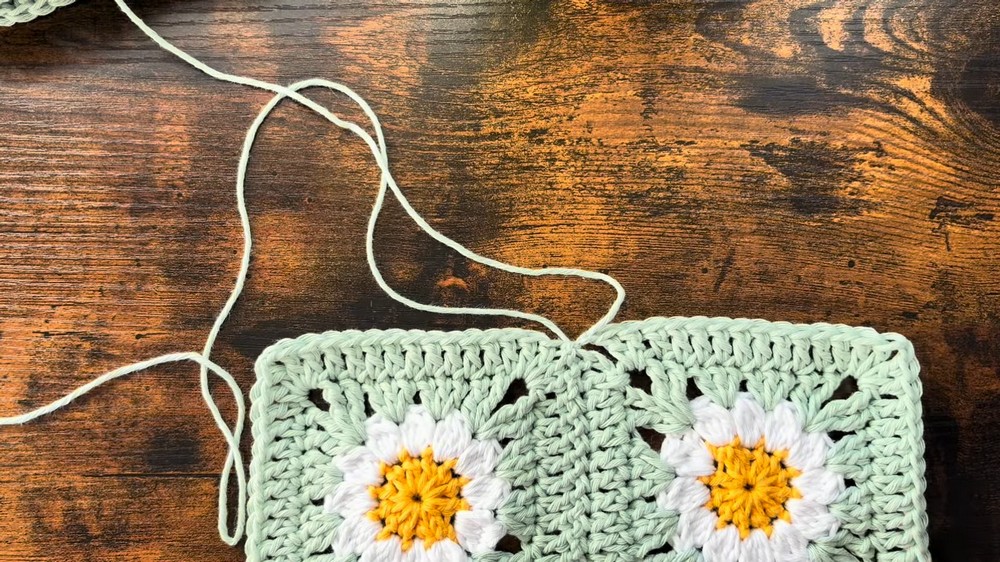
Step 3: Seaming Daisy Squares Together
- Arrange the squares in a T-shape:
- 4 squares on top, and 4 below arranged in a square.
- Use the Mattress Stitch technique to seam squares together:
- Thread the darning needle and work stitches under the corresponding edges of the squares.
- Once the squares are seamed, fold the bottom four squares upward to create the rectangular pouch.
Step 4: Sewing the Pouch Edges
- Mattress stitch the bottom and side edges of the folded squares to shape the pouch. Leave the top open.
Step 5: Adding Structure to the Pouch
- Join yarn to the edge of the pouch.
- Work 6 rounds of single crochet (sc) around the edges to provide strength and structure.
- Each round should have 96 sc stitches total.
- At the end of each round, join with sl st, ch 1, and turn.
Step 6: Decrease Round
- After 6 rounds of sc, work a decrease round to match the stitch count to the zipper (90 stitches).
- First, make 2 sc decreases.
- Work 42 sc around.
- Second, make 3 sc decreases.
- Work 42 sc, then make 1 final decrease.
Step 7: Attaching the Zipper
- Place the zipper across the pouch's opening.
- Place 1 stitch of the zipper with 1 stitch of the pouch. Sew these together using a darning needle.
- Repeat all the way around to secure the zipper fully.
Finishing
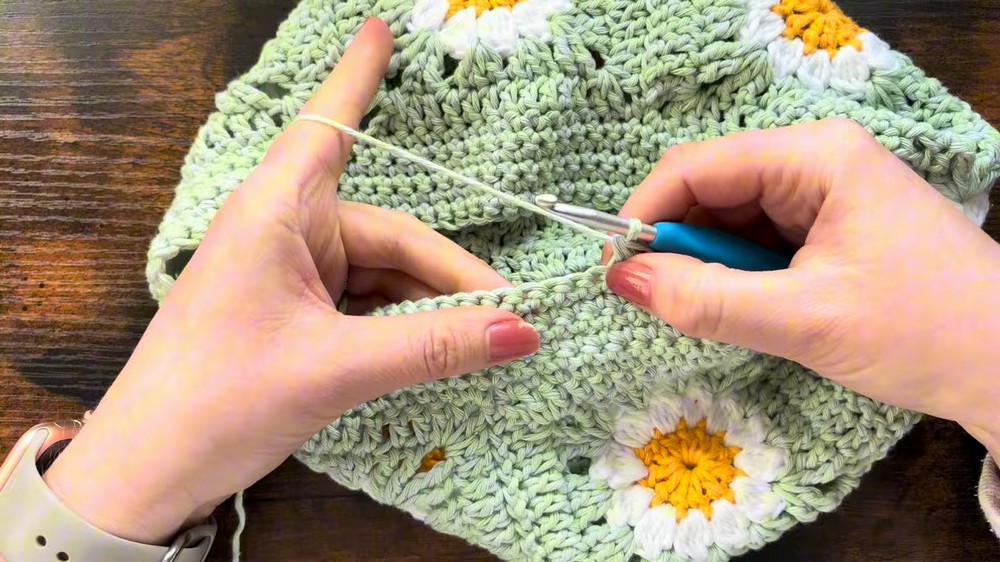
- Trim and weave in all loose ends with the darning needle.
- Ensure the zipper works smoothly.
- Block your pouch if needed to sharpen the edges.