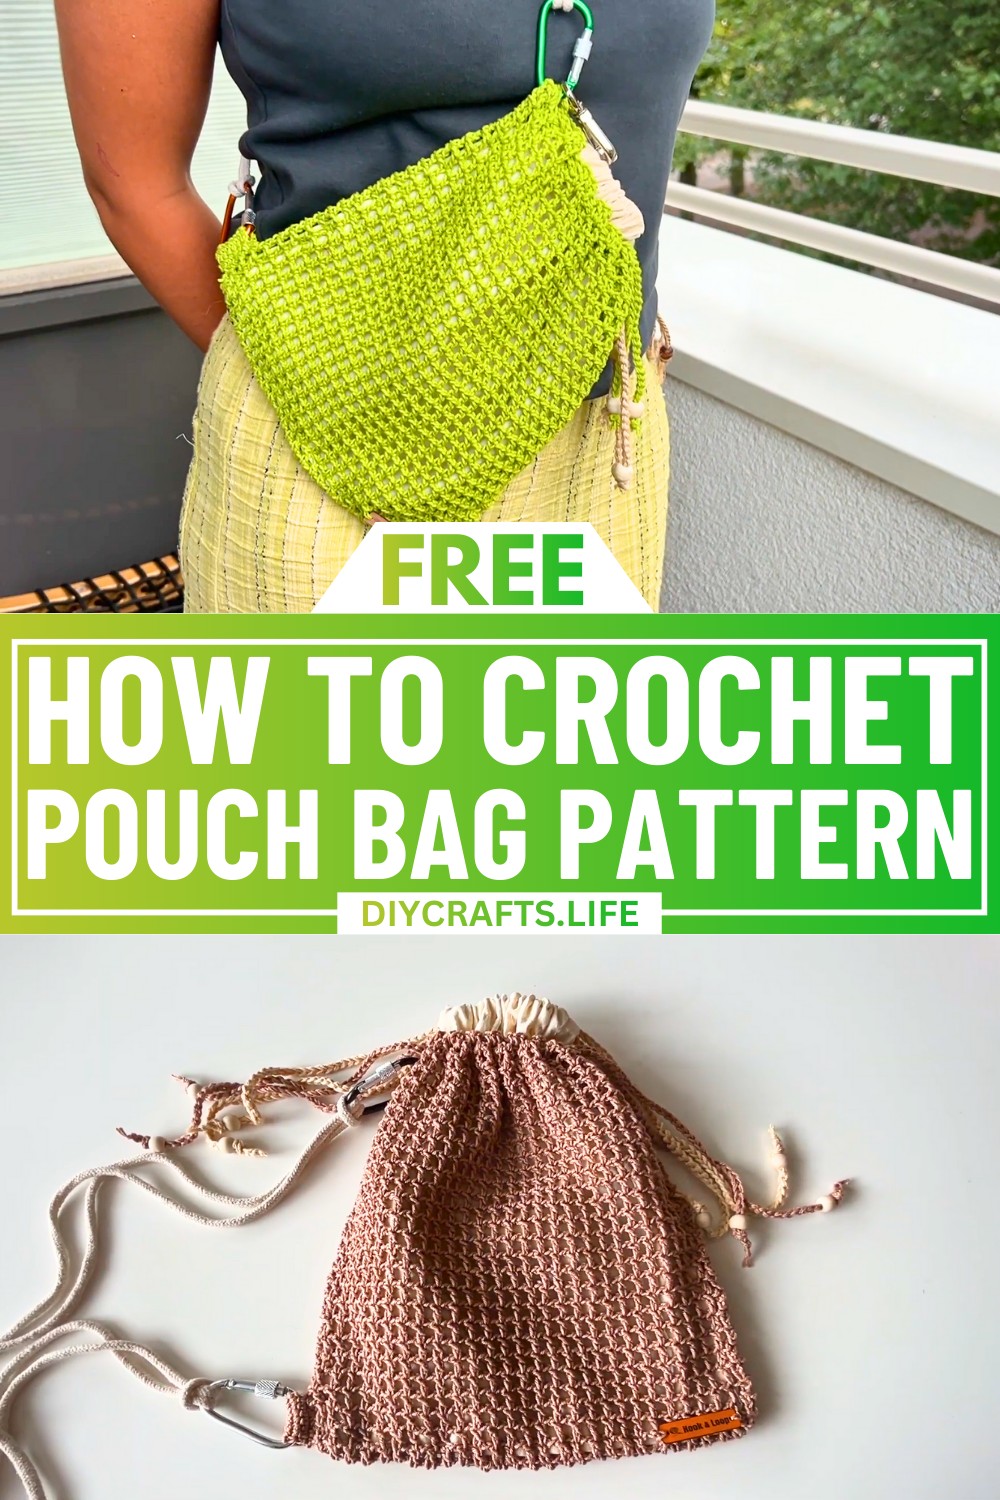
Bring your crochet skills to life with a practical yet stylish design that makes everyday carrying effortless. The crochet pouch bag combines structure and personality, giving you a way to show off your love for handmade while crafting a timeless accessory. Perfect for any style and purpose, this bag is something you’ll cherish for its utility and charm.
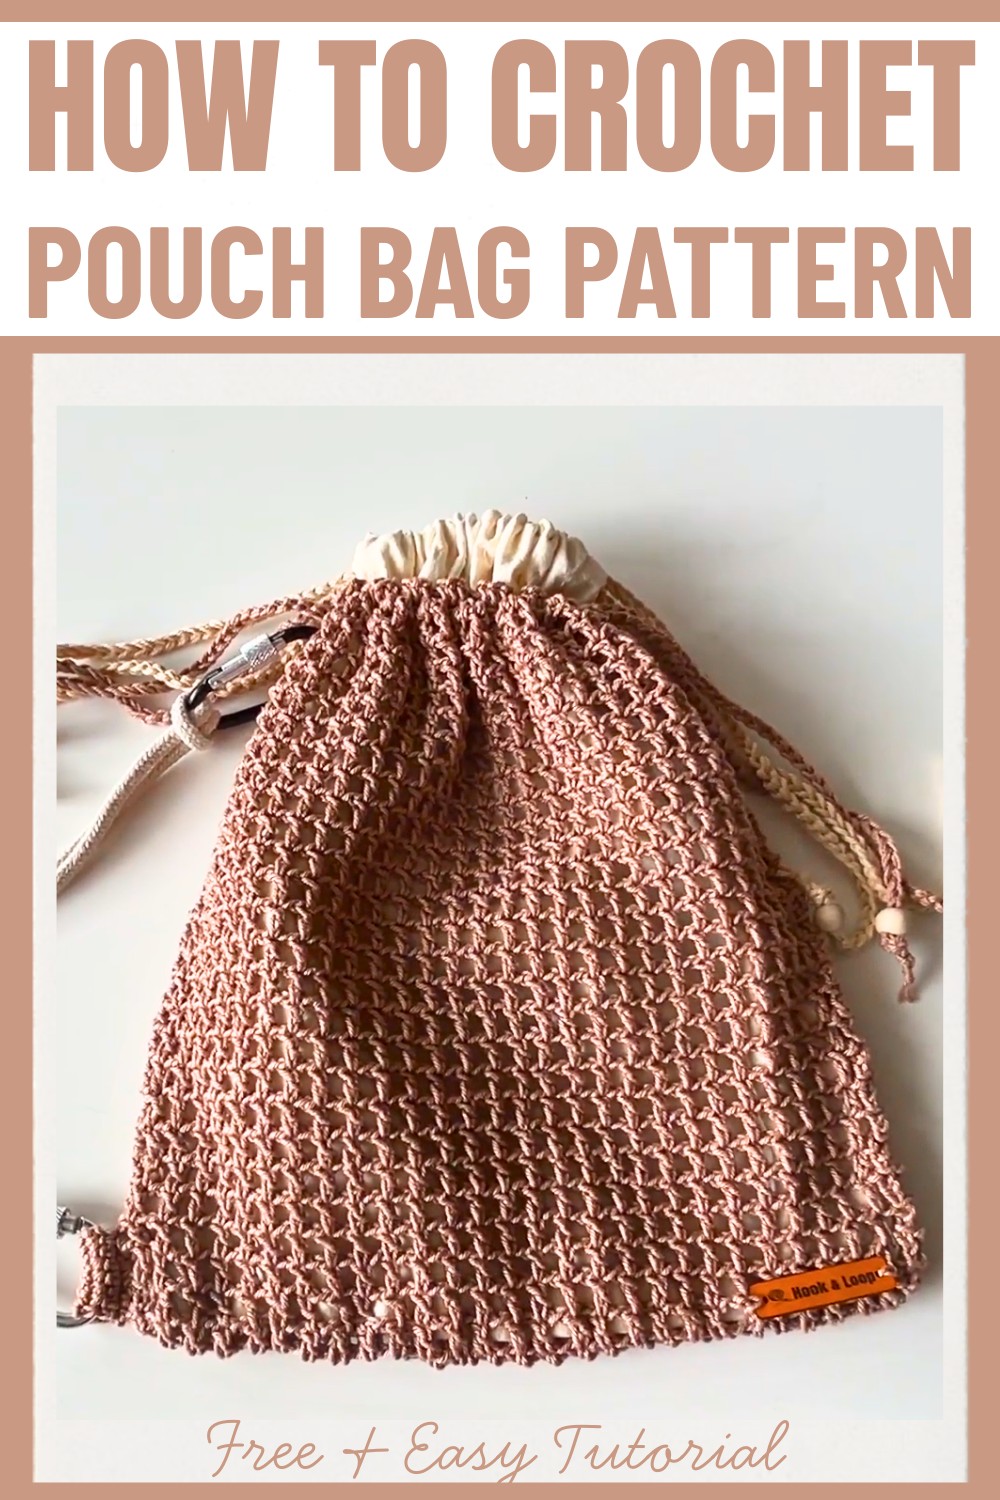
This pouch bag stands apart with its textured double crochet pattern, elegant finish, and the added touch of functional details including cords, carabiner clips, and bead accents. Crafted with cotton yarn and a matching fabric lining, the bag offers durability and room for personalized touches. The thoughtful design ensures flexibility for daily essentials while delivering an accessory that feels modern and unique to your creative expression.
Credit Hook & Loop Crochet Tutorials
Required Materials:
- 100% Cotton Yarn – In three colors (ecru and two additional colors of your choice).
- Cotton Fabric – To make the lining.
- 3 mm Crochet Hook – For the main pouch construction.
- 2 mm Crochet Hook – For the loop and finer stitches.
- Scissors
- Tapestry Needle
- Carabiner Clips – For attachment functionality.
- Small Ropes – For tying and threading.
- Beads – Optional for decoration (adds flair to the cords).
- Pins – To secure components while sewing.
Important Notes:
- Ensure your stitches are consistent throughout the project to maintain uniformity.
- If you adjust the pouch size, proportionally adjust the foundation chain length and lining dimensions.
- The bag lining needs to be slightly taller than the bag to allow for easy folding and sewing.
- Always secure cords and beads tightly, as these are important elements for durability.
- Maintain a comfortable tension while crocheting—tight but not too stiff to keep the bag functional.

Step-by-Step Detailed Crochet Instructions:
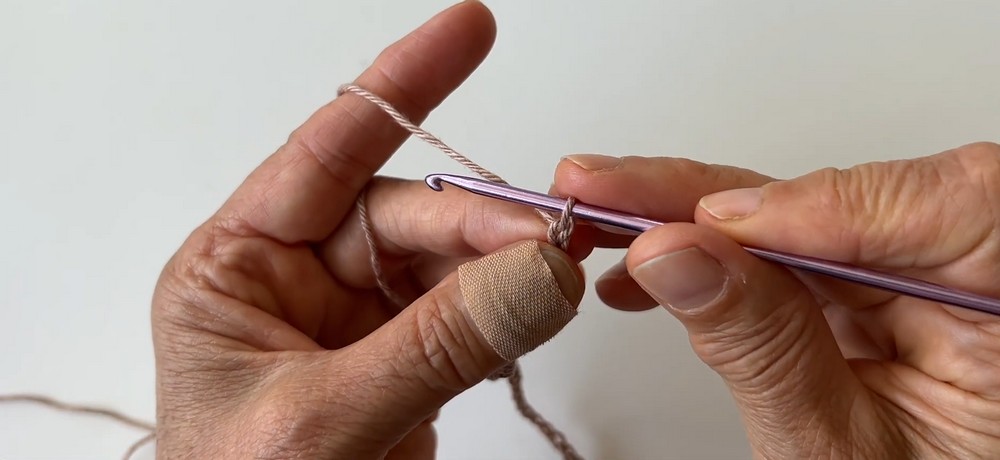
Foundation Chain:
- Create a slip knot to start.
- Chain stitches until your foundation measures 22–23 cm (8.7–9.1 inches).
Round 1:
- Chain 3 extra stitches.
- Work 1 double crochet (dc) into the 4th chain stitch from the hook.
- Chain 1 stitch, skip the next chain, and work 1 dc in the next chain.
- Repeat this pattern (ch 1, skip 1, 1 dc) across until you reach the end of the round.
- When you reach the last chain:
- Work 3 dc into the last chain stitch, inserting 1 chain space in between each double crochet.
- Chain 1 stitch, rotate your work, and work 1 dc into the next dc.
- Chain 1, work 1 dc into the next dc, and continue in this pattern until you reach the end of the round.
- Use a slip stitch (sl st) to join into the 3rd chain stitch.
Round 2:
- Chain 4 stitches (counts as 1 dc and 1 chain space).
- Work 1 dc, create 1 chain space, and repeat the pattern across the entire round.
- Use a sl st to join into the 3rd chain stitch.
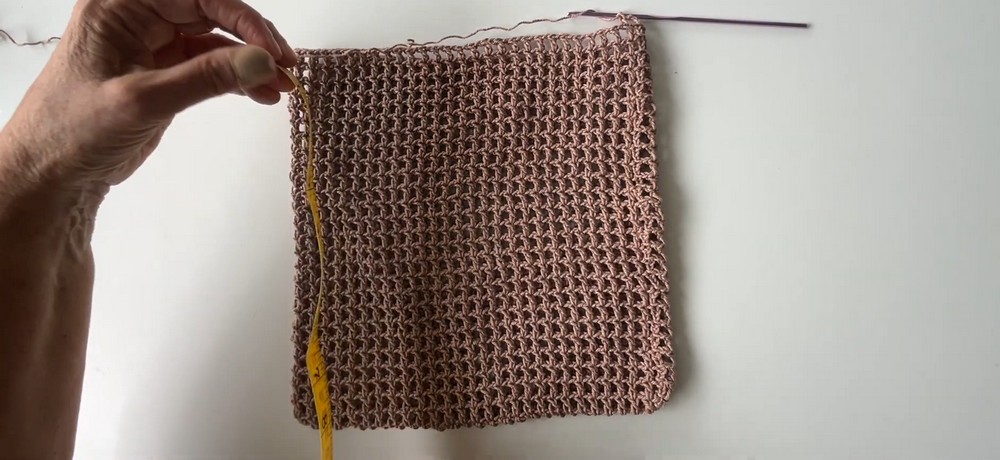
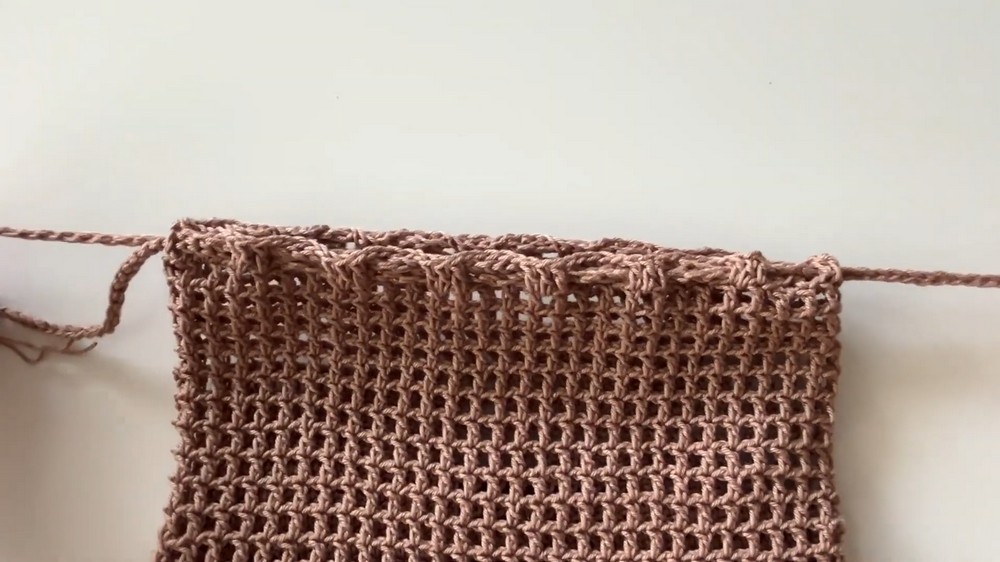
Round 3 and Beyond:
- Repeat the same pattern from Round 2 until your project measures approximately 23 cm (9 inches).
- Ensure the stitch count stays consistent as you work up.
Border:
- Chain 4 stitches to start.
- Work 1 dc into the chain space, then another dc into the next stitch.
- Chain 1, work 1 dc, repeat the sequence of chain 1, dc into space, dc into the next stitch around the border.
- Use a sl st to join into the 3rd stitch, then pull up the yarn and cut it.
- Weave in any loose yarn tails.
Cords:
- Hold two strands of yarn together.
- Make a slip knot and chain 120 stitches.
- Repeat to create two cords (one in each of the remaining colors).
- Thread one cord through the spaces of the pouch vertically, then repeat the process with the second cord vertically from the opposite side.
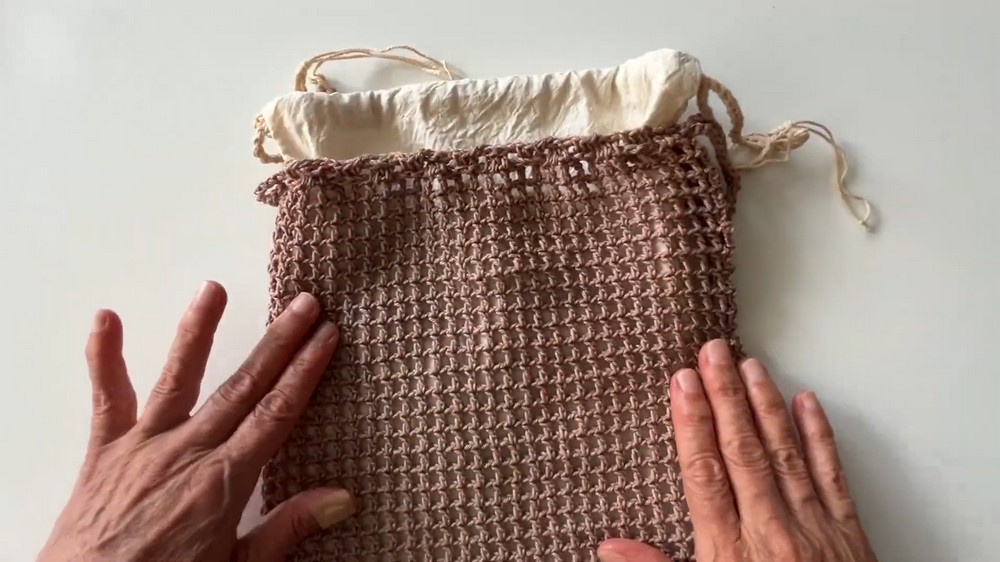
Lining:
- Cut the cotton fabric to match the size of the bag, ensuring it’s slightly taller than the pouch.
- Sew the lining to the pouch using pins to secure it in place before stitching:
- Option 1: Hand-sew using a tapestry needle.
- Option 2: Use a sewing machine for speed and precision.
Final Placement for Lining and Cords:
- Leave the top of the lining outside the pouch during sewing, as it will fold neatly.
- Sew the liner edges closed once inserted, ensuring the top remains visible.
- Thread the cords through the lining and outside spaces again.
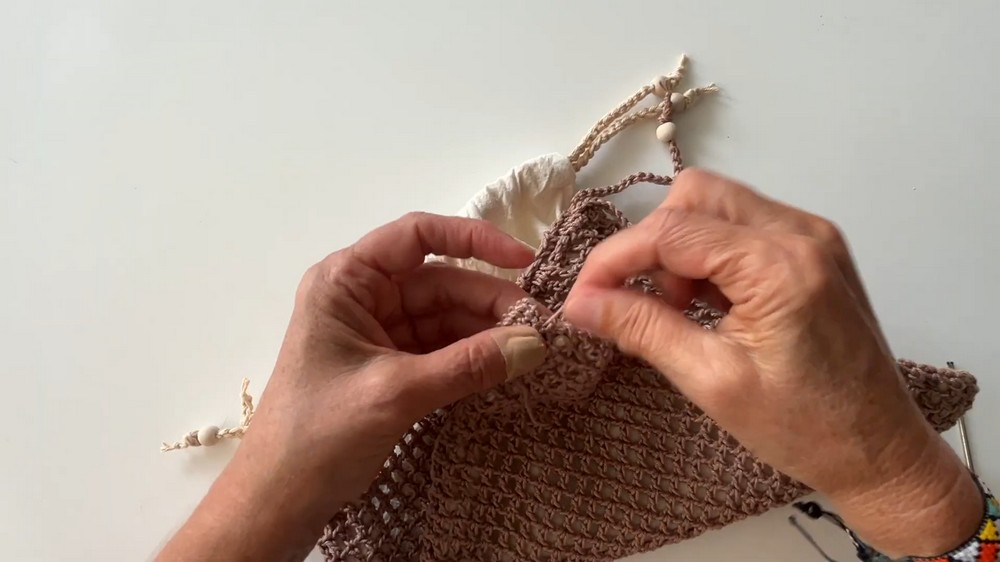
Carabiner Attachment Loop:
- Switch to a 2 mm crochet hook for finer work.
- Insert the hook into the stitches of the pouch to begin the loop.
- Chain 1 (counts as 1 single crochet (sc)).
- Work 6 sc into the stitches.
- Chain 1, turn, and work 7 sc across.
- Repeat the process for 7 rows.
- Pull up the yarn and cut, leaving a long tail.
- Fold the loop in half and sew to create the carabiner attachment.
- Add the carabiner clip through the loop.
- Wrap the ropes around the area where the loop connects, tying knots to secure.
Finishing and Decoration:
- Add beads to the cords for decoration, securing them in place.
- Sew a personal label to the bag, if desired.
- The pouch is complete!