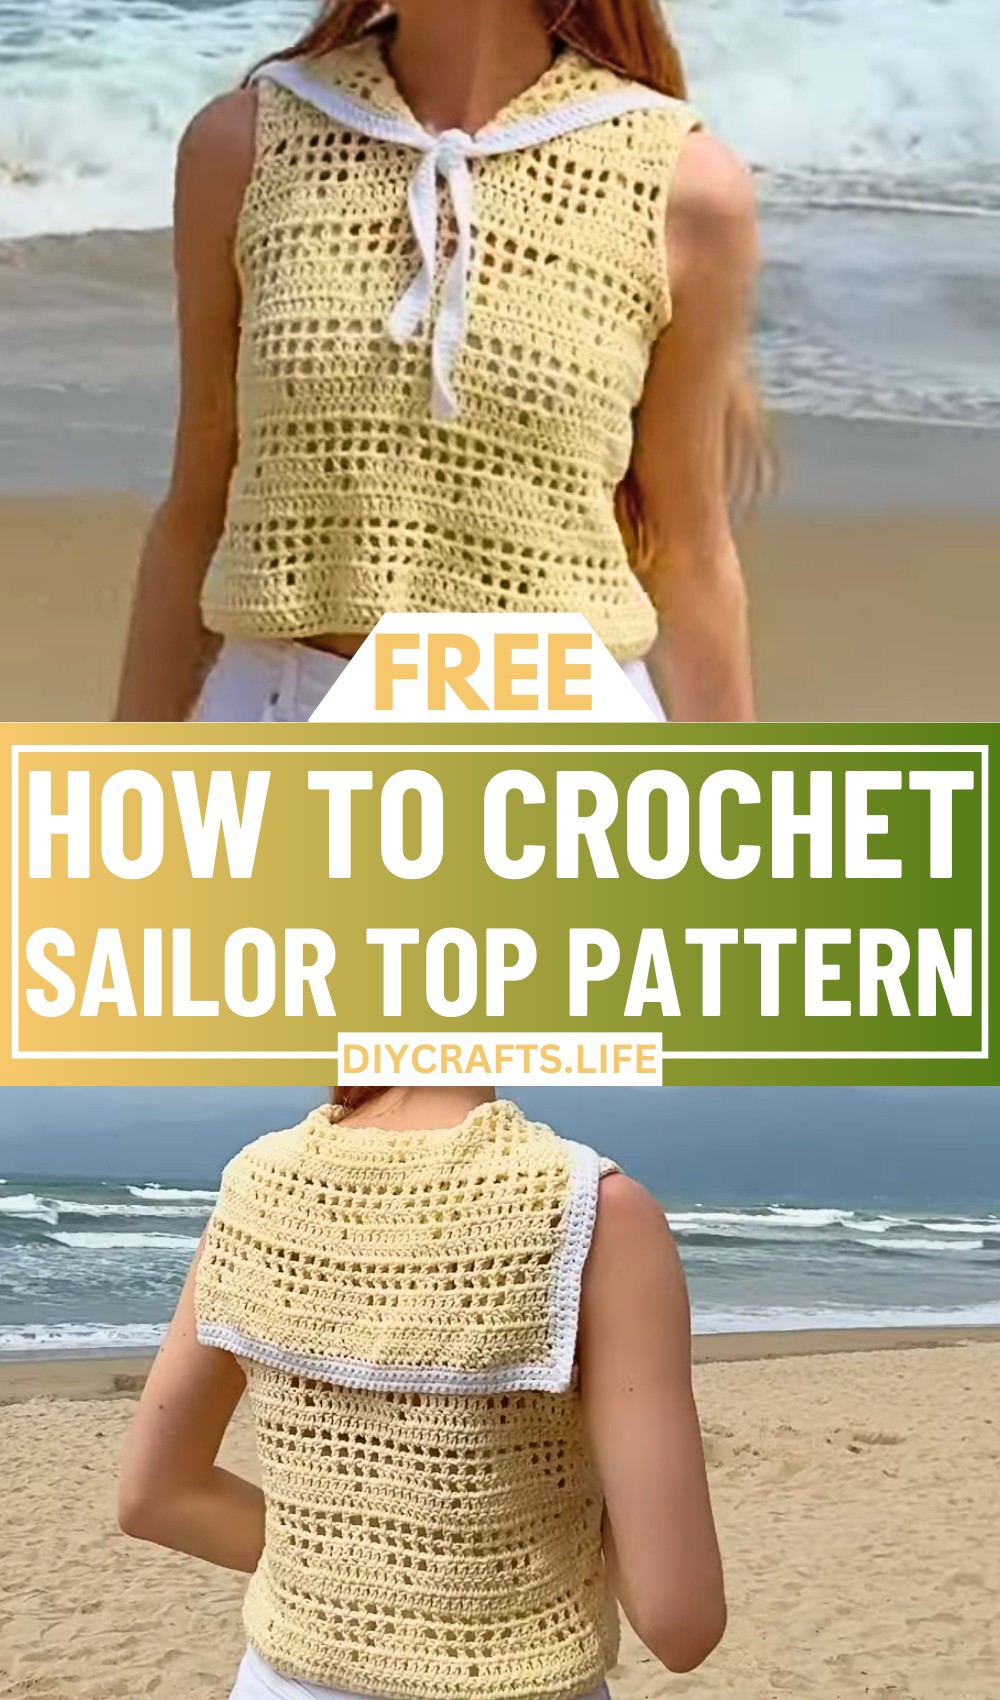
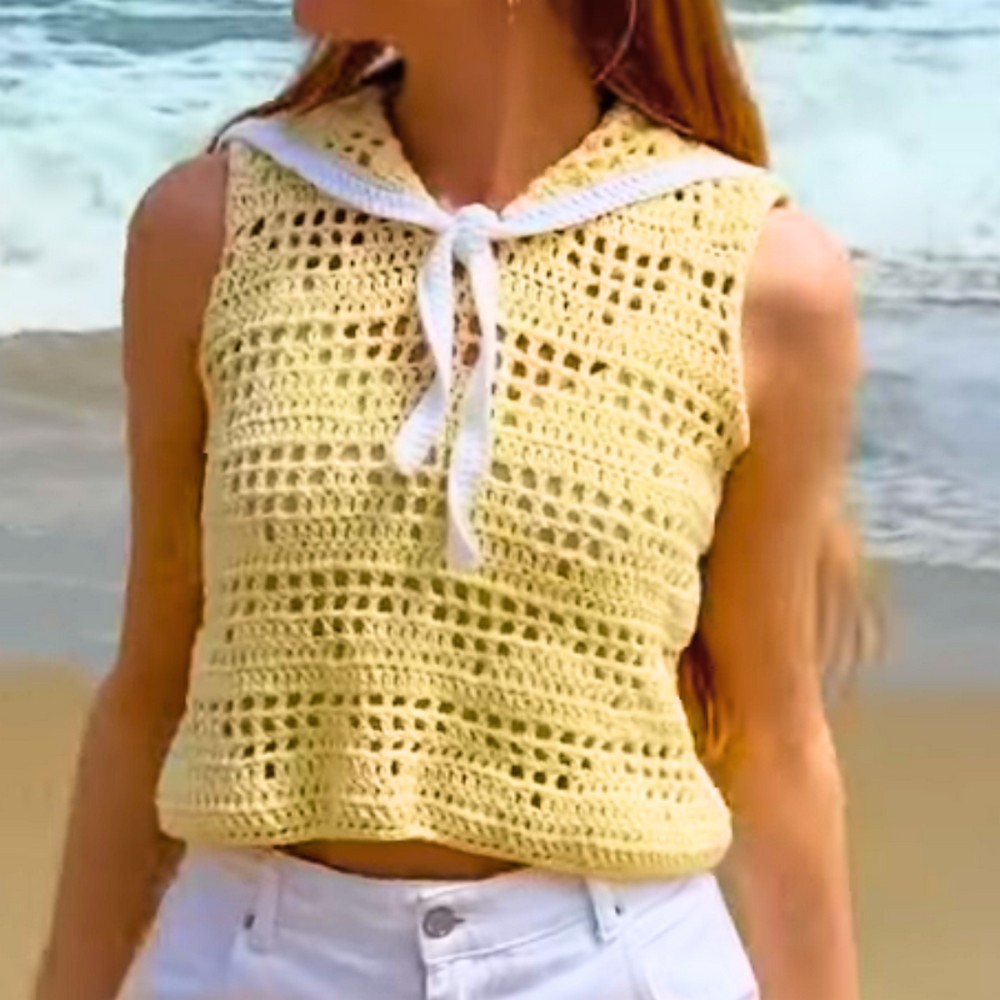
Bring a nautical flair to your wardrobe with this timeless Crochet Sailor Top. With its relaxed fit and classic vibe, this design takes influence from the seaside charm and transforms it into a chic and playful handmade garment. Whether dressed up or paired casually, this top offers a stylish way to express your creativity through crochet.
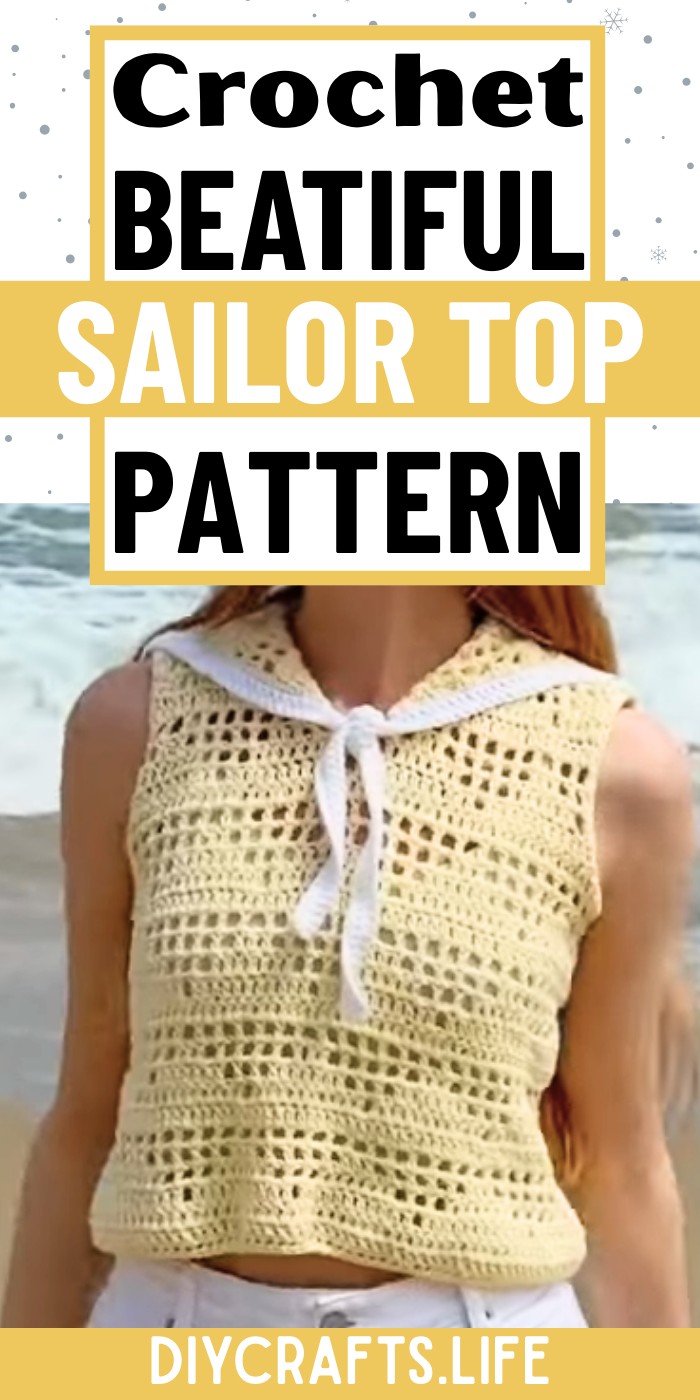
Crochet Sailor Top
This pattern features a balanced mix of airy stitches and bold striped details, creating a lightweight garment that’s perfect for warm days or layering in cooler weather. The sailor-inspired neckline adds a unique touch, while the pattern allows for endless color combinations to suit your personal style. With its clean lines and adaptable design, this crochet piece effortlessly combines classic fashion with modern handmade art.
Credit WONDER NETTING
Materials & Tools Needed
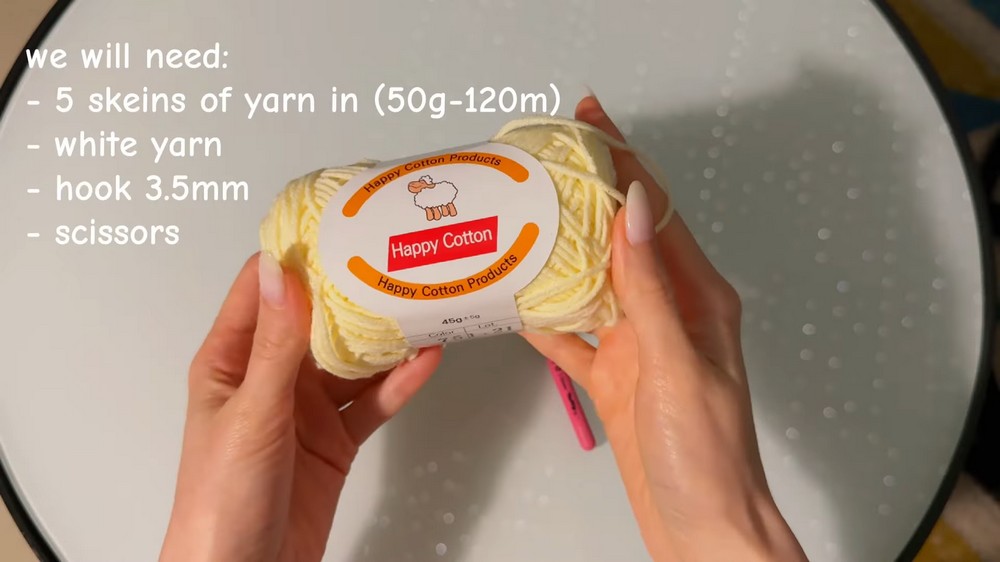
- Yarn
- Main Yarn: Five skeins of cotton yarn, 50g each with 120m per skein. The cotton composition makes the top perfect for summer and late spring, giving it a light and breathable feel.
- Contrast Yarn (for trimming/edging): A small amount of white yarn to edge the sailor-style collar and other parts of the top.
- Crochet Hook
- A 3.5mm crochet hook is recommended to match the lightweight cotton yarn.
- Additional Tools
- Scissors: To cut off yarn tails after working.
- Yarn Needle: For weaving in ends and assembling the pieces.
- Stitch Markers: Useful for marking edges during assembly and keeping track of pattern repeats.
Finished Size & Customization Ideas
- Approximate Finished Size
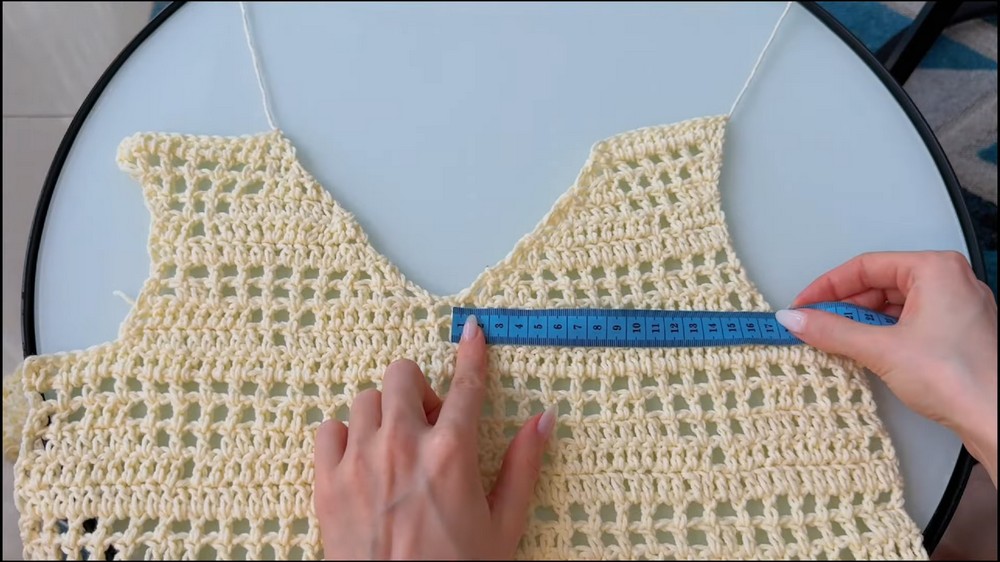
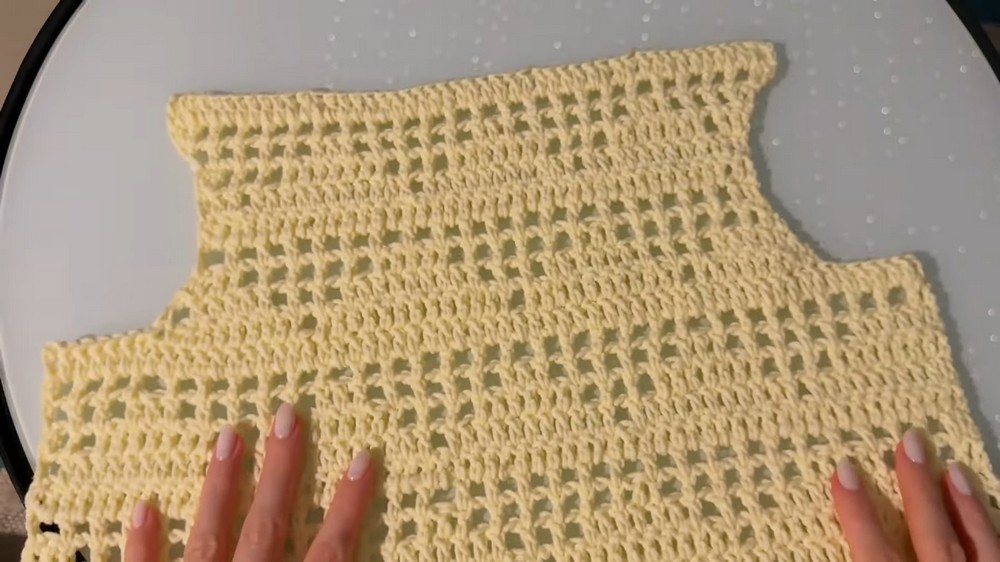
- Front Panel Dimensions: Approximately 28 cm high and 43 cm wide.
- Neckline Width (Base): 17 cm, tapering to 7.5 cm at the top after the neckline shaping.
- Back Panel: Matches the front panel in overall size (excluding neckline shaping).
- Collar: The sailor collar involves 49 double crochets and a pattern of triangle rows spanning 17 rows in total. Finished edges should align with the front panel neckline.
- Customization Suggestions
- Adjusting the Size:
- Increase the starting chain by adding multiples of 12 for additional width. Each 12 stitches equals a pattern repeat. Always add 13 extra chains to maintain symmetry.
- Work additional pattern rows to extend the length of the top to suit individual preferences.
- Yarn Variations:
- Switch to acrylic yarn for a more structured and warm top suitable for cooler seasons. Use a lightweight lace or bamboo yarn for a softer, flowy effect.
- Styling Options:
- Make the top without the sailor collar for a simpler, minimalist version.
- Embroider or add small appliqué details to personalize the collar.
- Color Adjustments:
- Swap the white yarn edging for bold colors (e.g., red or any contrasting hue) for a modern “navy” theme. Use striped or gradient yarn for a unique touch.
- Adjusting the Size:
Pattern Abbreviations & Terminology
- Abbreviations
- Ch: Chain
- Sc: Single Crochet
- Hdc: Half Double Crochet
- Dc: Double Crochet
- Sl st: Slip Stitch
- Dec: Decrease (crochet two stitches together)
- Inc: Increase (work two stitches in the same stitch)
- Terminology
- Pattern Repeat: Refers to repeated groups of stitches, such as the combination of 12 stitches used for the triangle designs.
- Open Spaces: Chains within the pattern that leave small gaps for a lacy and airy aesthetic.
- Blocking: A method to shape and smooth panels after completing the crochet work.
Step-by-Step Detailed Crochet Instructions
Part 1: Front Panel
- Foundation Chain
- Start with a foundation of 61 double crochets (equivalent to 4 full pattern repeats plus 13 extra stitches).
- To make the panel wider, add multiples of 12 to the base (e.g., 5 sets of 12 + 13 for larger sizes).
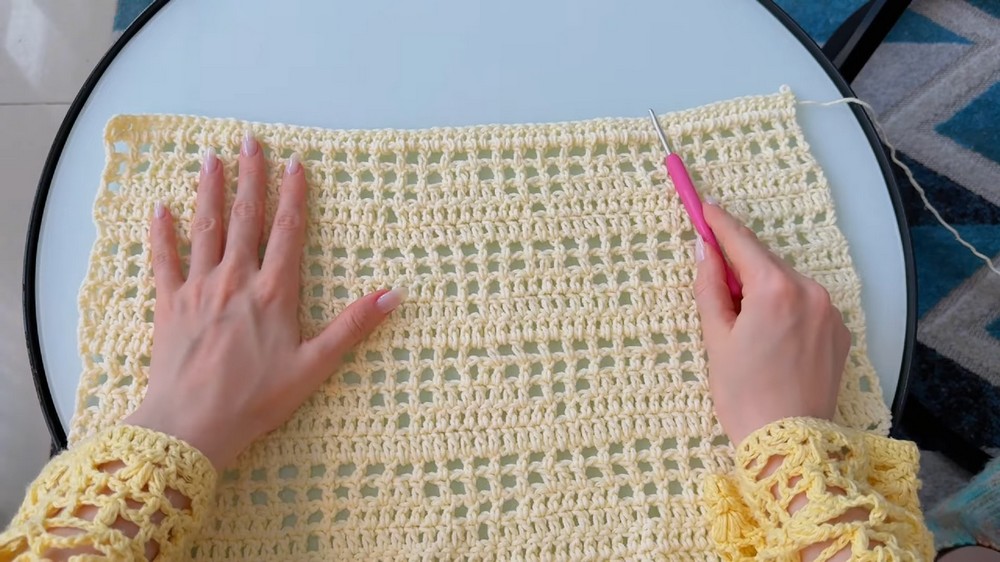
- Row 1: Double Crochet Foundation
- Work 61 double crochets directly into the foundation chain. If preferred, create a standard chain and then crochet a row of double crochets. The row should measure approximately 45 cm long.
- Row 2 and Onwards: Base Pattern
- The front panel is primarily patterned with alternating solid and open triangle designs. Use this setup:
- Chain 2, turn your work.
- For triangle patterns: Work 10 dc, then chain 1, skip 1 stitch, and work 11 dc. Repeat this across the row. Each pattern repeat involves creating open spaces above solid triangle sections.
- Row 3: Add more open spaces as you progress, starting with 2 dc, then chain 1, and continue alternating as per the pattern.
- Continue following this triangle pattern for a total of 4 triangle rows.
- The front panel is primarily patterned with alternating solid and open triangle designs. Use this setup:
- Final Dimensions
- Panel Height: 28 cm.
- Panel Width: 43 cm.
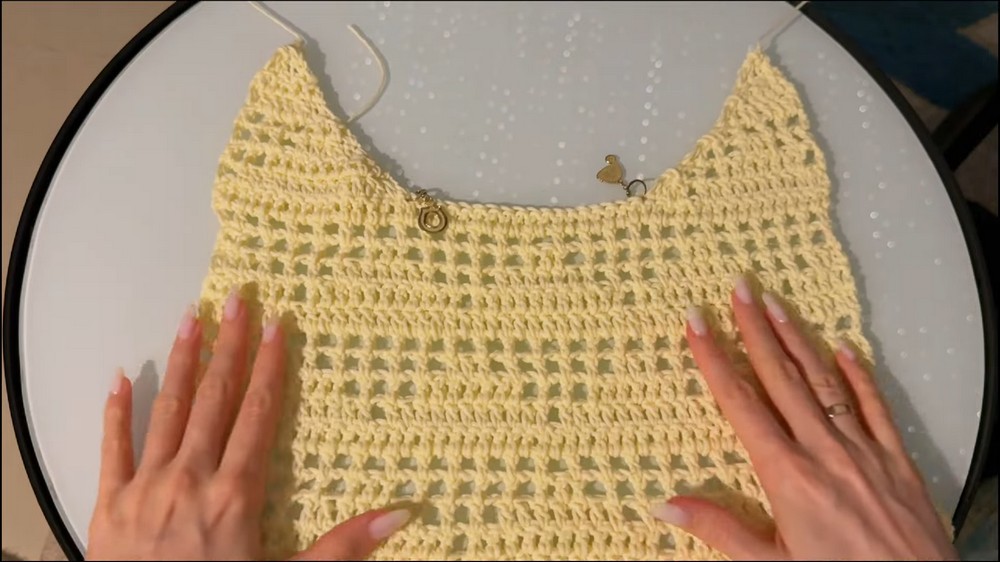
Part 2: Shaping the Neckline
- Right Side
- Starting from the top of one side, work 7 slip stitches along the first few rows of the shoulder. Then, chain 1 and start a row of decreases to taper the top as follows:
- Make a single crochet decrease for the first two stitches, then continue the triangle pattern. Leave eight stitches unworked at the end of this row to form the armhole.
- Continue Decreasing:
- Perform 2 decreases (single crochet and double crochet decrease) at the beginning of every row.
- On the shoulder or outer edge, start making increases while keeping the neckline decrease steady.
- Starting from the top of one side, work 7 slip stitches along the first few rows of the shoulder. Then, chain 1 and start a row of decreases to taper the top as follows:
- Left Side
- Repeat the same steps as the right, mirroring the decreases and increases to ensure symmetry.
Part 3: Back Panel
- Foundation Chain and Rows
- Repeat the same pattern as the front panel without shaping the neckline. Use the same triangle pattern rows for decoration.
- Armhole Shaping
- Add 7 slip stitches at both ends to create the armhole, then finish with straight rows.
Part 4: Sailor Collar
- Foundation Chain
- Start with 49 double crochets that span the neckline.
- Triangle Pattern Rows
- Work three complete triangle patterns (approximately 17 rows). Finish with a straight row of double crochets for a polished look.
- Decreasing the Edges
- Add two decreases (one single crochet decrease and one double crochet decrease) on each side at the start of every other row to taper the collar slightly.
Part 5: Assembly
- Shoulder Seams
- Place the front and back panels together, right sides facing. Use single crochets to join the shoulders, adding two stitches per row for even seams.
- Side Seams
- Work single crochet seams along the sides, leaving the armhole openings unstitched.
- Attach the Collar
- Line up the collar edges with the neckline on the front and back panels. Attach the edges using single crochets, ensuring the rows align evenly.
- Note: If the back stitches and collar rows don’t match, work two back stitches into a single collar row for seven stitches on either side.

Part 6: Edging
- Sailor Collar Edging
- Attach white yarn at the edge of the collar. Chain approximately 40 air loops to create ties, then single crochet along the edge of the collar, adding three single crochets at the corners for a smooth turn.
- At the end of the collar, chain another 40 air loops, then work a second row of single crochets over the entire edge.
- Sleeve and Bottom Edging
- Work 2 single crochets into each row along the sleeve edges. Add a simple single crochet border along the bottom hem for a finished appearance.
Final Notes
- Blocking: Block the top after assembly to smooth edges and ensure the shape stays symmetrical.
- Styling Tip: The top is perfect as-is, but you can add lining or pair it with a camisole to reduce transparency.