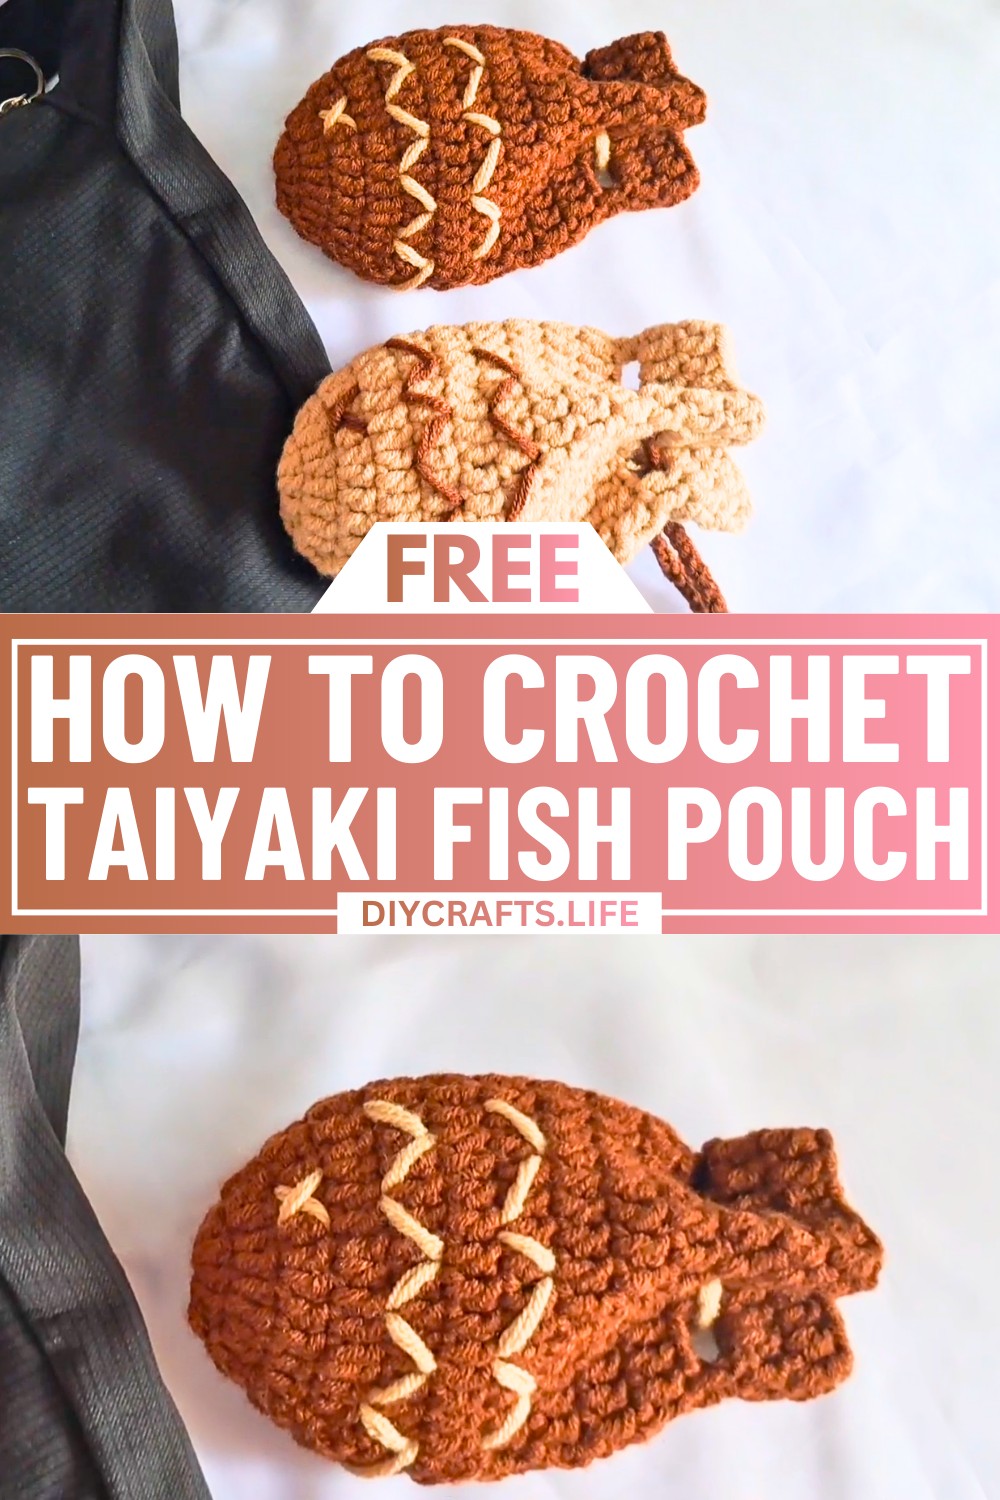
Turn an everyday accessory into something playful and extraordinary with this crochet taiyaki fish pouch design! More than just a pouch, this piece is a charming work of art that sparks joy and adds a touch of whimsy to your personal style. Whether you're looking to make a fun statement or gift something truly one-of-a-kind, this design is bound to impress.

This taiyaki pouch draws inspiration from the traditional Japanese fish-shaped pastry, creating a unique blend of practicality and artistic expression. Its detailed texture mimics the crispy waffle-like layers of the real treat, while its clever pouch structure keeps your essentials secure in style. Let this imaginative design turn heads and transform simple accessories into delightful fashion moments.
Credit from littlespot
Required Materials
To make the crochet Taiyaki (fish-shaped) pouch, you will need the following items:
- Yarn: 5 ply milk cotton yarn (2 mm thickness)
- Crochet hook: 3.0 hook
- Scissors
- Yarn needle:
- Stitch marker

Detailed Step-by-Step Instructions
Base of the Pouch (Rounds 1–3 for Shaping the Fish Body)
- Start with a Magic Ring:
- Wrap the yarn around your fingers to create two loops.
- Insert your hook under the first loop, hook the second loop, and pull through.
- Secure the magic ring with a chain stitch.
- Round 1:
- Chain 3 (this counts as the first double crochet).
- Make 9 more double crochets into the magic ring (10 double crochets total).
- Pull the yarn to close the ring, then slip stitch into the first double crochet.
- Round 2 (Increase Round):
- Chain 3.
- On the same stitch as the chain 3, work 1 double crochet.
- Make 2 double crochets in each stitch (this doubles the stitch count).
- Slip stitch into the first double crochet to complete the round.
- Round 3 (4 Double Crochet + Increase Pattern):
- Chain 3.
- Work 1 double crochet in the same stitch as the chain.
- Crochet 1 double crochet in the next 4 stitches.
- In the next stitch, work 2 double crochets (increase).
- Repeat this pattern (4 double crochets + 1 increase) all around.
- Slip stitch into the first double crochet.
Rounds 4–10: Building the Pouch
- Round 4 (2 Double Crochet + Increase Pattern):
- Chain 3.
- On the same stitch as the chain, work 1 double crochet.
- Crochet 1 double crochet in the next stitch, followed by 2 double crochets in the next (increase).
- Repeat this pattern all around.
- Slip stitch into the first double crochet.
- Rounds 5–10:
- Chain 3.
- Work 1 double crochet in each stitch around.
- Slip stitch into the first double crochet at the end of each round.
Round 11: Create the Taiyaki Hole Pattern
- Round 11:
- Chain 3, then work 2 double crochets.
- Chain 3 and skip 2 stitches.
- Work 2 double crochets into the next 2 stitches.
- Repeat the pattern: Chain 3, skip 2 stitches, 2 double crochets until the end of the round.
- Slip stitch into the first double crochet.
Rounds 12–13: Finalize the Fish Body
- Round 12:
- Chain 3 and work 2 double crochets.
- In the chain 3 gaps from the previous round, work 2 double crochets.
- Continue alternating: 2 double crochets (in stitches) + 2 double crochets (in chain gap) until you reach the end.
- Slip stitch into the first double crochet.
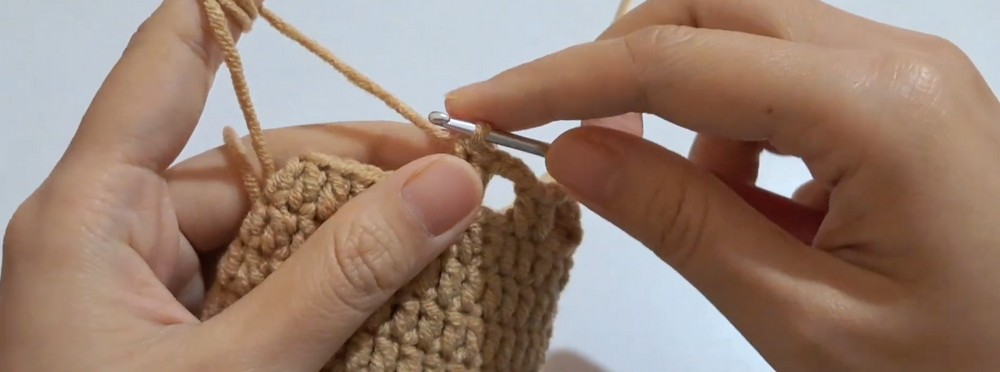
- Final Round:
- Chain 3, then work a double crochet in every stitch.
- After completing the round, slip stitch into the first double crochet.
- Chain 1, cut the yarn, and weave in the end.
Adding the String
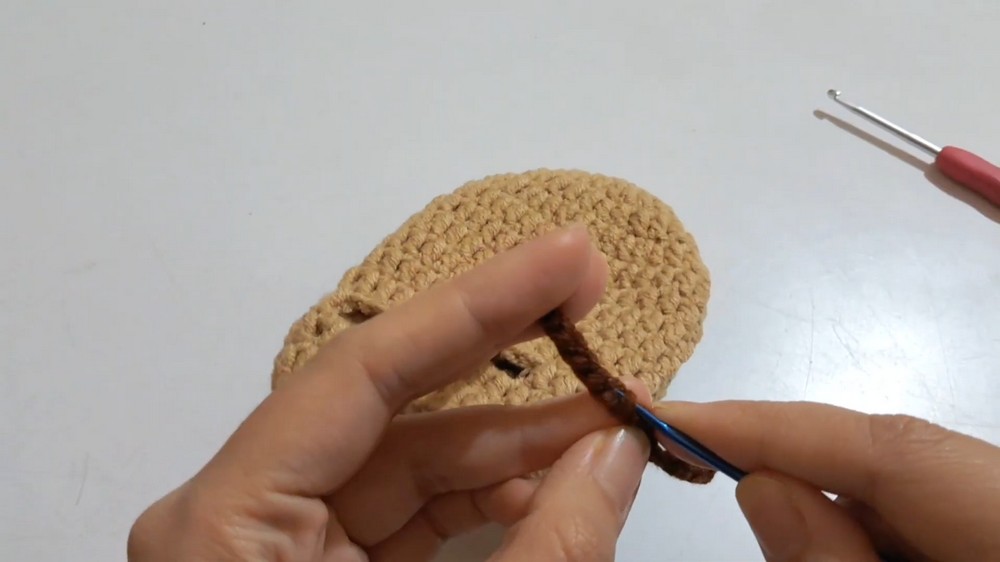
- Create the String:
- Start with a slip knot. Wrap the yarn around your fingers, then pull the loop through.
- Chain your desired length (about 60 chains is a good starting point).
- Attach the String:
- Insert the string evenly around the pouch’s hole (created in Round 11).
- Once threaded, tie the two ends of the string together securely.
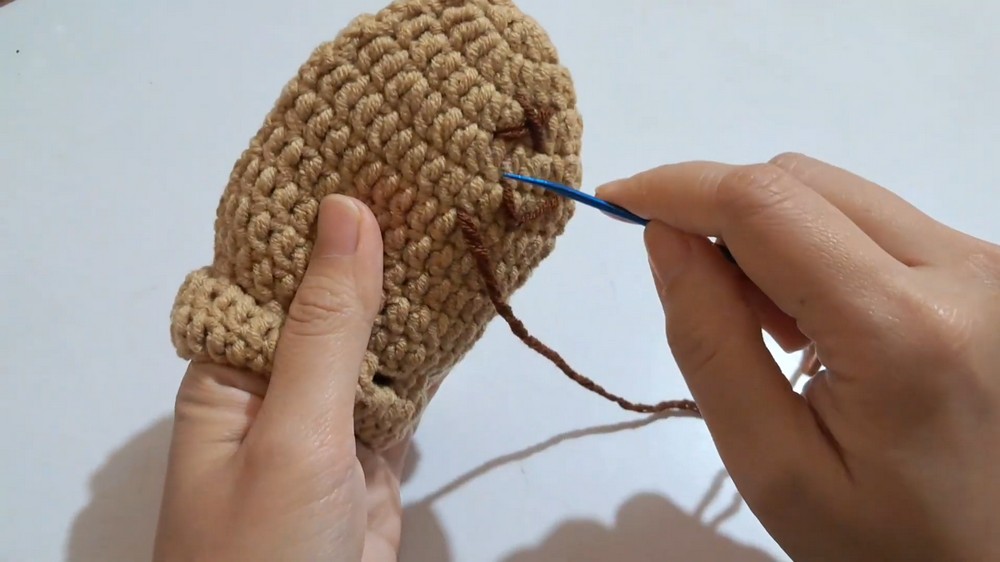
Adding Details (Eyes and Scales)
- Crochet the Eye (Optional):
- Create a small circle using the magic ring technique (5-6 single crochets inside the ring).
- Sew the finished eye onto the Taiyaki pouch.
- Decorative Scales (Optional):
- Use a contrasting thread or additional crochet stitching to embroider scale patterns onto the fish body.
Final Thoughts
Congratulations! Your crocheted Taiyaki fish pouch is complete. Use it as a cute storage pouch for small items or as a unique handmade gift.