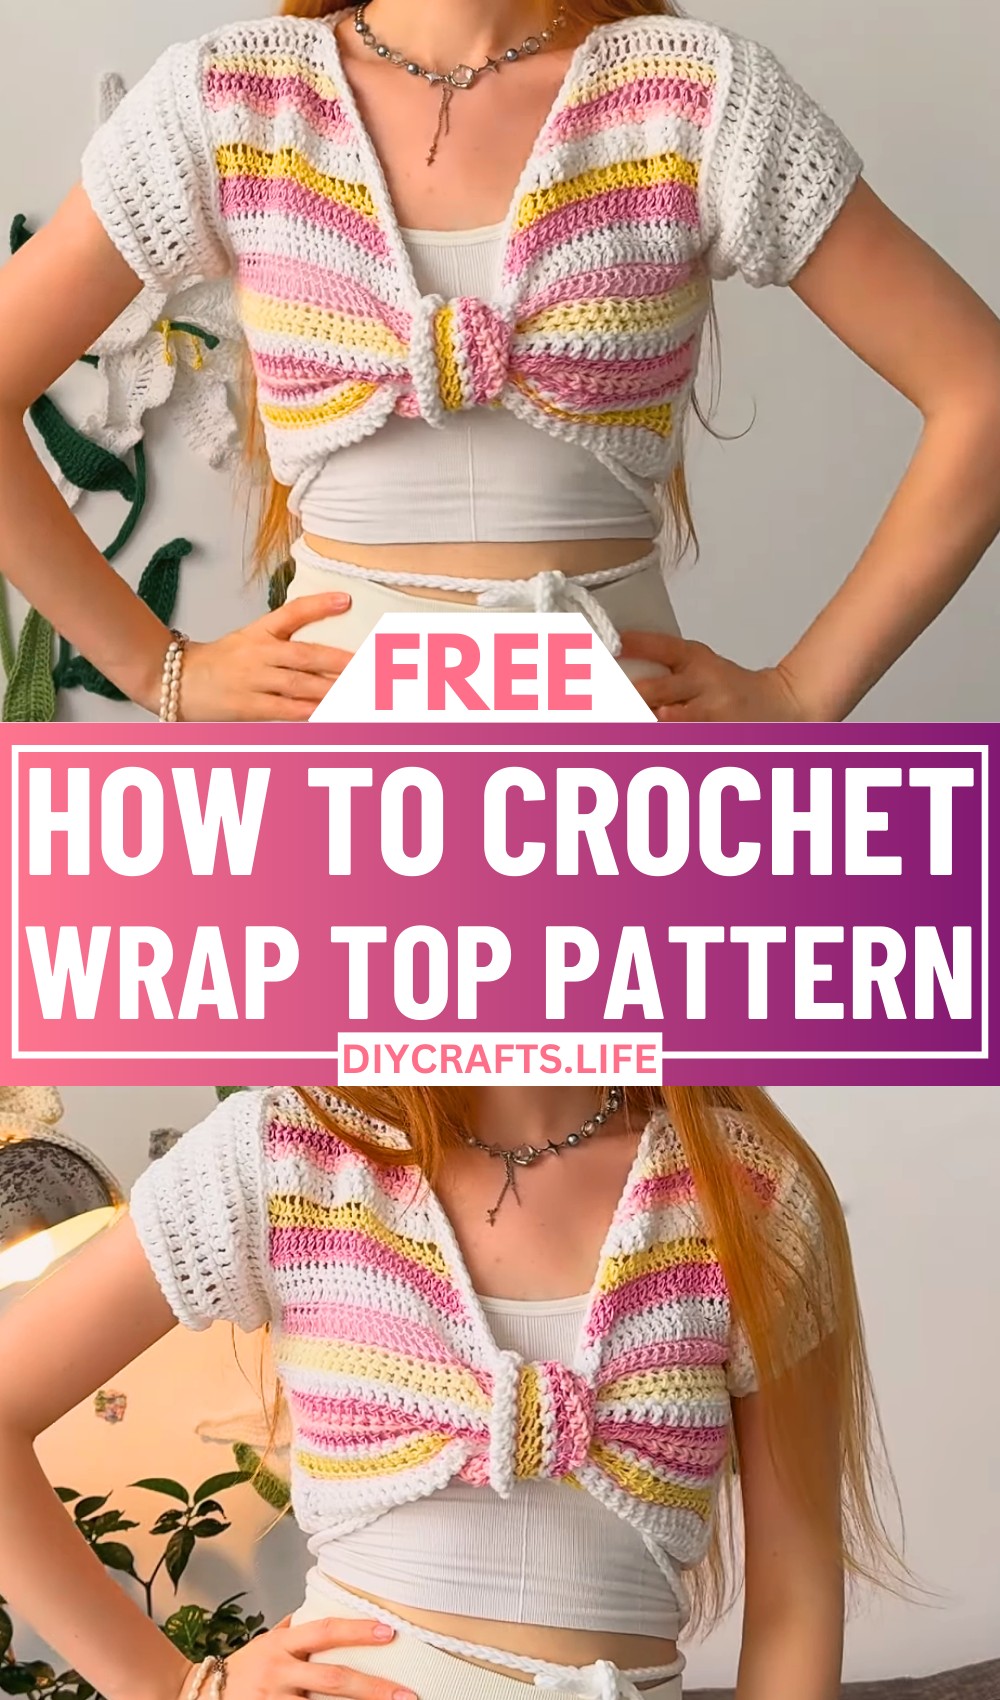
Add a playful touch to your handmade wardrobe with this Crochet Wrap Top, a design that perfectly blends simplicity and style. Using leftover yarns, this project turns scraps into a colorful and functional piece that feels both effortless and unique. It’s lightweight, versatile, and offers endless possibilities for customization, making it an inspiring addition to any crochet enthusiast’s collection.
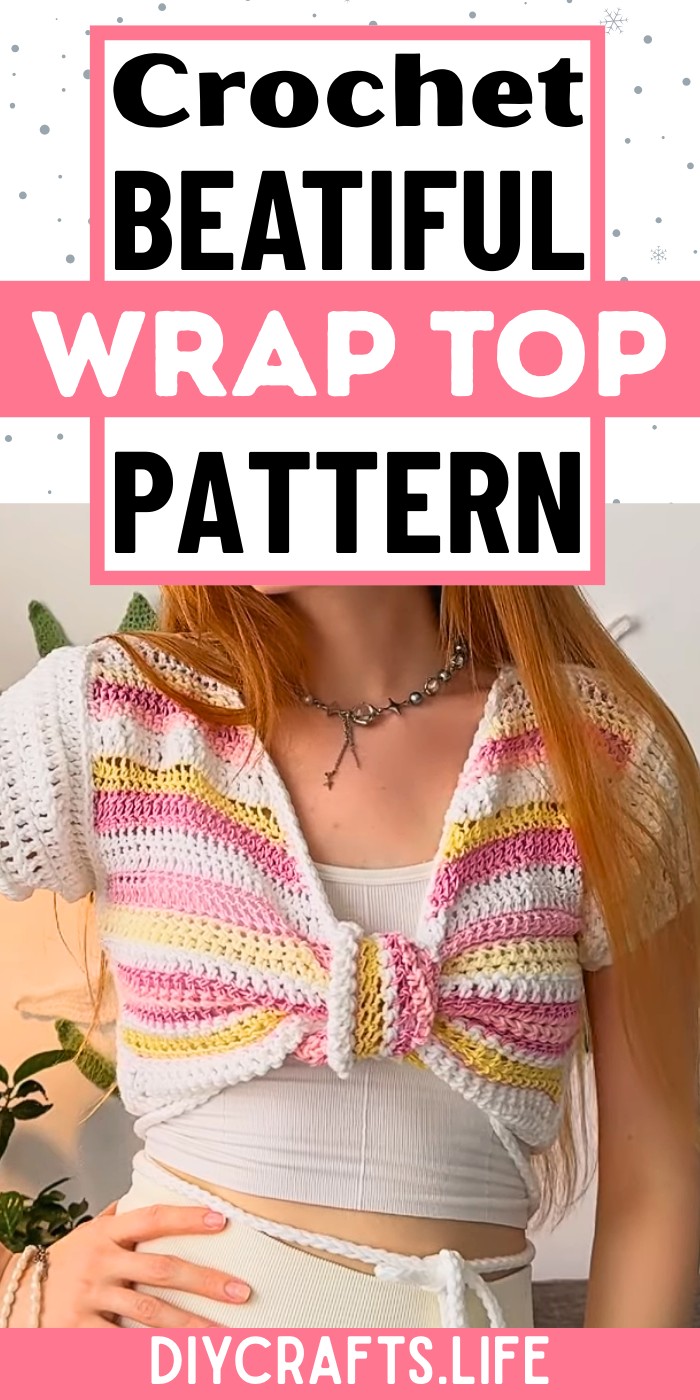
Crochet Wrap Top
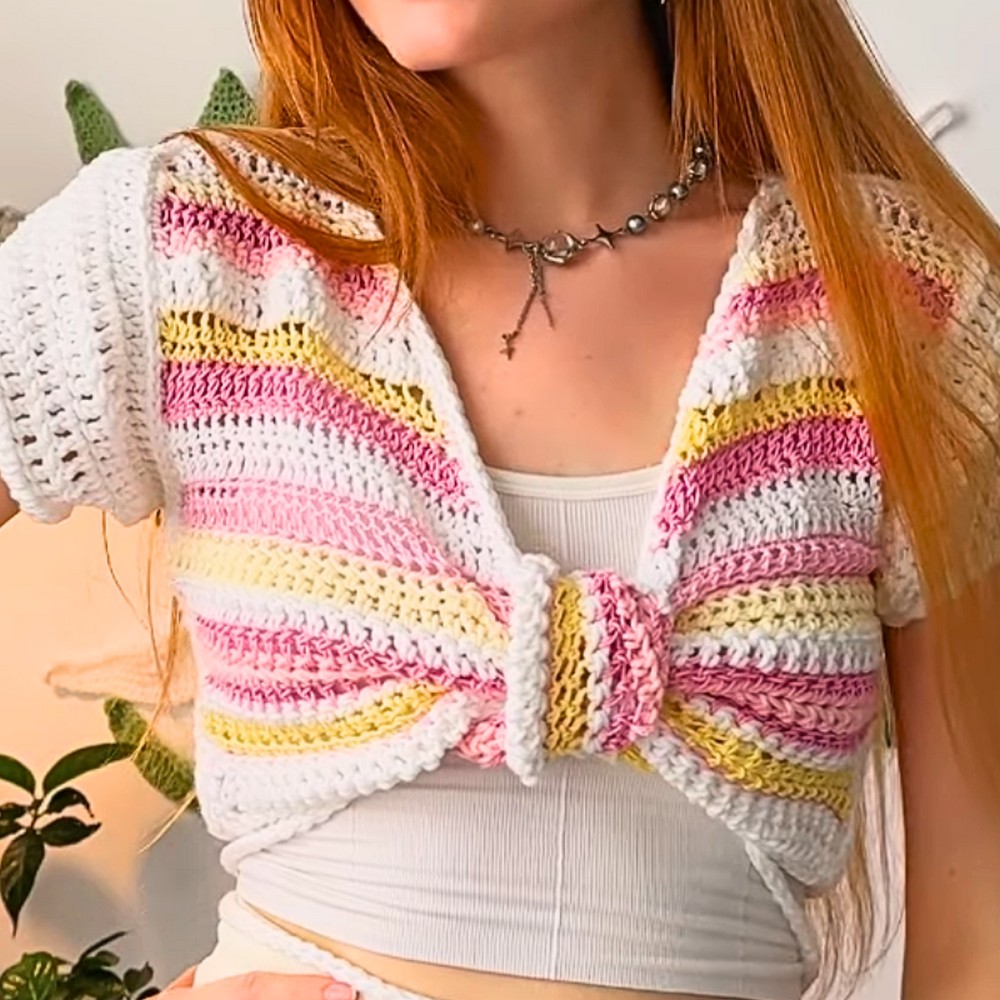
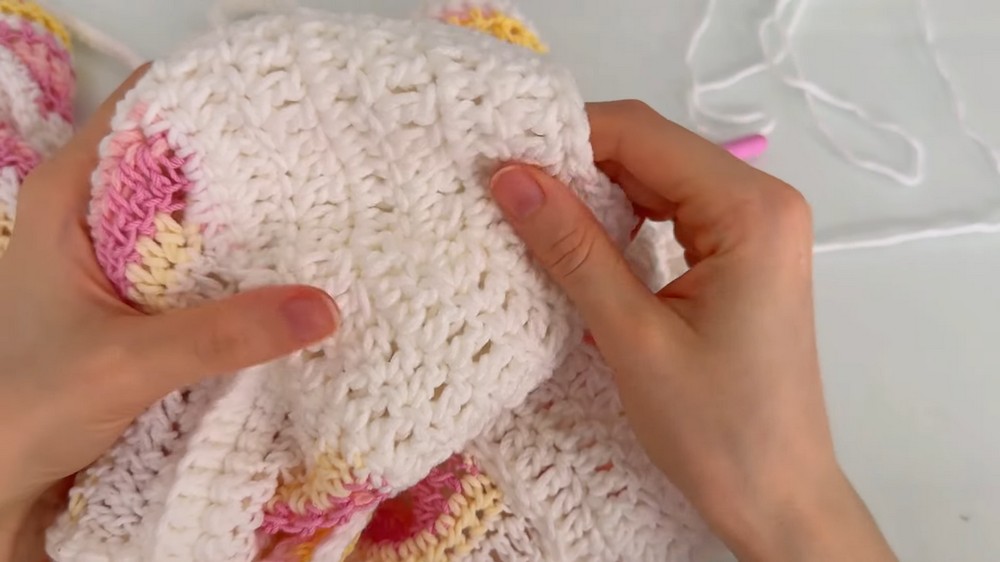
What makes this wrap top special is its cropped fit, long adjustable ties, and a harmonious mix of stripes created with various stitch patterns like double crochet, single crochet, and half double crochet. The creative use of different yarn types and colors brings additional texture and charm. Whether kept sleeveless, fitted with short sleeves, or extended into longer ones, this crochet top lets you showcase your creativity while staying true to your personal style — a perfect way to recycle yarns and craft something practical yet beautiful.
Credit WONDER NETTING
Materials & Tools Needed
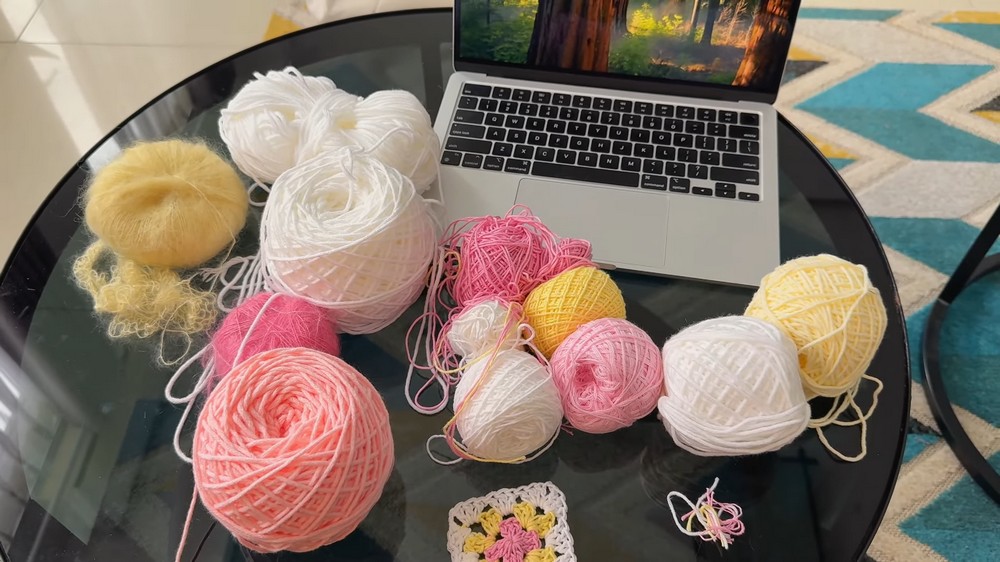
- Yarn
- Use lightweight yarn (Category 3) for a comfortable and flowy wrap top.
- Cotton or blended yarn is recommended for breathable summer wear. For cooler weather, consider acrylic or wool-blend yarn.
- Suggested yardage: 500-800 meters, depending on the size.
- Crochet Hook
- Match the hook size to the yarn weight (typically 4mm - 5mm) as recommended on the yarn label.
- Yarn Needle
- Needed for seaming panels, attaching straps, and weaving in loose ends.
- Stitch Markers
- Use stitch markers to mark sleeves, panel edges, or midpoints for symmetry.
- Scissors
- For neatly trimming yarn tails after securing stitches.
Finished Size & Customization Ideas
- Approximate Size
- Measurements will depend on the wrap style, but the base pattern typically fits Small – Extra Large (S-XL) sizes.
- For a standard size:
- Front Panel/Wrap Length: About 45 cm – 55 cm.
- Back Panel (Width): Approximately 40 cm – 50 cm, depending on size.
- Strap Thickness: 4-6 cm, with length adjusted to your preference for the wrap tie.
- For a standard size:
- Measurements will depend on the wrap style, but the base pattern typically fits Small – Extra Large (S-XL) sizes.
- Customization Ideas
- Size Adjustments:
- Add or subtract foundation chains to increase or decrease the width of the panels.
- Adjust the total row count to increase the length of the panels for a larger size.
- Style Variations:
- Longer Straps: Add length to wrap the ties around twice for a more layered style.
- Open Sleeves: Leave the sleeves flared or widen the armholes for a sleeveless wrap top.
- Color Customization: Use gradient-colored yarn for a sleek fade effect or color-blocking with contrasting shades (e.g., alternate panel colors or colored straps).
- Textural Variations: Use a textured stitch pattern (e.g., puff stitches, shell stitches) instead of simple rows for a more intricate look.
- Size Adjustments:
Pattern Abbreviations & Terminology
- Abbreviations
- Ch: Chain
- Sc: Single Crochet
- Hdc: Half Double Crochet
- Dc: Double Crochet
- Sl st: Slip Stitch
- Inc: Increase (work two stitches in the same stitch)
- Dec: Decrease (work two stitches together)
- Rep: Repeat
- Terminology
- Foundation Chain: The initial chain stitches that determine the width of your piece.
- Joining Seams: Connecting panels using slip stitches or whip stitches.
- Blocking: The process of shaping panels evenly using steam or wet techniques after completing the project.
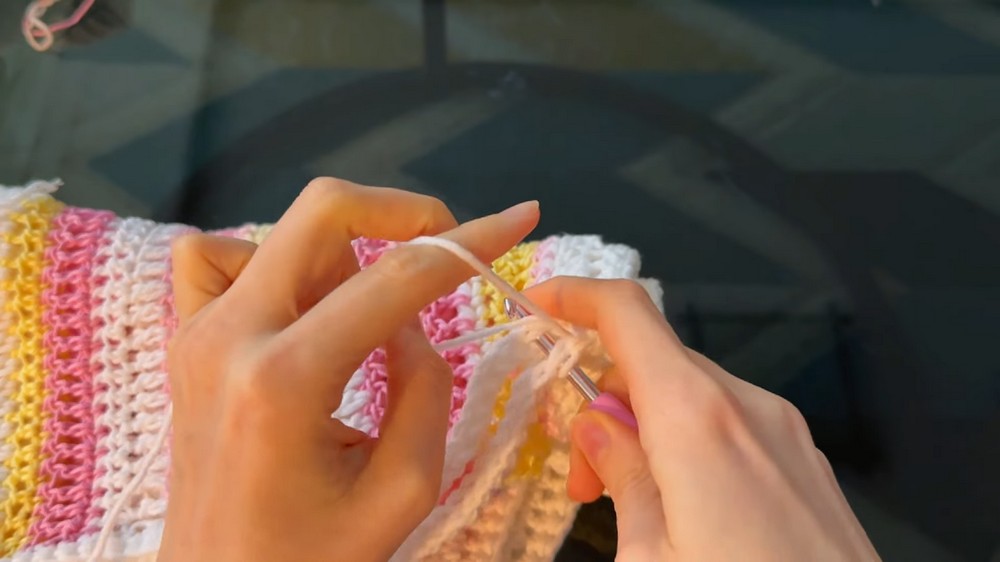
Step-by-Step Detailed Crochet Instructions
1. Crochet the Back Panel
This section forms the back of the wrap top.
- Foundation Chain
- Start by chaining 70-100 stitches (or to your desired width, based on chest size).
- Row 1: Single Crochet Foundation Row
- Sc in the second chain from the hook and in each stitch across the row. Turn.
- Row 2 and onwards: Double Crochet Rows
- Ch 2, Dc in every stitch across. Turn.
- Work in rows of Dc until the back panel reaches your desired height (approx. 40 - 50 cm or as needed for torso coverage).
- Fasten Off: Secure and set aside the back panel.

2. Front Wrap Panels (Make 2)
The front panels are worked separately and will overlap to create the wrap style.
- Foundation Chain
- Create a foundation chain of the same width as the back panel (70-100 stitches) for the base row.
- Row 1: Work Sc across the row. Turn.
- Row 2 and onwards:
- Ch 2, Dc across.
- To create the angled wrap shape, decrease 1 stitch at the end of every row by skipping the last stitch.
- Continue decreasing rows until the panel tapers to a point. This creates the diagonal wrap shape.
- Second Panel:
- Repeat these steps to create a mirrored front panel.
3. Straps (Make 2)
- Foundation Chain
- Make a chain of 100-150 stitches, depending on how long you want the straps to wrap around your waist.
- Strap Rows
- Work 2 rows of Sc or Hdc across the chain to add a bit of structure to the straps.
- Fasten Off: Weave in the ends and set them aside.
4. Sleeves (Optional)
- Foundation Chain
- Create a chain measuring approximately 25-30 cm, or longer for a loose, airy sleeve.
- Rows
- Work rows of Dc (or any textured stitch pattern of your choice) until the sleeve reaches your desired length.
- Shaping the Sleeves
- Add increases at the end of every second row to add flare to the sleeve. Alternatively, add tight decreases at the ends for fitted sleeve cuffs.
- Attach Sleeves
- Seam the finished sleeve panels to the armholes on either side of the back panel.
5. Assembly & Edging
- Assemble Panels
- Place the back panel flat. Lay the front wrap panels on top, overlapping them diagonally. The pointed ends of the panels should align with the waist edge of the back panel.
- Seam the sides using Sc or slip stitches.
- Attach Straps
- Securely stitch the straps to the pointed ends of the wrap panels. Ensure they are firmly attached for durability.
- Edging (Optional)
- Add a decorative edge to the neckline, bottom hem, and sleeve cuffs using simple Sc stitches or a more intricate edging pattern (e.g., shell stitch).
Tips & Finishing Touches
- Blocking
- Block the entire top after assembly to smooth out stitches and define edges for a polished look.
- Styling Tip
- Pair with high-waisted jeans or skirts to highlight the wrap design.
- Storage
- Gently fold and store flat to preserve the shape of the wrap top.