Pumpkins with leaves and tendrils are a delightful addition to your crochet collection. These soft, plush creations are perfect for fall decorations, cozy home accents, or thoughtful handmade gifts. Their textured look and adorable details, like curled tendrils and leafy embellishments, make them special and fun to crochet. Whether you’re crafting for Halloween, Thanksgiving decor, or just to brighten up a room, these pumpkins bring autumn's charm indoors.
Crochet Pumpkins with Leaves & Tendrils

The tutorial guides you step by step to create crocheted pumpkins of various sizes using soft, plush yarn. The realistic features like sections, curling tendrils, and brightly colored leaves are all created with simple stitches. With just a hook, some yarn, and stuffing, you can crochet your own masterpiece. If you’re new to crocheting, this warm, detailed tutorial is beginner-friendly.
Credit Medintseva toys
Materials and Tools Needed:
- Yarn for Pumpkin:
- Orange Pumpkin: Himalaya Dolphin Baby yarn (100g, 120m, 100% micropolyester), color #368. ~125g of yarn needed.
- Beige Pumpkin: Alize Velluto yarn, color #310. 3 skeins of yarn required.
- Yarn for Leaves: YarnArt Dolce or similar leftover yarn in green.
- Yarn for Tendrils: Brown yarn for spirals, matching thickness.
- Stuffing: ~140g (more for larger pumpkins, ~190g for bigger ones).
- Hook Size:
- 4mm hook for Himalaya Dolphin Baby yarn.
- 5mm hook for Alize Velluto yarn.
- Other Tools:
- Thick thread for shaping (e.g., #10 thread).
- Scissors.
- Tapestry needle with a blunt end.
- Stitch marker.
Finished Size & Customization Ideas:
- Orange Pumpkin (Himalaya Dolphin Baby): 67cm (26 inches) in circumference.
- Beige Pumpkin (Alize Velluto): 79cm (31 inches) in circumference.
- The size can be customized by increasing or decreasing the number of rows and rounds as detailed in the pattern.
Pattern Abbreviations & Terminology:
- ch: Chain stitch
- sc: Single crochet
- st: Stitch
- inc: Increase (2 sc into the same stitch)
- dec: Decrease (single crochet 2 stitches together)
- sl st: Slip stitch
The pattern is written in US terms.

Step-by-Step Crochet Instructions:
Pumpkin Body:
- Foundation Ring (Row 1):
- Create a slip knot and chain 2.
- In the first chain, make 7 sc.
(Alternatively, use a magic ring and crochet 7 sc into it).
- Row 2:
- Crochet 7 inc (2 sc in each st).
- Total: 14 stitches.
- Row 3:
- Work in sequence: 1 sc, 1 inc, repeat 7 times.
- Total: 21 stitches.
- Row 4:
- Work in sequence: 2 sc, 1 inc, repeat 7 times.
- Total: 28 stitches.
- Row 5:
- Work in sequence: 3 sc, 1 inc, repeat 7 times.
- Total: 35 stitches.
- Rows 6–16:
- Continue increasing as per the pattern.
- Row 6: 4 sc, 1 inc → 42 stitches.
- Row 7: 5 sc, 1 inc → 49 stitches.
- ...
- Row 16: 14 sc, 1 inc → 112 stitches.
- Rows 17–30:
- Work evenly (1 sc in each st) for 14 rows.
- Row 31-45 (Decreasing):
- Reverse the increase pattern:
- Row 31: 14 sc, 1 dec → 105 stitches.
- Row 32: 13 sc, 1 dec → 98 stitches.
- ...
- Row 45: 7 consecutive decreases to fully close the pumpkin.
- Add stuffing gradually. Keep the pumpkin soft to help with shaping later.
- Reverse the increase pattern:
- Shaping the Pumpkin:
- Thread ~30 inches of yarn left over toward the center (top to bottom).
- Use thick thread (folded and knotted) to divide the pumpkin into 8 sections, pulling tight for defined ridges.

Pumpkin Stem:
- Foundation Ring (Stem Base):
- Make a slip knot and chain 2.
- In the first chain, make 7 sc.
- Rows 2–7:
- Work 1 sc in each st.
- Total: 7 stitches per row.
- Row 8:
- Crochet 6 sc, 1 inc.
- Total: 8 stitches.
- Row 9:
- Work 1 sc in each st.
- Total: 8 stitches.
- Row 10:
- Crochet 7 sc, 1 inc.
- Total: 9 stitches.
- Row 11:
- Work 1 sc in each st.
- Total: 9 stitches.
- Row 12–15: Increase rows, following the pattern to reach 30 stitches by Row 15. Cut the yarn, leaving a tail for sewing.
- Add stuffing and sew the stem to the top of the pumpkin.

Leaves:
- Start with a chain of 10.
- Row 1 (Leaf Foundation):
- Starting from the 2nd chain from the hook, crochet 9 sc.
- Chain 3, sl st into the first chain to create a pointed edge.
- Row 2 (Shaping the Leaf):
- Work along the opposite side: 8 sc.
- 3 sc in the tip to turn the corner and 6 sc down the next side.
- Add "corners" using chain 3 sections symmetrically.
- Finish with sl st and cut the thread, leaving a tail to sew the leaf to the pumpkin.
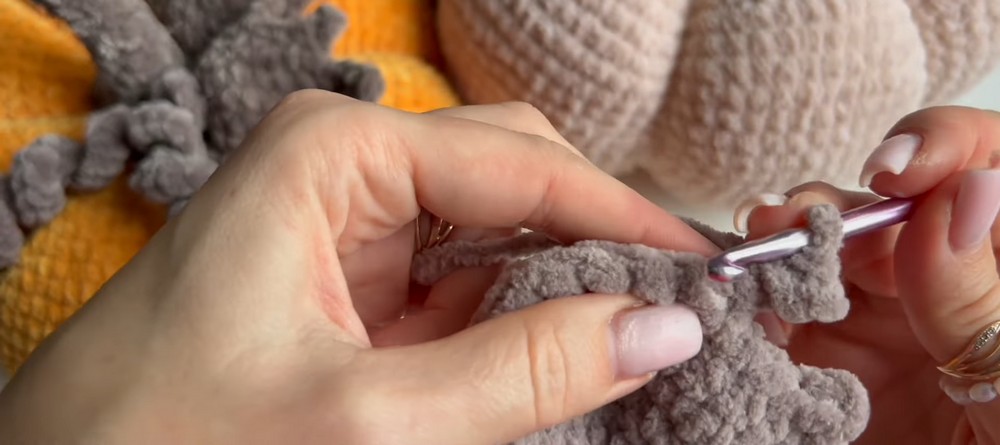
Tendrils (Curls):
- Create the foundation chain.
- Short curl: Chain 25.
- Long curl: Chain 30 (or customize length).
- Work 2 sc in each chain stitch.
- As you crochet, the chain will naturally curl into a spiral.
- Cut the yarn, leaving a tail for sewing.

Assembly:
- Position the leaves symmetrically on the top of the pumpkin.
- Attach the tendrils near the stem.
- Secure all components tightly and hide any loose ends.
Final Notes:
- Customize the color to suit your decor needs (e.g., rich autumn oranges, greens, or pastels).
- Adjust the size by adding or reducing rows in the pumpkin base pattern or stem.