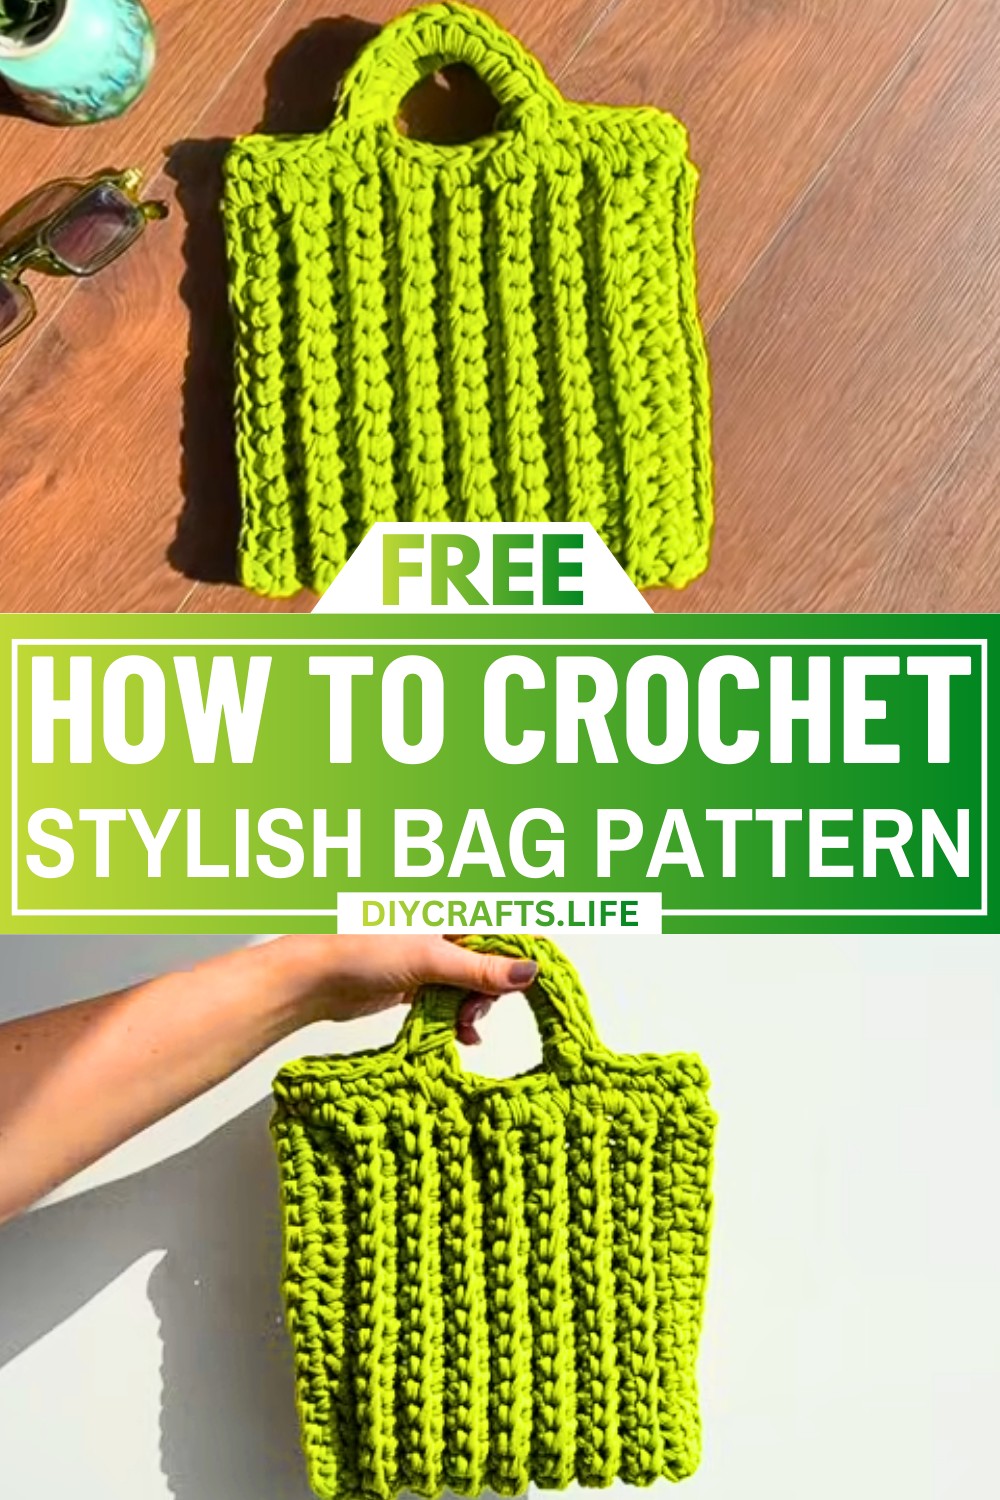
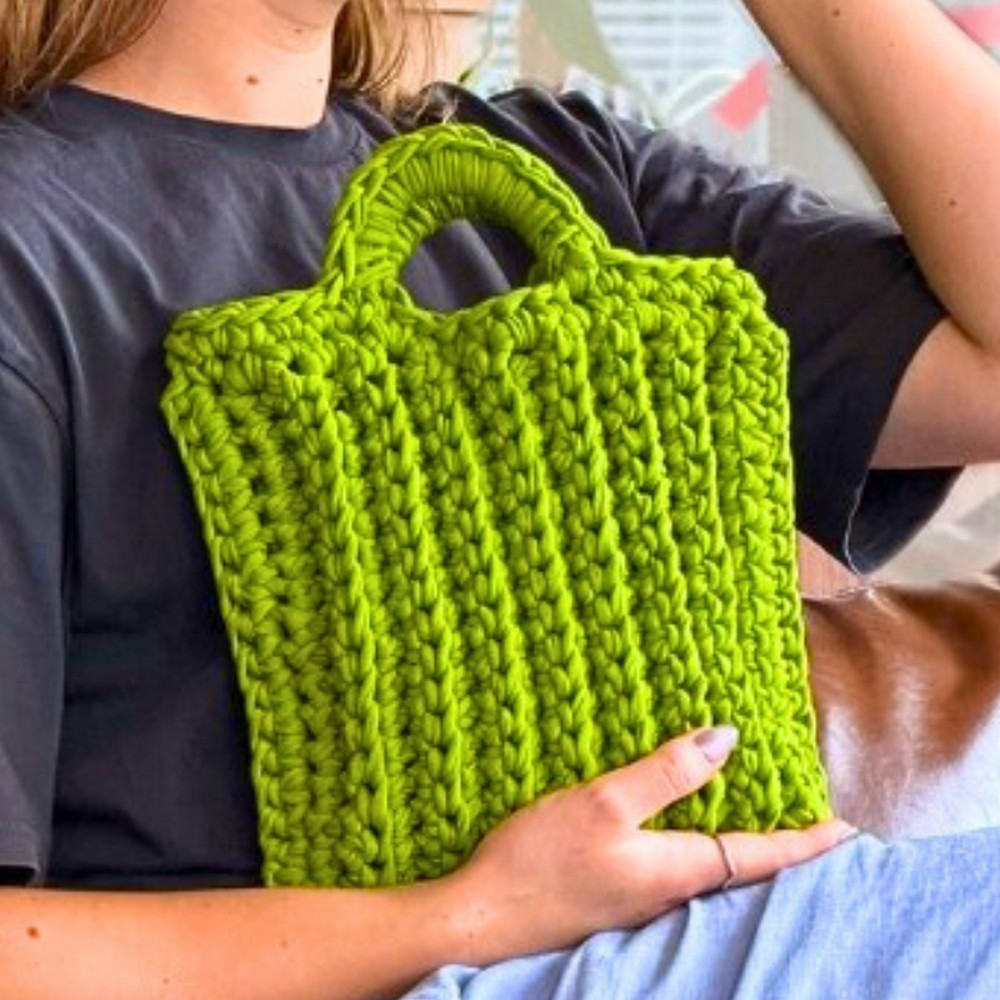
This crochet bag is simple, stylish, and super versatile. It’s the perfect size for casual coffee trips, a sunny day out, or light shopping. With its soft texture and sturdy design made using t-shirt yarn, it’s an adorable handbag that you’ll love showing off. Plus, it’s lightweight and fits just enough to keep your essentials handy while looking great.
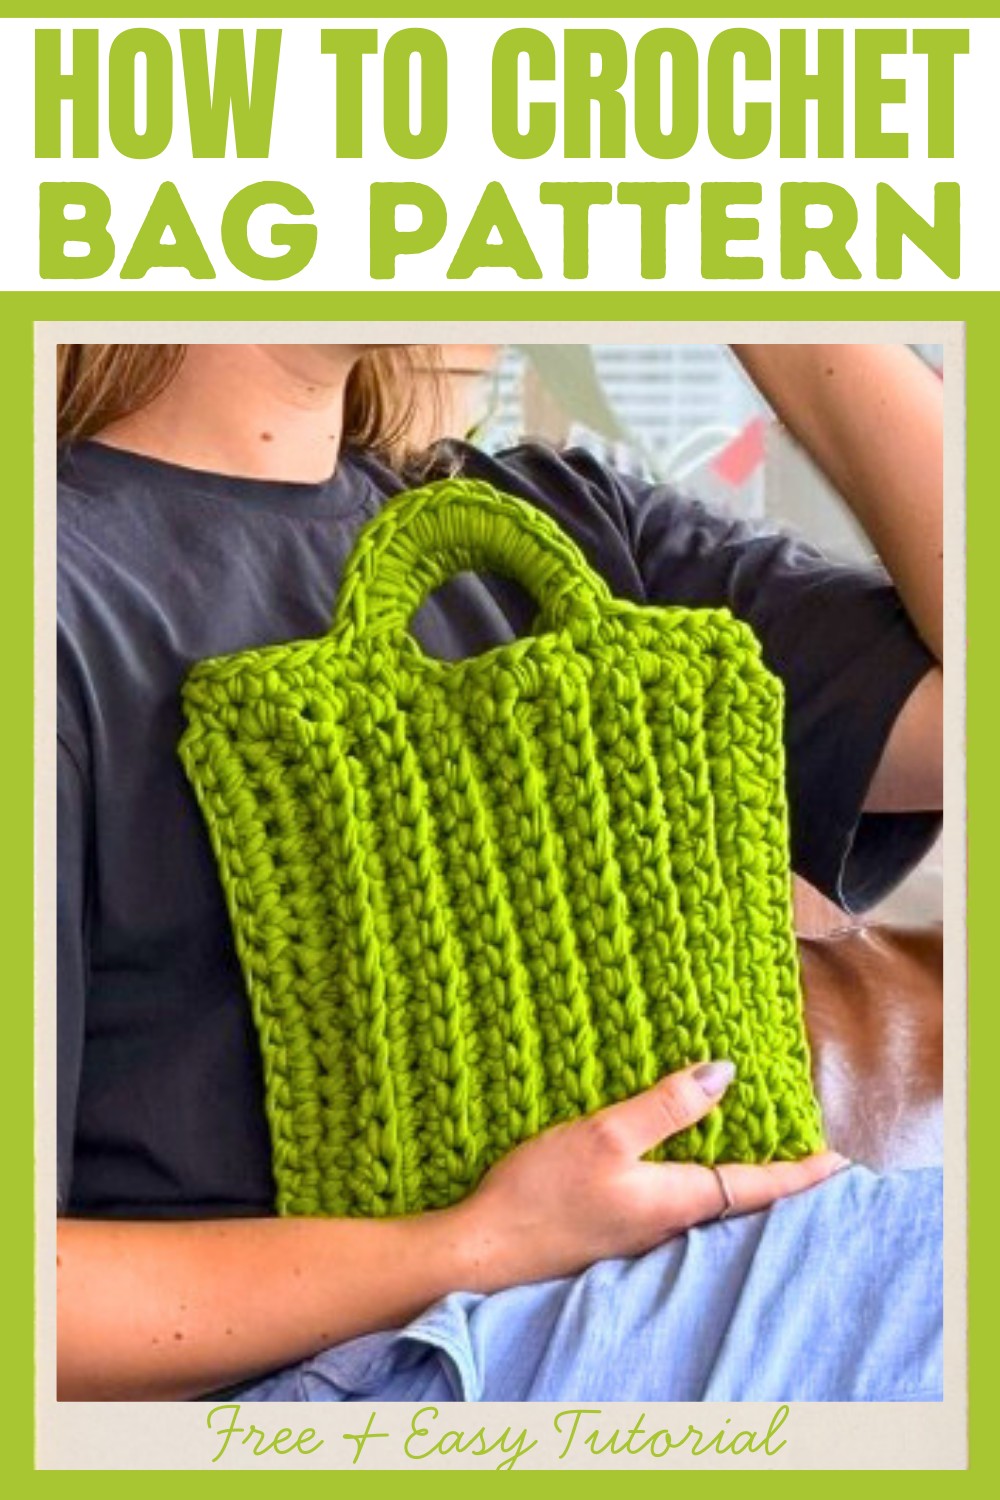
Making this bag is easy for anyone—even beginners! Using basic stitches like single crochet, you’ll create a lovely textured pattern. The handles are strong yet comfortable, making it a practical everyday bag. All you need is t-shirt yarn, a crochet hook, and simple techniques to transform it into a cute and functional accessory. A beginner-friendly way to make something you can use daily and cherish.
Credit lerugi crochets
Materials & Tools Needed
- T-Shirt Yarn:
- 400 g (approximately 14 oz) of sturdy polyester t-shirt yarn.
- Yarn strand width: ~1 inch (2.5 cm).
- Ensure you’ve stretched the yarn at the beginning to measure your initial foundation chain correctly.
- Crochet Hooks:
- Main hook size: 8 mm.
- Smaller hook: 5 mm for weaving in ends.
- Stitch Markers:
- Essential for marking first and last stitches in rows and rounds.
- Scissors or Yarn Cutter:
- For cutting the yarn at the end of the project.
Finished Size & Customization Ideas
- Approximate Finished Dimensions:
- Width: ~20 cm (8 inches).
- Height: ~49 cm (18.3 inches).
- Customization Ideas:
- Adjusting Size:
- Use thinner or thicker yarn to change the bag’s texture and size.
- Adjust the number of foundation chains and total rows for wider or taller bags.
- Changing Handles:
- Increase or decrease the handle chain length for shorter or longer straps. Suggested: Start with 9 chains but adjust as needed.
- Color Choices:
- Use multi-color t-shirt yarn for a vibrant look or switch colors after completing each row for stripes.
- Create contrasting handles for added style.
- Alternative Stitch Patterns:
- Instead of single crochet back loop only (for the body), switch to half-double crochet or add textures like puff stitches for a unique look.
- Adjusting Size:
Pattern Abbreviations & Terminology
- ch - Chain
- sc - Single Crochet
- BLO - Back Loop Only
- sl st - Slip Stitch
- sk - Skip
- st(s) - Stitch(es)
Terminology is based on standard US crochet terms.
Step-by-Step Detailed Crochet Instructions
1. Create the Foundation Chain
- Make a slip knot on your hook.
- Chain 34 stitches (ch 34).
- Stretch your chain; the final length should be ~49 cm (18.3 inches). Adjust if using different yarn.
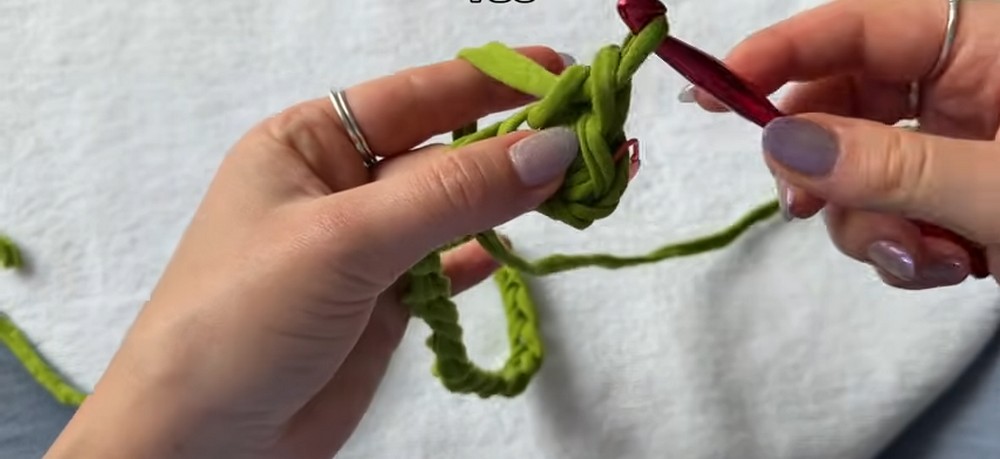
2. Row 1 (Initial Single Crochet):
- Chain 1 for turning.
- Begin in the second chain from the hook: Make a single crochet (sc).
- Insert the hook, grab the yarn, pull a loop (2 loops on the hook). Yarn over, pull through both loops.
- Mark this first stitch with a stitch marker.
- Continue with 34 sc across the row (one sc in each chain stitch).
- At the end, chain 1 and turn.
3. Rows 2 to 16 (Back Loop Only Rows):
- Start Row 2: Insert into the back loop only (BLO) of the stitch when working single crochets.
- Repeat for stitches across the row. You should have 33 sc (BLO) and 1 regular sc at the end of each row to maintain smooth edges.
- Mark the beginning stitch in each row.
- Repeat Row 2 for a total of 16 rows to create the body of the bag.
4. Fold and Seam the Sides
- Fold the fabric in half crosswise (short edge to short edge).
- Choose your “good” side (the side you'd like visible).
- Seam Both Sides Using Single Crochet:
- Working side by side, insert the hook through both layers.
- Place single crochets along the edges to join.
- Use the last pair of stitches to finish neatly, leaving a slight tail after fastening off the yarn.
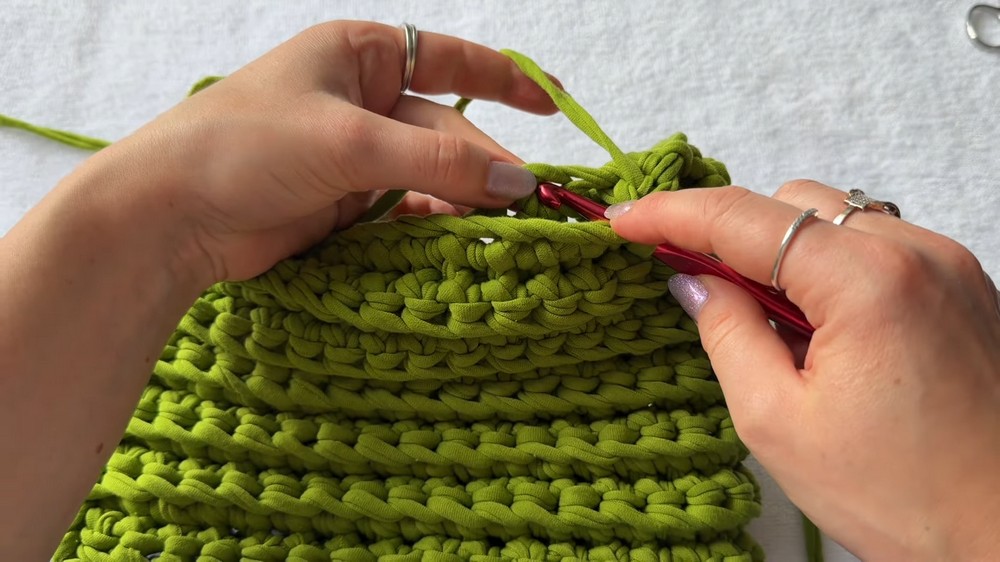
5. Create the Handles and Work Top Edging
Round 1 (Top Edging):
- Work around the top opening & place sc stitches along vertical rows:
- Place 5 sc, then 7 sc (mark the 12th stitch), then 5 sc again for a total of 17 sc.
Handle Creation:
- Chain 9 stitches (or preferred length) for the handle.
- Count 7 sc backward, connect the chain into the marked stitch using sl st.
- Place 1 sc in the same stitch for security.
- Fill the chain with 9 sc, then connect with another sl st.
- Repeat this handle process on the opposite side.
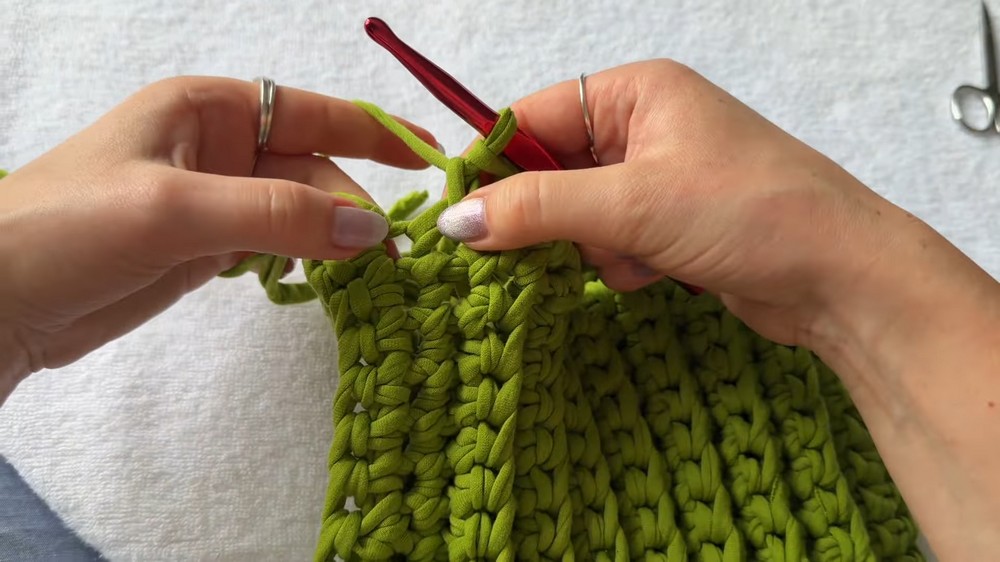
Round 2 (Reinforce Handles):
- Work extra single crochets over the handle row created in Round 1 to build sturdiness.
- Add 10-15 sc evenly distributed across the chain for a firm grip.
- Repeat for the opposite handle.
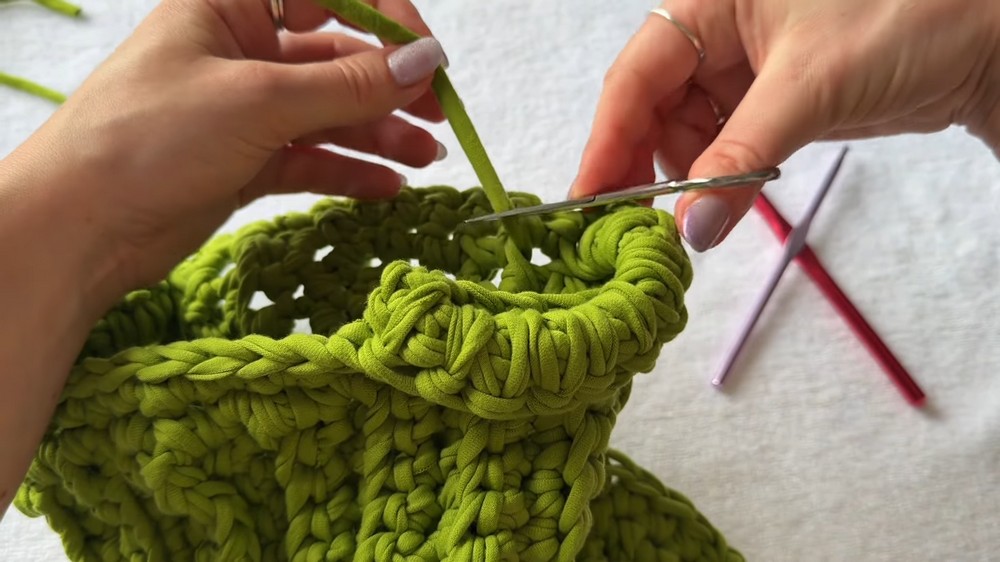
6. Finishing Touches
- Create an Invisible Join:
- After finishing the last round, pull a long loop, cut the yarn, and use a smaller hook to mimic a natural stitch with the tail.
- Weave in Loose Ends:
- Secure all yarn tails through the inside of the bag with knots to prevent unraveling.
Completed Work
- Uses: Perfect for casual outings, shopping trips, or general everyday use.
- Optional Embellishments:
- Attach decorative charms, tassels, or crocheted flowers for personalization.