Looking for a stylish project that blends beauty, functionality, and creativity? The Crochet Granny Square Tote Bag is perfect! With its timeless design, vibrant colors, and practicality, this tote is a standout accessory that’s easy to make and versatile to use. Let’s create a masterpiece together!

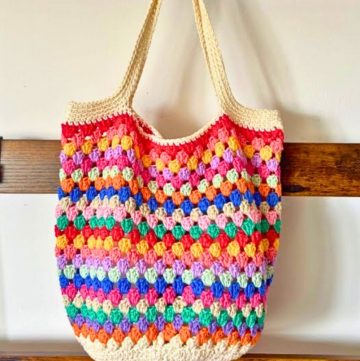
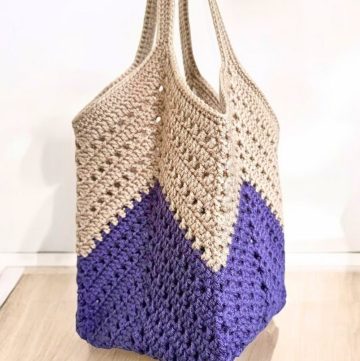
This tote bag isn’t just visually stunning—it’s highly practical. Made from durable crocheted granny squares, it can hold daily essentials or shopping items with ease. Featuring vibrant colors and elegant craftsmanship, this bag is both a conversation piece and a functional accessory.
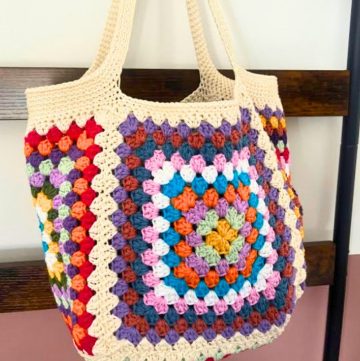
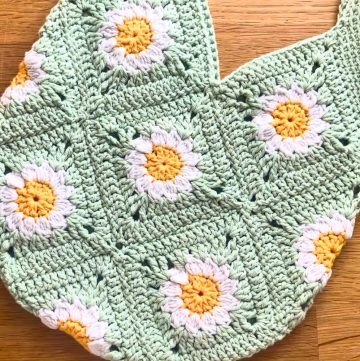
Crochet Granny Square Tote Bag
Crafting this tote bag is a fun and rewarding experience, whether you’re a beginner or advanced crocheter. Start with granny squares, building up to a vibrant and unique design. It’s customizable to fit your favorite colors and styles while unlocking endless creative possibilities.
Materials and Preparation
To make the Granny Square Tote Bag, you'll need:
- Yarn: Soft bleached rope or yarn
- Yarn Color: Four different colors for granny squares, and dark brown for the bag bottom
- Yarn Thickness: 2 mm
- Crochet Hook: Size 5/0 (3.00 mm)
- Scissors: For cutting yarn
- Tapestry Needle: For weaving ends
Tip: Ensure that your yarn is lightweight but sturdy (such as cotton or acrylic) for a durable tote.
Abbreviations and Notes
Crochet Abbreviations:
- CH: Chain
- SC: Single Crochet
- DC: Double Crochet
- SL ST: Slip Stitch
Notes Before Starting
- The tutorial repeats a simple granny square pattern, ideal for learning the technique.
- Ensure consistent tension to achieve uniform granny squares.
- Leave extra yarn tails when finishing each piece for easier sewing.
- If you’re new to joining pieces, pause the video tutorial for clarity.
Gauge, Approximate Size, and Pattern Notes
- Gauge: Not critical, but aim for tight, neat stitches.
- Finished Size: Depends on the granny square and bag size you choose; general dimensions are customizable.
- Special Technique: Magic Ring (used to begin granny squares).
- Gauge Swatch: Optional, but recommended to ensure desired square size matches your design.

Step-by-Step Pattern
Step 1: Making Granny Squares
- Round 1:
- Create a Magic Ring.
- CH 3 (counts as first DC).
- DC 2 times, then CH 2.
- Repeat (DC 3, CH 2) three more times.
- Join with SL ST to the CH 3 from the start.
- Round 2:
- Start with CH 3, then DC 2 into the same corner.
- CH 1. In the corners, crochet DC 3, CH 2, DC 3. Repeat all four corners.
- Between corners, crochet DC 3.
- Rounds 3-6:
- Follow the same pattern, increasing the number of DC between corners.
- Use DC 3, CH 1 between each corner.
- In corners, repeat DC 3, CH 2, DC 3.
- Complete 4 granny squares in alternating colors for the bag panels. For the bottom, use dark brown yarn and repeat the pattern for 12 rounds.

Step 2: Connecting Granny Squares
- Arrange the 4 granny squares to form a rectangle.
- Sew along the edges with leftover yarn tails, using slip stitching or whip stitching.
- Sew the dark brown bottom piece to your granny squares, creating a full bag shape.

Step 3: Adding Straps
- Strap Base: Crochet CH 80 for each strap.
- Work SC across each strap for 2 rounds for added durability.
- Sew the straps securely to the sides of the bag.

Step 4: Finishing Touches
- Weave in all remaining yarn ends with a tapestry needle.
- If desired, block the bag to give it a more polished look.
- Celebrate your crochet artistry—your tote bag is complete!

Pattern Question:
Q: How do I ensure my granny squares have uniform edges?
A: Be consistent with your tension and count stitches in each round carefully. Using the same hook size throughout will also help maintain the uniformity of your squares.
Conclusion
The Crochet Granny Square Tote Bag combines style, versatility, and practicality, making it a joy to create and use. Whether for yourself or as a thoughtful handmade gift, this project is worth every stitch. Grab your yarn and hook, and let your creativity shine!