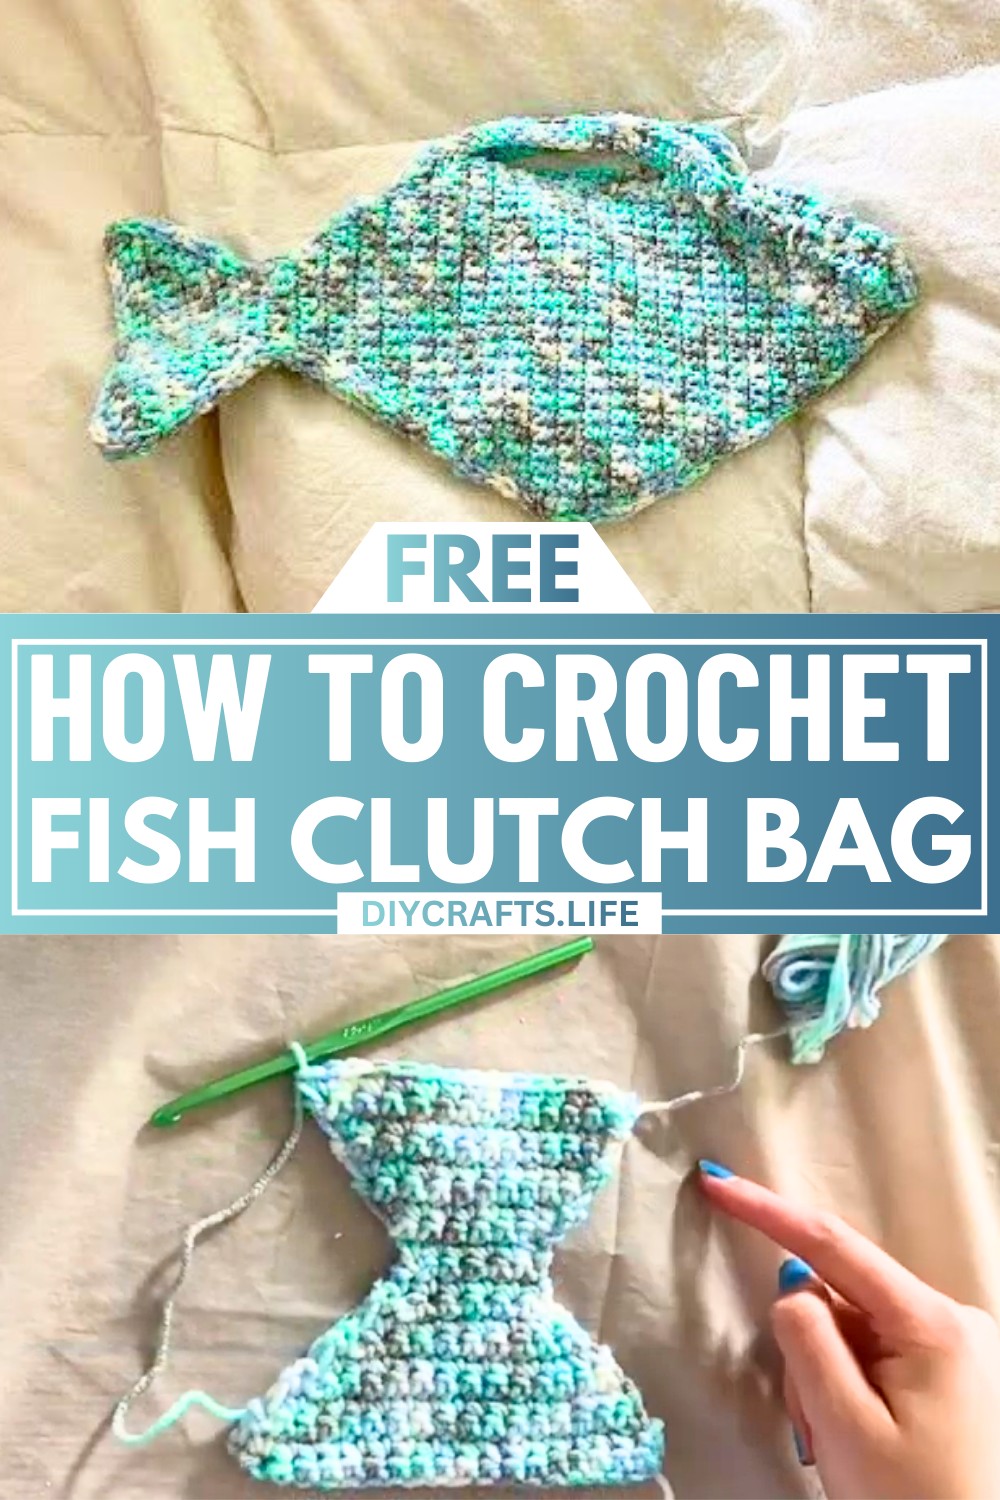
Create a splash of personality with this eye-catching Fish Shaped Clutch Bag crochet design. Perfectly whimsical and full of charm, this project combines fun shapes with practical use, making it more than just a bag – it's a statement piece. Whether you’re headed to a casual outing or a themed event, this playful accessory captures attention with its clever design and intricate detail. Handmade accessories don't get more unique than this!
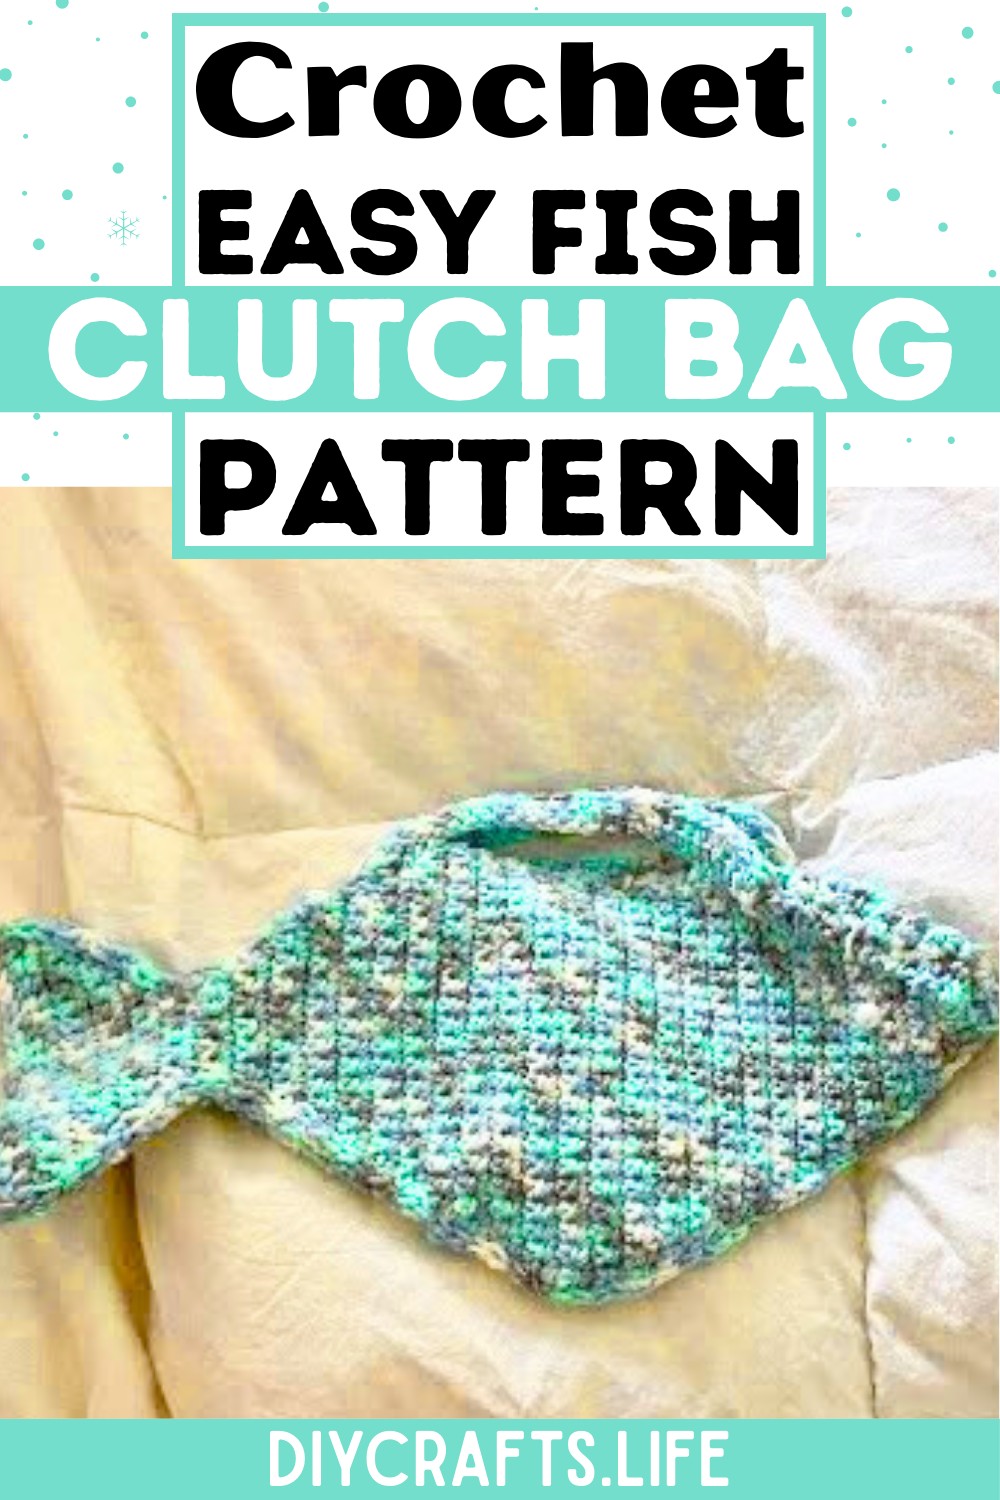
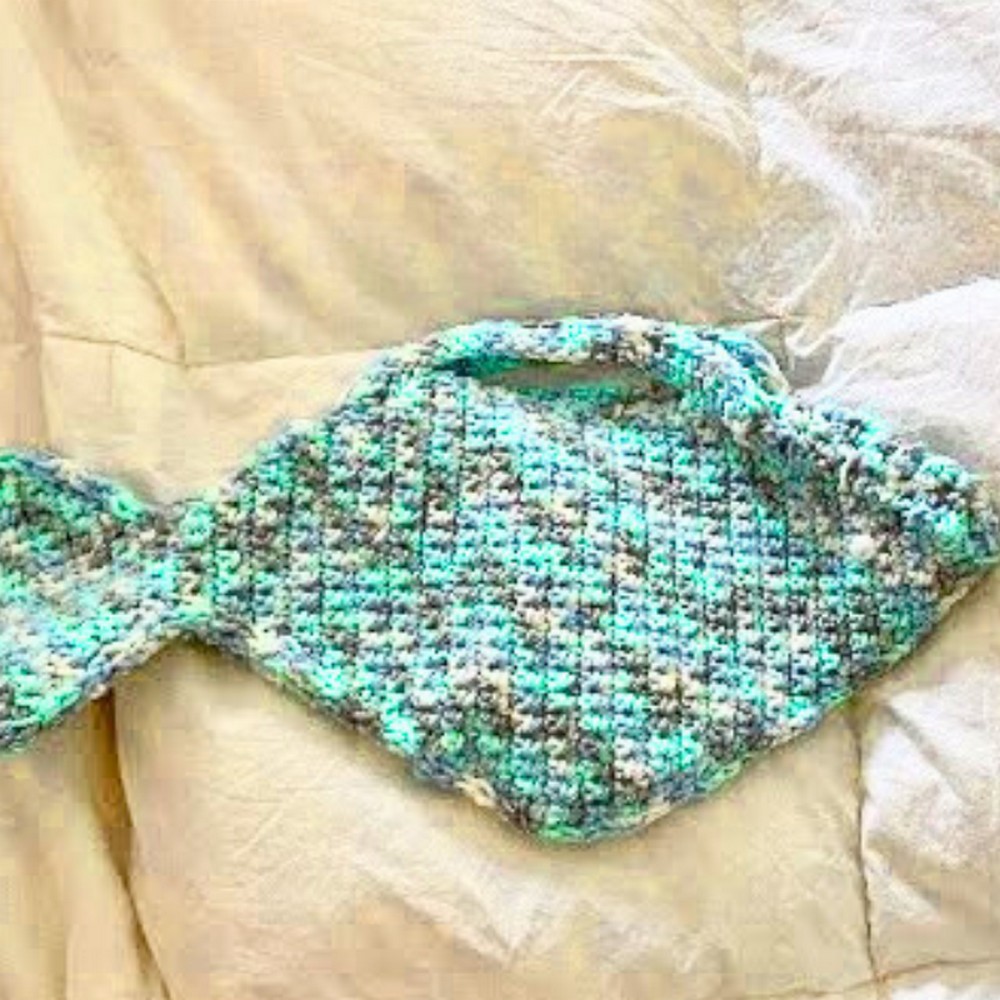
This fish-shaped bag is perfect for showcasing your creativity. Designed with vibrant yarn and faux pearl eyes, it combines quirky style with functionality. The structured frame allows ample room for essentials, making it both a decorative and practical piece. Soft, comfortable handles give the bag versatility, whether carried as a clutch or on your wrist. With a seamless body and tail design, this is a beautiful blend of art and fashion, sure to bring joy to any wardrobe.
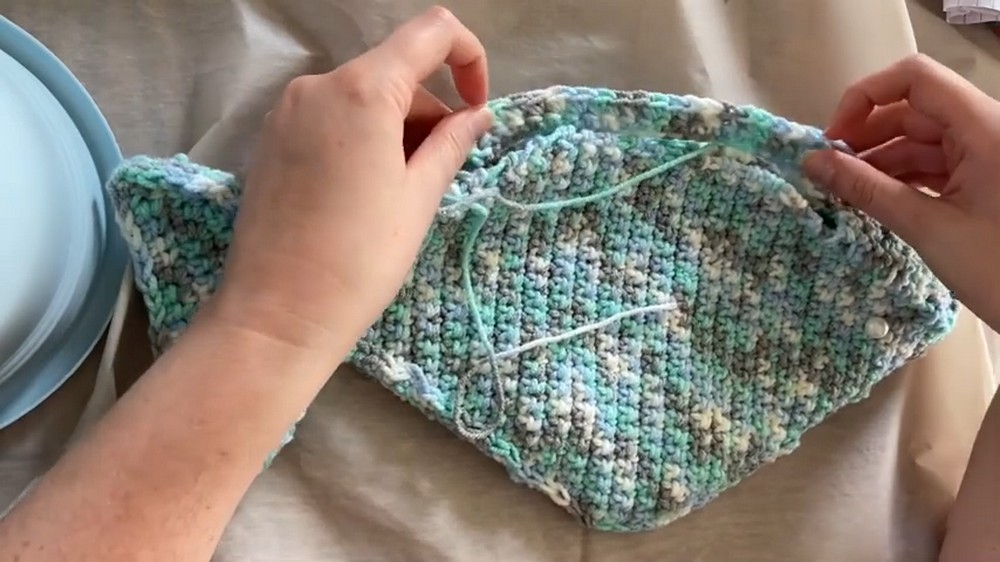
Credit Frayed KnotCo Tutorials
Required Materials:
- Yarn: Loops & Threads Soft Classic (252 yards, 5 oz). You will need less than 200 yards for one bag.
- Crochet Hook: Size 5.25 mm (recommended to get tighter stitches for durability).
- Fake Pearl: To use as the fish’s eyes (found in the button or bead section of your craft store).
- Yarn Needle: For weaving in ends, sewing pieces together, and attaching the eye decorations.
- Stitch Markers: Optional, but useful for keeping track when connecting and closing sections.
- Scissors: For cutting yarn as needed.
Important Notes:
- Skill Level: Best for those with basic crochet experience (e.g., knowledge of single crochet, chaining, and decreasing stitches).
- Bag Size: The body of the bag is crafted to fit items like a small wallet, phone, and keys.
- When adding the pearl eyes, ensure you place them on opposite sides of each half to face outward when sewn together.
- Adjust the bag’s handle size based on your preferred design (short hand-held straps or a longer crossbody strap).
- You may need to add cushion to the bottom seam if you plan to carry heavier items.
- Check your tension while crocheting to avoid warping the flat/curved edges.
Detailed Step-by-Step Instructions:
1. Starting the Fish Tail:
- Create a chain of 20 stitches.
- Single crochet (SC) into the 19th stitch, then continue SC across the row (19 stitches).
- On the 2nd row, skip the first stitch to start decreasing the width row-by-row:
- Row 2: 18 SC.
- Row 3: 17 SC.
- Continue decreasing, following this pattern, until the fish tail tapers to 6 stitches at row 9.
2. Transition from Tail to Body:
- Work 3 rows of 6 stitches to finish the narrow tail portion.
- Begin expanding the tail into the fish’s body:
- Add a single crochet stitch at each end of the row to increase width.
- Example: Row 10 = 7 SC, Row 11 = 8 SC, Row 12 = 9 SC, and so on.
- Continue until you reach approximately 20 stitches in width. This will form the widest part of the fish shape.
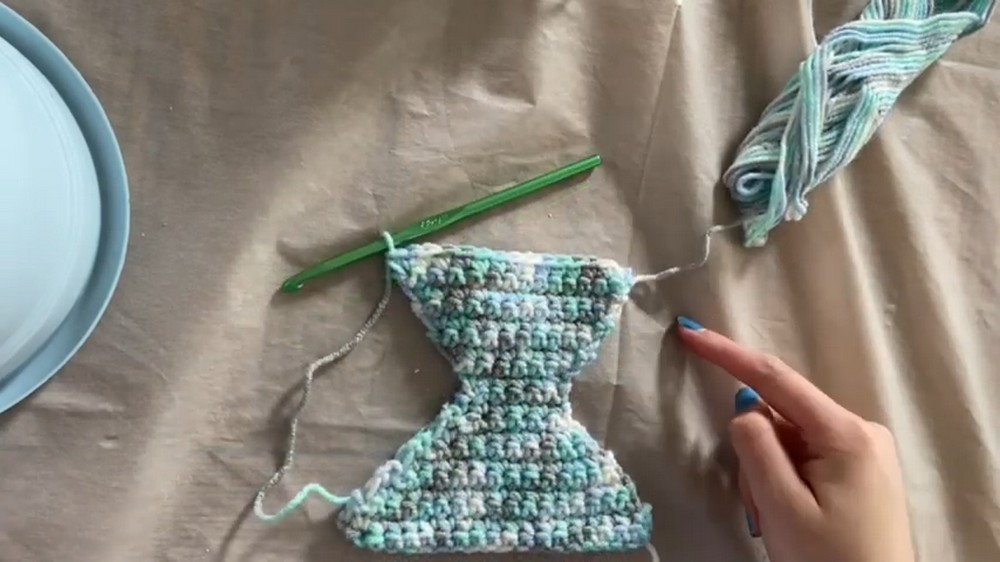
3. Shaping the Fish Body:
- Alternate between rows of increasing and maintaining width:
- For a rounded bottom, continue to periodically add to the row until the body looks proportionate.
- Example: Rows 26–30 may have consistent 23 stitches to flatten the top edge for the handle placement.
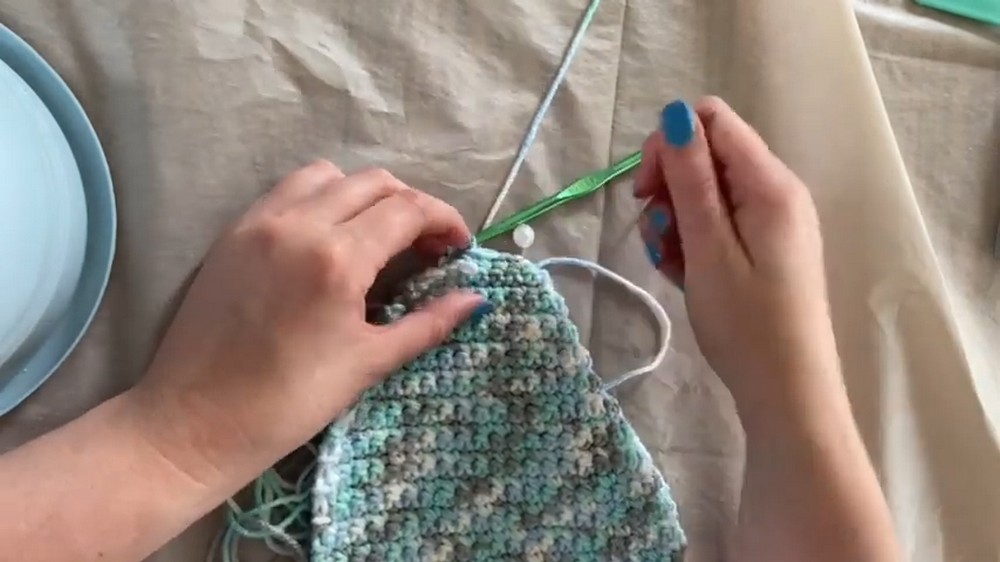
4. Adding the Eye:
- When the body is approximately half-finished:
- Thread your yarn needle with a fake pearl and string it onto the yarn midway through a row.
- Secure the pearl by continuing to crochet around it. This technique holds the bead in place without additional stitching.
- Keep the bead toward the outer side when joining the two sides later.
5. Returning to the Point (Fish Face):
- Begin decreasing width symmetrically to taper the fish's head:
- For Row 43 and onward: Decrease by skipping the first stitch at the start of each row.
- Example: Row 43 = 19 SC, Row 44 = 18 SC, Row 45 = 17 SC, etc.
- Stop decreasing when each side narrows to a single stitch. Tie off securely.
6. Creating the Second Side:
- Repeat all steps above to complete the second side of the fish bag.
- Ensure the pearl eye placement is opposite the first side, so both eyes are visible when the sides are joined.
7. Joining the Fish Body:
- To assemble the bag:
- Place the two fish shapes together with their outsides aligned.
- Use slip stitches to seam the curved edges together.
- For the tail or other curved areas, alternate between slip stitches and single crochets for added stability.
- For the bottom edge:
- If you want more depth, crochet a flat strip separately, then stitch it between the two sides.
- Alternatively, directly crochet rows between both edges to add width (around 3 stitches per side).
8. Creating and Attaching the Handles:
- To create the handles:
- Chain 25 stitches, then SC across for 24 stitches per row. Complete 2 rows for a thin handle.
- Adjust the length (or add rows) if you want a longer strap for a shoulder or crossbody bag.
- Attach the handle securely:
- Use the tail ends of the yarn to sew each side of the handle to the top flat edge of the fish bag.
- Reinforce with additional stitches for strength.
9. Finishing Touches:
- Weave in all remaining yarn ends.
- Check for gaps in the seams and secure them as needed.
- Trim any loose threads and enjoy your handmade fish-shaped clutch bag!
This project is both fun and functional, especially for trips to the beach or as a nautical-themed accessory. Pair it with different colors or patterns to make the design truly unique.