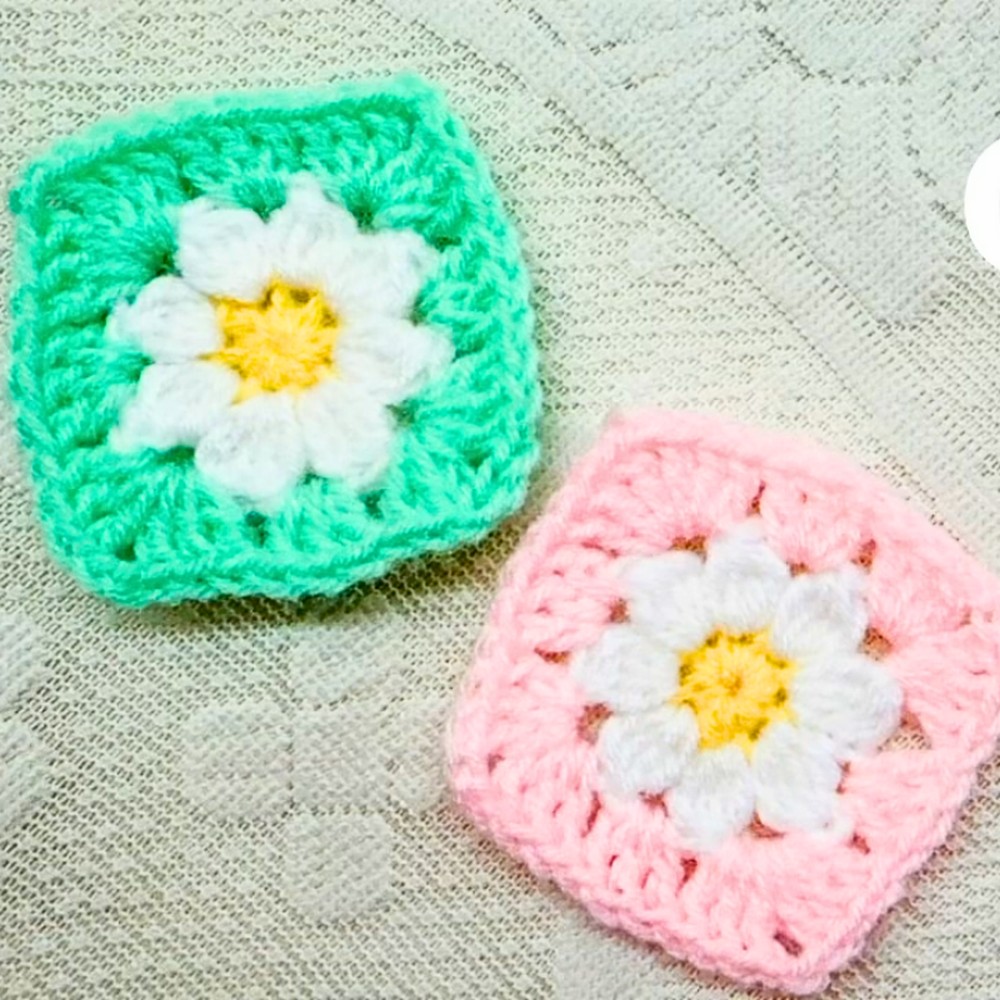
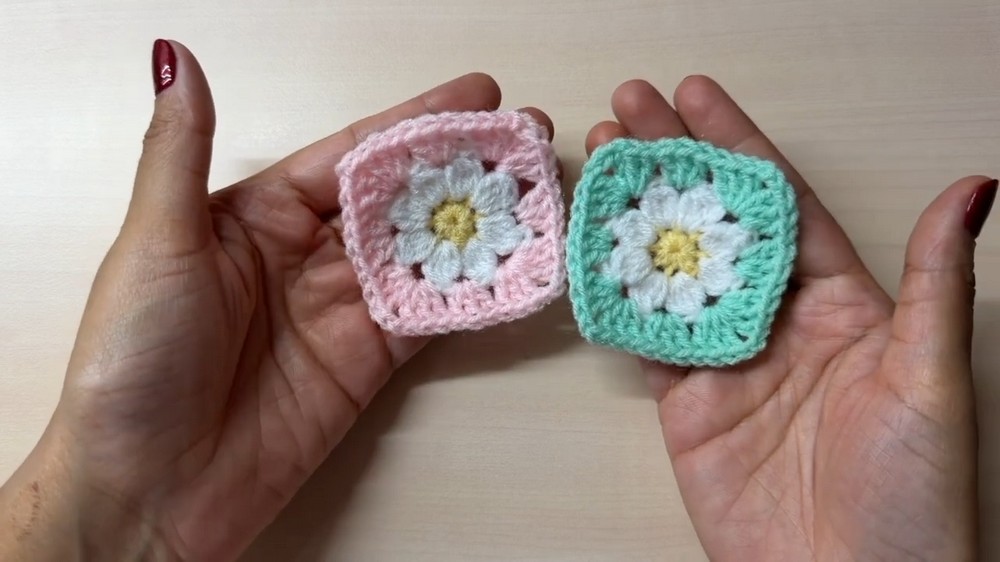
This Crochet Daisy Granny Square is a delightful little creation that combines a cheerful daisy design with the timeless granny square. Its soft petals and vibrant colors make it the perfect combination of beauty and comfort. You can use this square in so many creative ways—imagine a cozy blanket, a cheerful pillow, or even a cute tote bag!
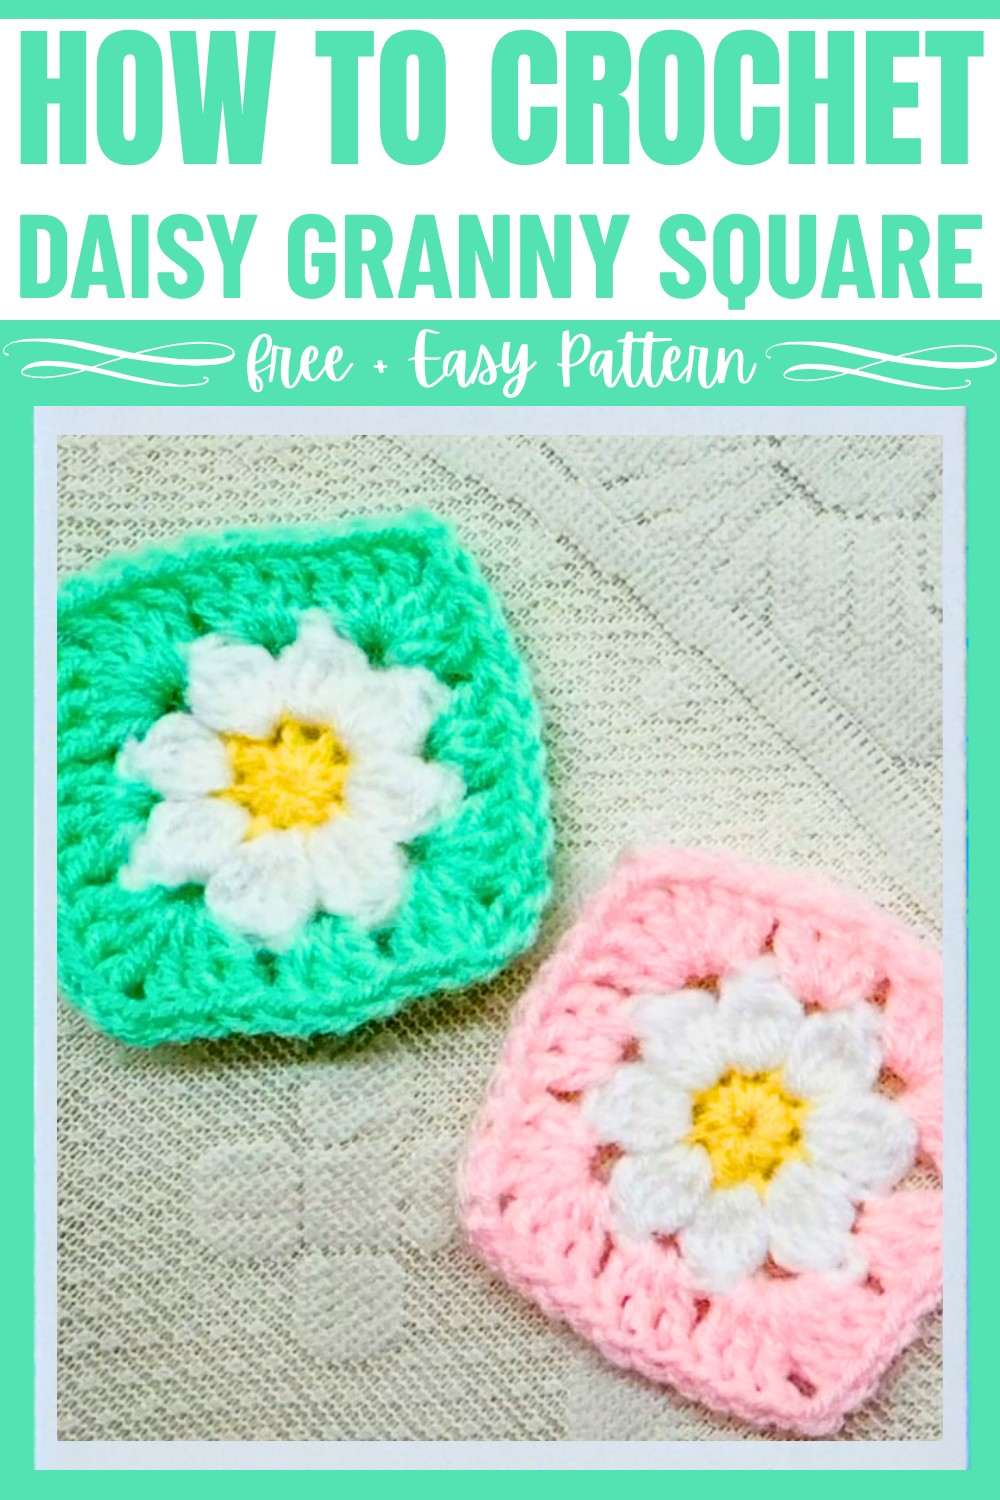
Making this crochet granny square is straightforward and fun. It starts with a bright yellow center for the daisy, surrounded by white petals and framed with a colorful border. With just a hook and some yarn, you'll see the cute daisy come to life one step at a time. This pattern is perfect for beginners wanting to try something new or for experienced crocheters looking to create something bright and simple.
Credit Handmade by Appy
Materials & Tools Needed
- Yarn: Acrylic yarn in three colors: yellow (center), white (petals), and your choice of color for the square base.
- Crochet Hook: 3.5 mm hook.
- Tapestry Needle: For weaving in the ends.
- Scissors
Finished Size & Customization Ideas
- Finished Size: Size will vary depending on your tension and yarn, but typically each square will measure around 4-5 inches.
- Customization Ideas:
- Use pastel shades for a soft, springtime vibe.
- Alternate border colors to create striped or checkerboard effects when assembling multiple squares.
- Combine with solid granny squares for blankets, pillows, or coasters.
Pattern Abbreviations & Terminology
The pattern uses U.S. crochet terminology:
- CH: Chain
- SC: Single Crochet
- DC: Double Crochet
- SL ST: Slip Stitch
- Cluster Stitch: A set of partially completed DCs worked into the same stitch, joined together at the end.
Step-by-Step Detailed Crochet Instructions
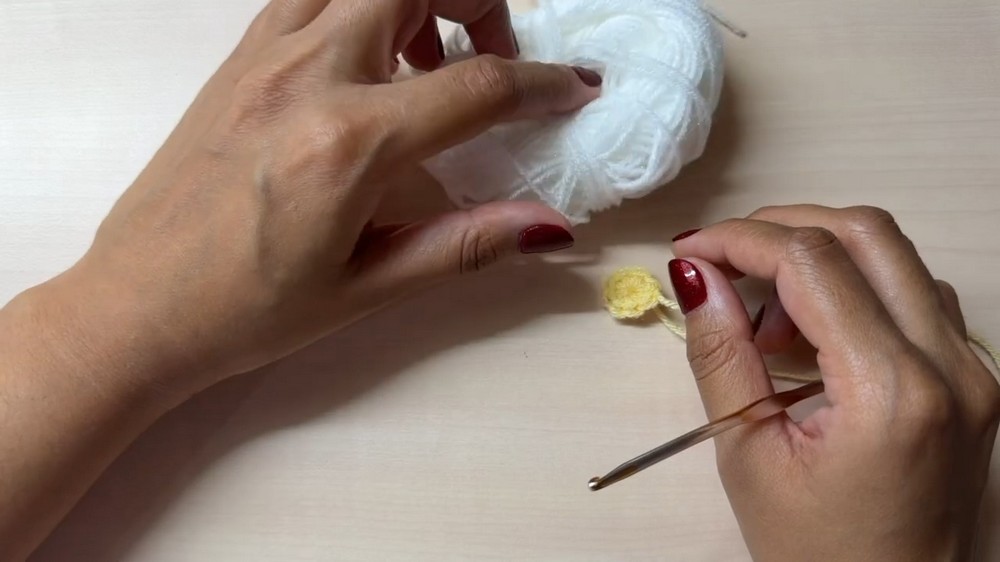
Step 1: Crochet the Daisy Center
Yarn Color: Yellow
- Start with a magic circle.
- CH 1 to secure the circle.
- Work 8 SC into the magic circle.
- Pull the magic circle tight to close.
- Join with a SL ST into the first SC.
- Fasten off (cut the yellow yarn).
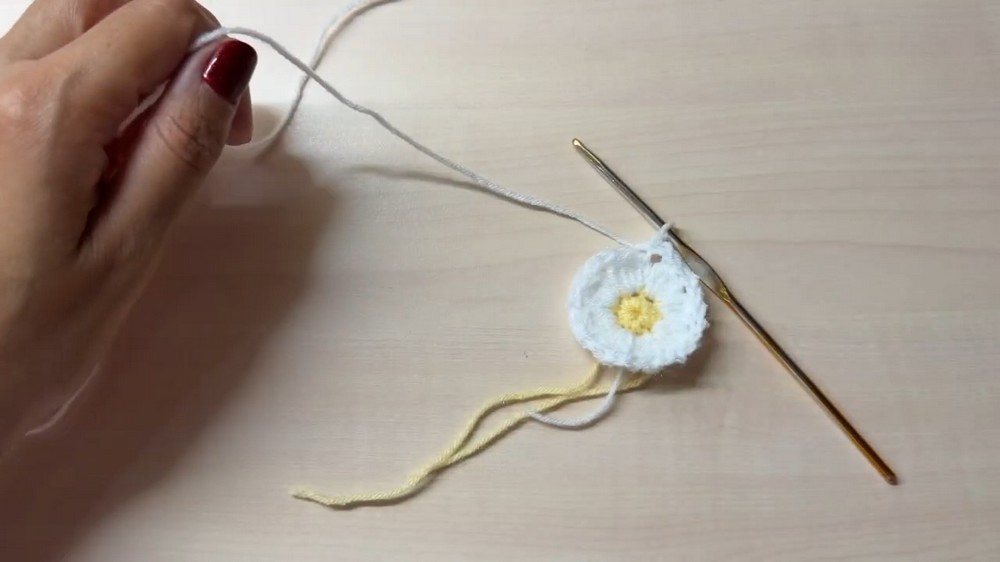
Step 2: Crochet the White Petals
Yarn Color: White
- Attach your white yarn by inserting your hook into any SC from the previous round and pulling up a loop.
- Chain 3 (this counts as the first DC in a cluster).
For Each White Petal (Cluster Stitch):
3. Yarn over, insert your hook into the same stitch, pull up a loop, yarn over, and pull through 2 loops (one incomplete DC).
- Repeat step 3 three more times in the same stitch (now you should have 4 partially completed DCs plus the CH 3, making 5 loops on your hook).
- Yarn over and pull through all loops on the hook.
- CH 2 to create a space between the petals.
Continue Around:
7. Work 4 incomplete DCs in the next SC, yarn over, and pull through all loops to form a second petal. CH 2.
- Repeat until each SC (8 total) has a petal, with a CH 2 between each petal.
Finishing Off the Petals:
9. After the last petal, CH 2 and join with a SL ST to the top of the chain 3.
- Fasten off (cut the white yarn).
Step 3: Adding the Square Base
Yarn Color: Color of your choice (for the square base).
- Attach the new yarn by inserting your hook into any CH-2 space from the previous round and pulling up a loop.
- CH 5 (this acts as 1 DC + 2 chains).
Forming a Corner:
3. In the same CH-2 space, work 3 DC.
Forming the Sides:
4. In the next CH-2 space, work 3 DC.
Next Corner:
5. In the next CH-2 space, work 3 DC, CH 2, and 3 DC (this forms a corner of the square).
Repeat Around:
6. Repeat steps 4 and 5 around the circle, creating groups of 3 DC in each CH-2 space and 3 DC, CH 2, 3 DC at each corner.
Joining to Finish the Round:
7. After completing the final corner, go back to the first CH-2 space where you began.
- Work 2 DC into that space (to complete the group of 3 DC).
- Join with a SL ST into the third chain of the starting CH 5.
- Fasten off (cut your yarn) and weave in the ends.
Finishing Techniques
- Fastening Off: After completing the square, weave in all loose ends using a tapestry needle.
- Blocking: If your square is uneven, lightly steam block it to achieve a perfect square shape.
Your daisy granny square is now complete! Use it as a coaster, or combine multiple squares to create blankets, bags, or other projects.


